DIY Wooden Surfboard
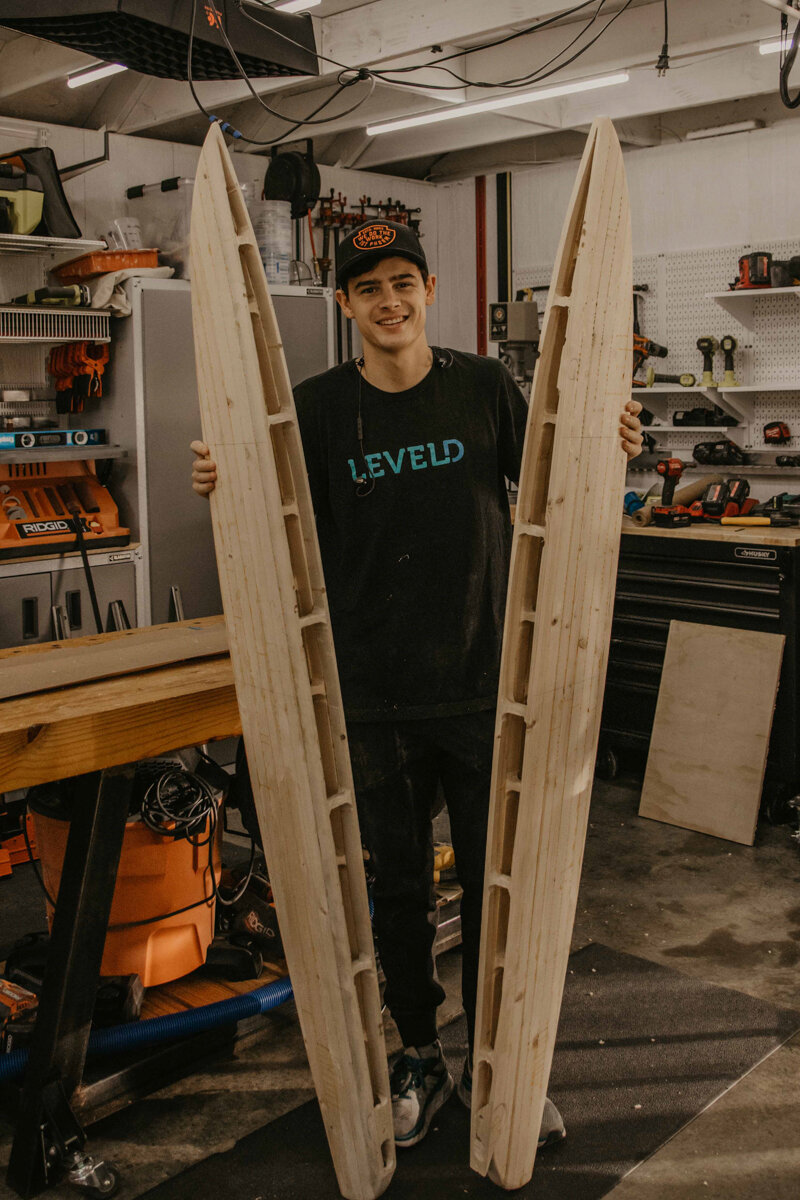
Awe man, oh man. We haven't been this excited for a project in a long time! Maybe because this has been in the works for over a year now, and we are stoked to be starting on our DIY Wooden Surfboard!
This project is quite the build. I am going to do my very best explaining everything without you seeing my talking hand movements. Also, this blog post is from my, Mollys, perspective. Dylan has written an in-depth book about this entire process from his perspective and why he did things the way he did. If you are interested in learning how to build this board, we do have a full set of plans with the templates here!
Alright, let's get started, shall we?
Cut Materials to Length
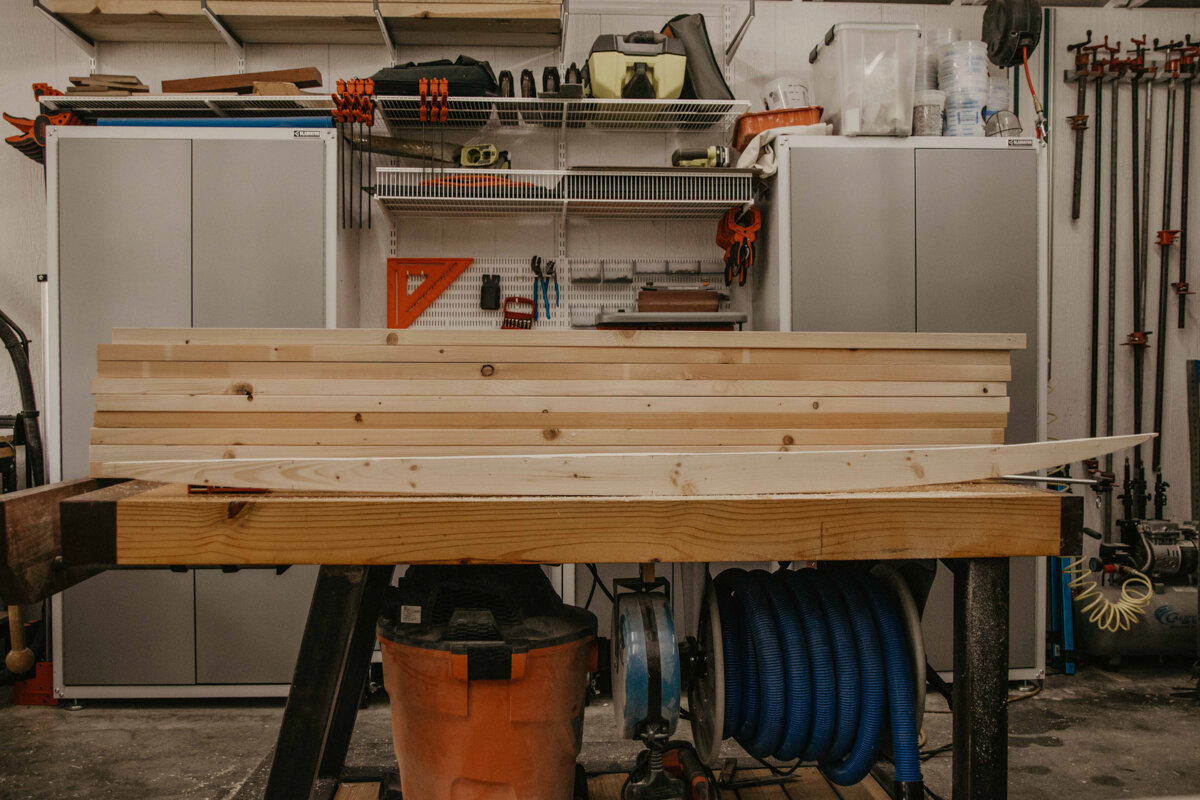
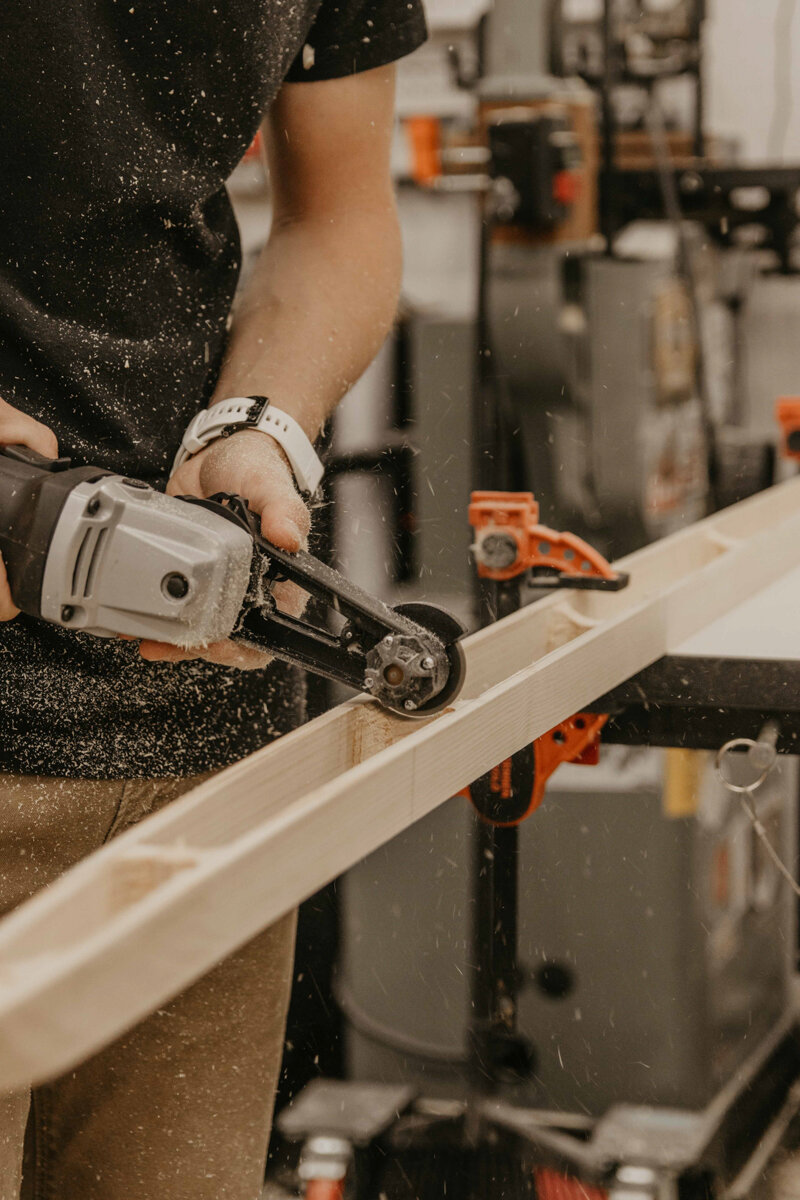
The only thing we need for wood materials are a crap ton of 2x6 at 8 ft long. First, we are going to cut the boards down to a rough length. We want to make sure we have plenty of material so we have enough to cut out the board. With that said, we are cutting these down to around 6 1/2’.
Miter Saw: https://homedepot.sjv.io/VDMrO (affiliate link)

One thing we always do, and you should too with any project, is cut the end of the board off first, then flip it over, now use a tape measure, and cut to your measurement. This just makes sure your board is cut square.
Plane Boards
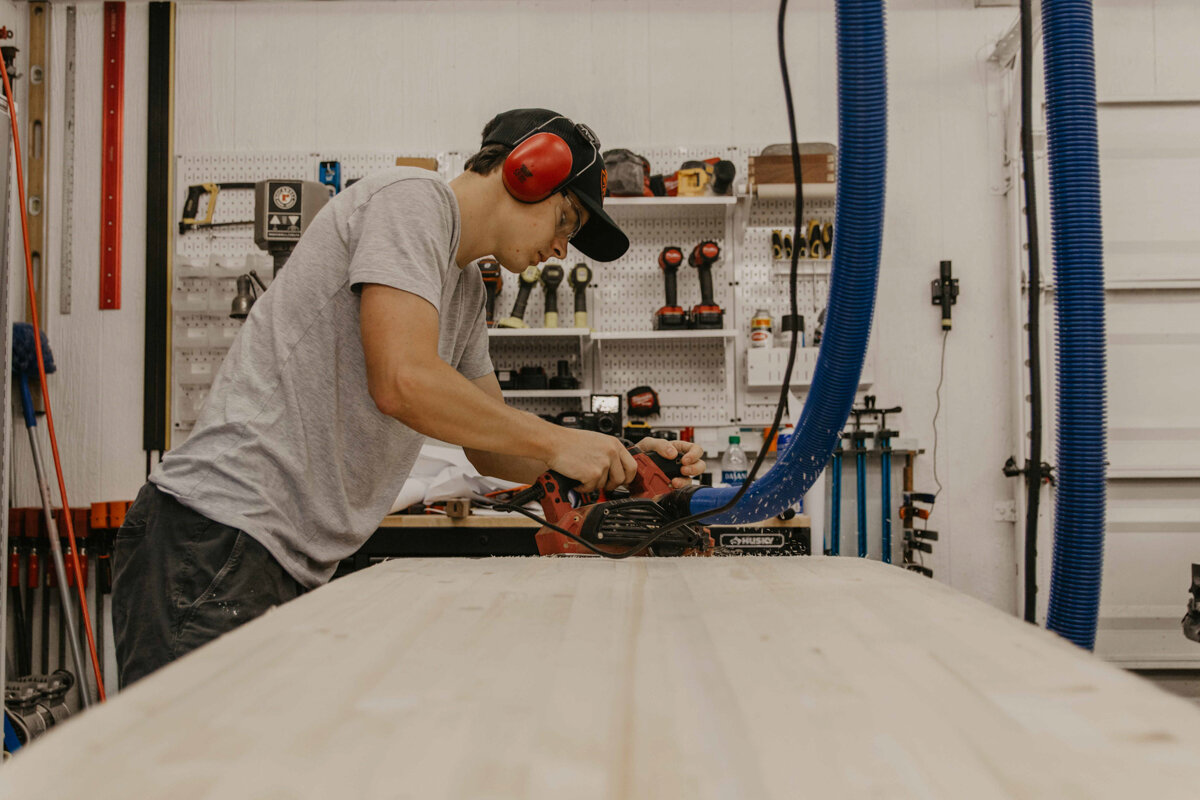
After we cut each board down at the miter saw station, we are moving over to the planer and planing down each board. They are getting planed on their front and back and it took a few passes to get the height just right.

That is going to do it for our first day. Before we go any further we want to make sure the boards are nice and dry as they can get. For the next few days, we are going to let them sticker, aka, put the same length strips between each layer of boards to help the airflow in between all of them. This helps dry out any moisture. We added in clamps for extra security so the boards won’t twist, crossing our fingers so hard this won’t happen.

Transfer Template to Boards
We had one of our friends cut us out all of our full-sized templates that Dylan made on a really nice big sheet of paper. You can also get this sized cut at a sign shop. We are going to cut out the long profile template now and roll up the rest for later.


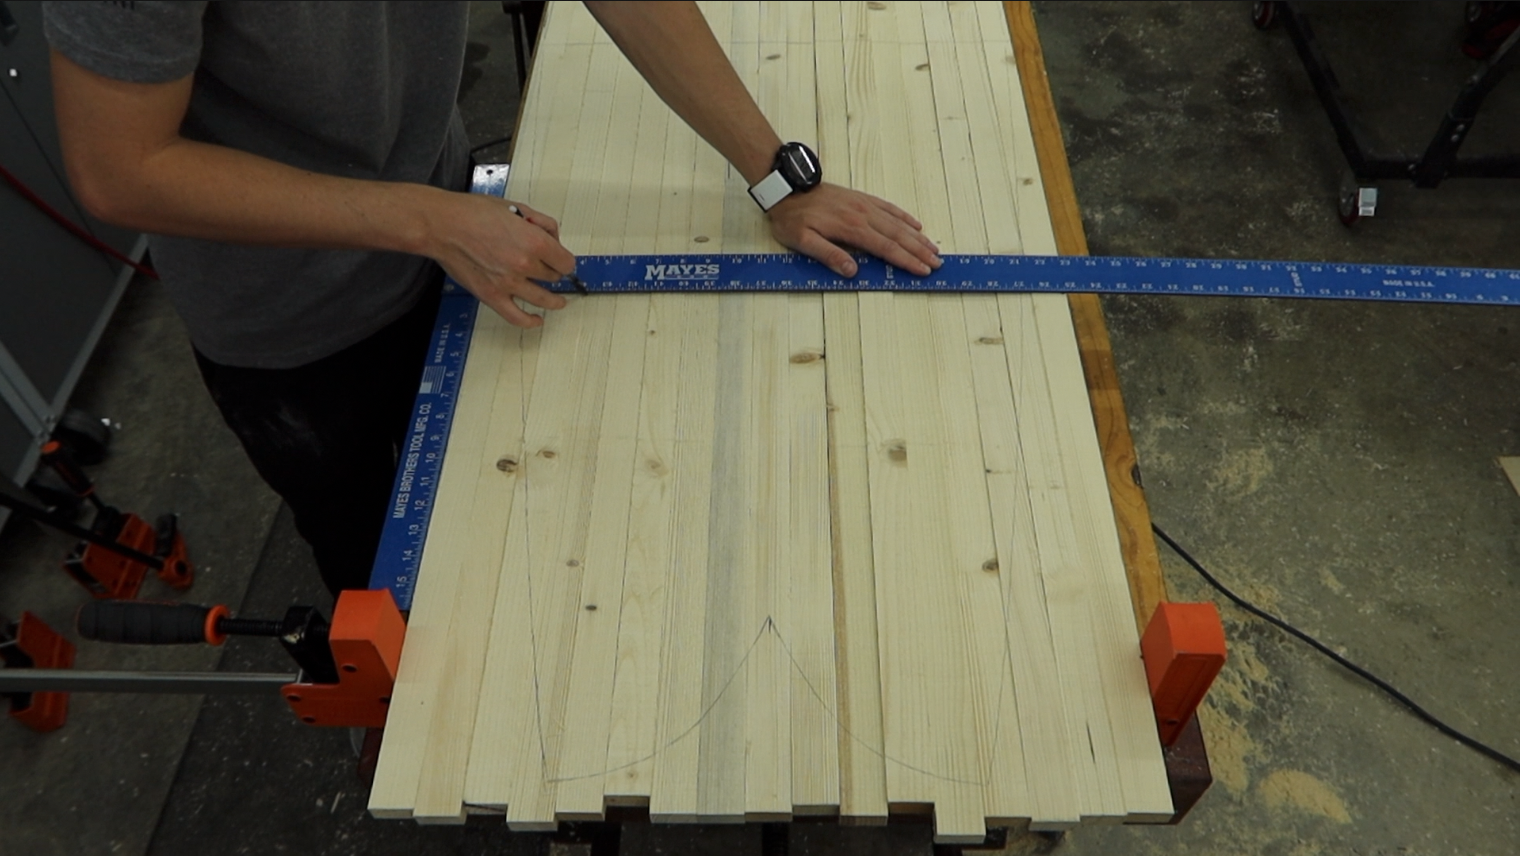
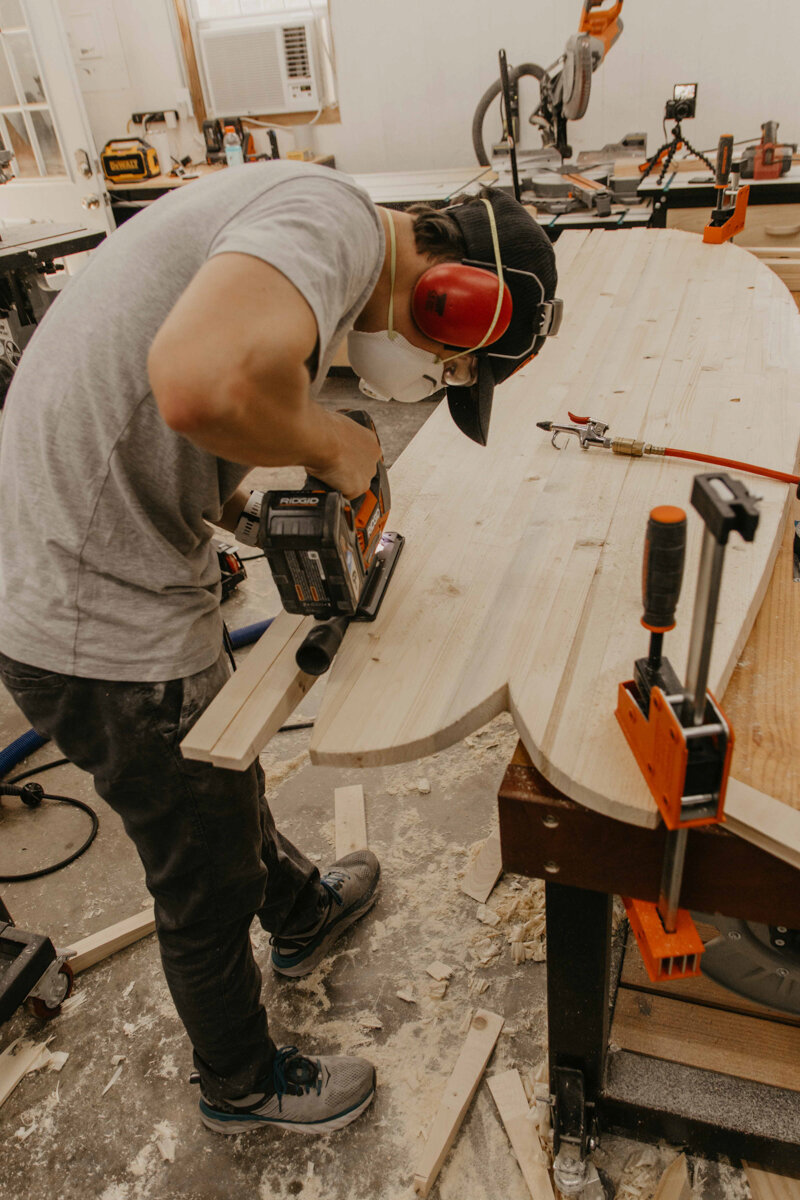
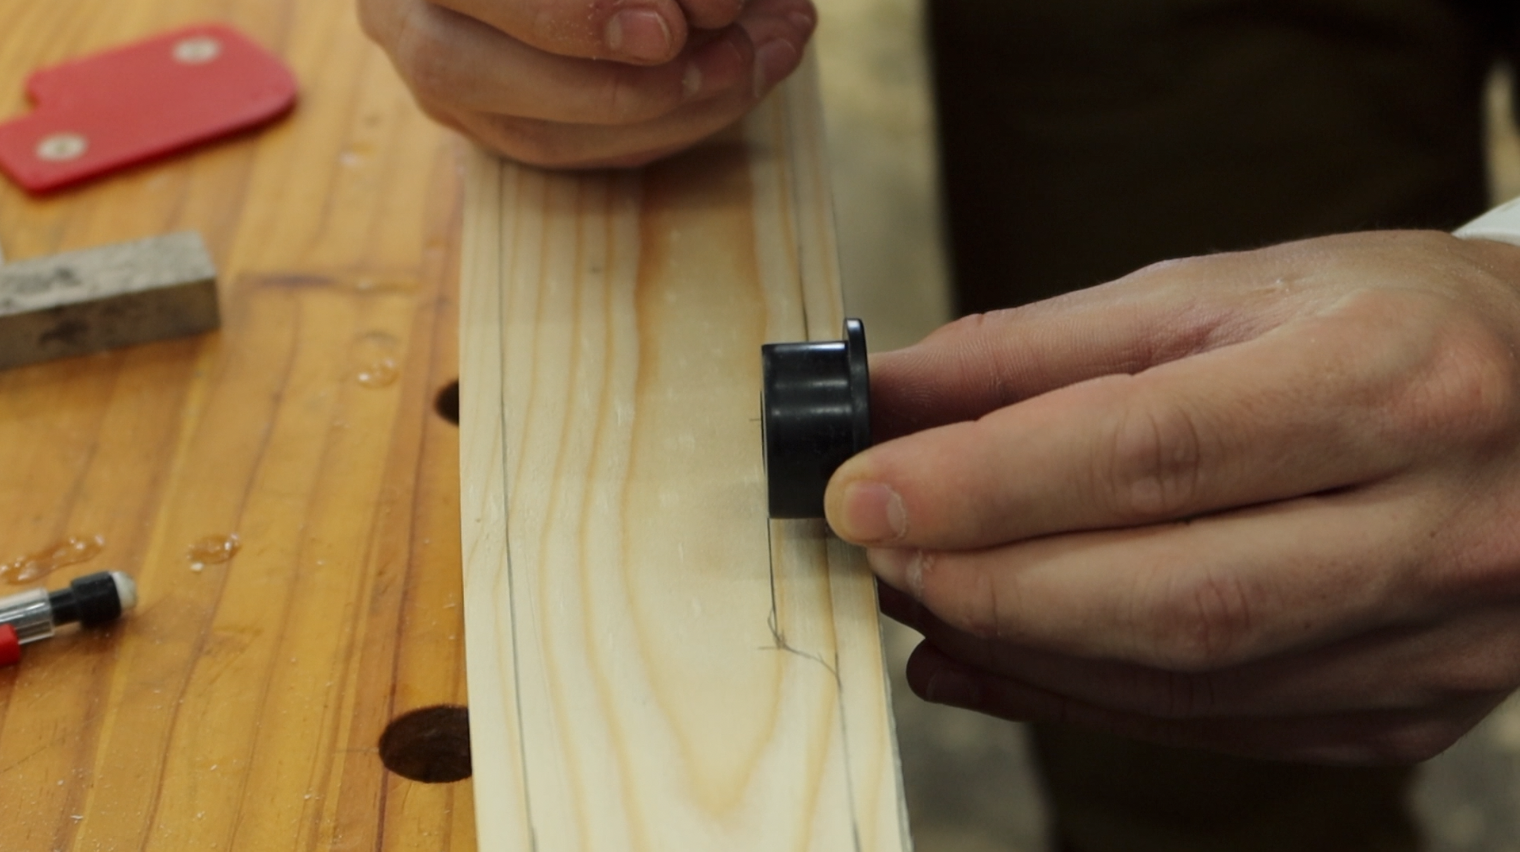
Now for the first of many long, tedious processes, tracing the template onto all 17 boards. A lot of the times when you use a template, you might spray adhesive the paper onto the board and then cut your shape out. Since we have so many to cut, that wasn’t an option and we couldn’t ruin the template So, it’s frog tape to the rescue.
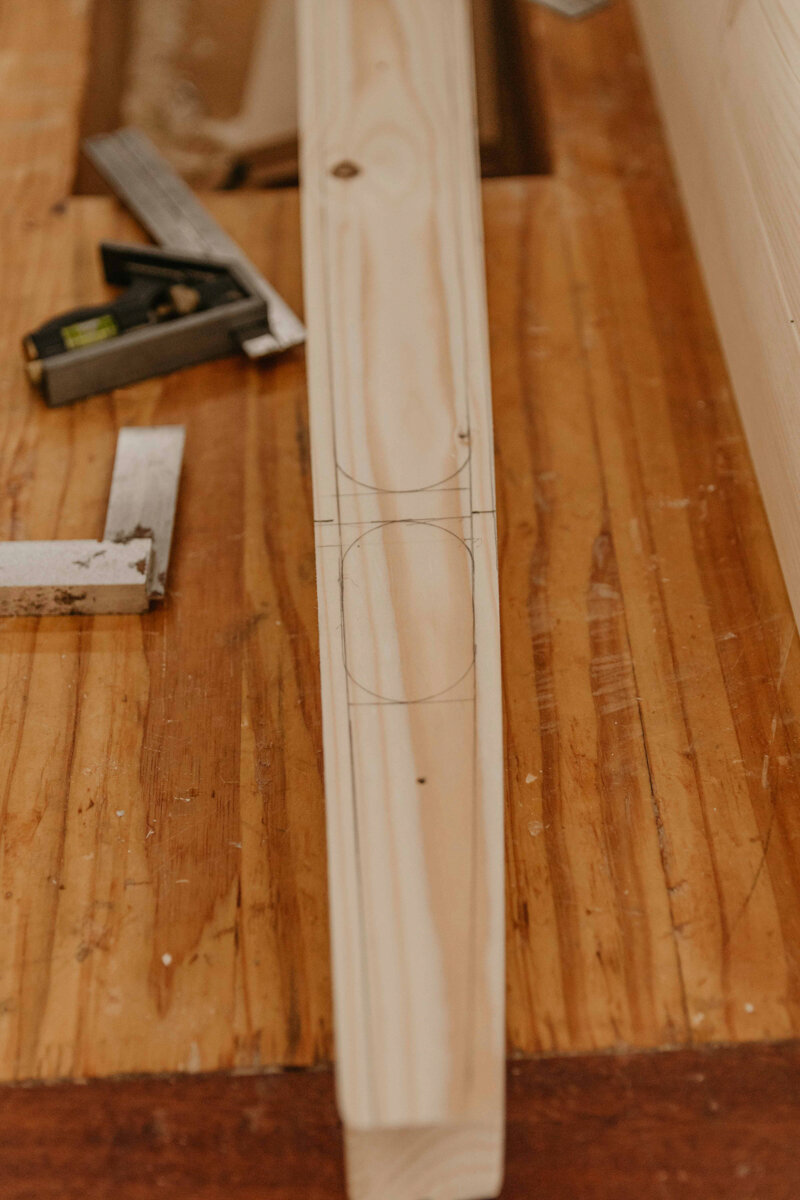
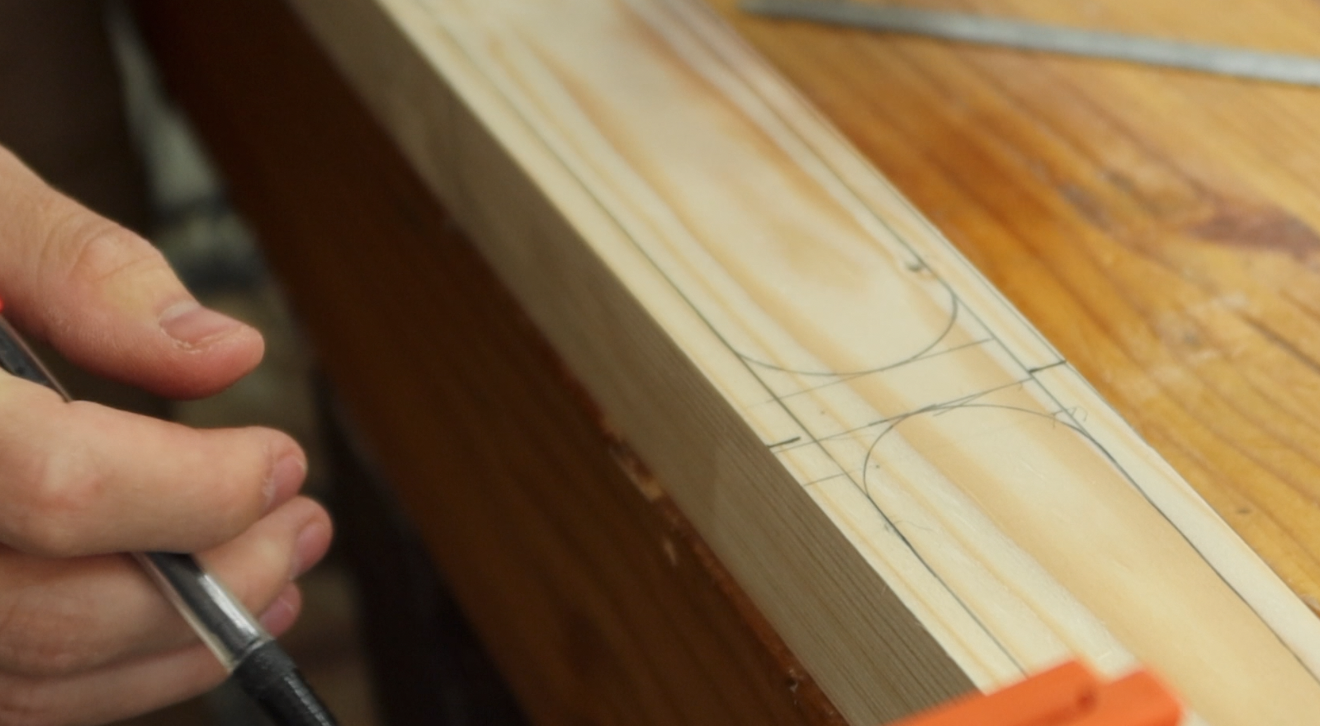
In the template, there are these dividing lines that pretty much break up the board into sections. We have the nose, center, and tail. For marking accuracy, we just cut out a sliver of the template so we can mark that line on the board where it won’t get cut off. If we just marked outside of the template, that mark will just get cut off and we would have no idea. This will help us line the boards up when we screw them together, even if they don't get cut the exact same way.

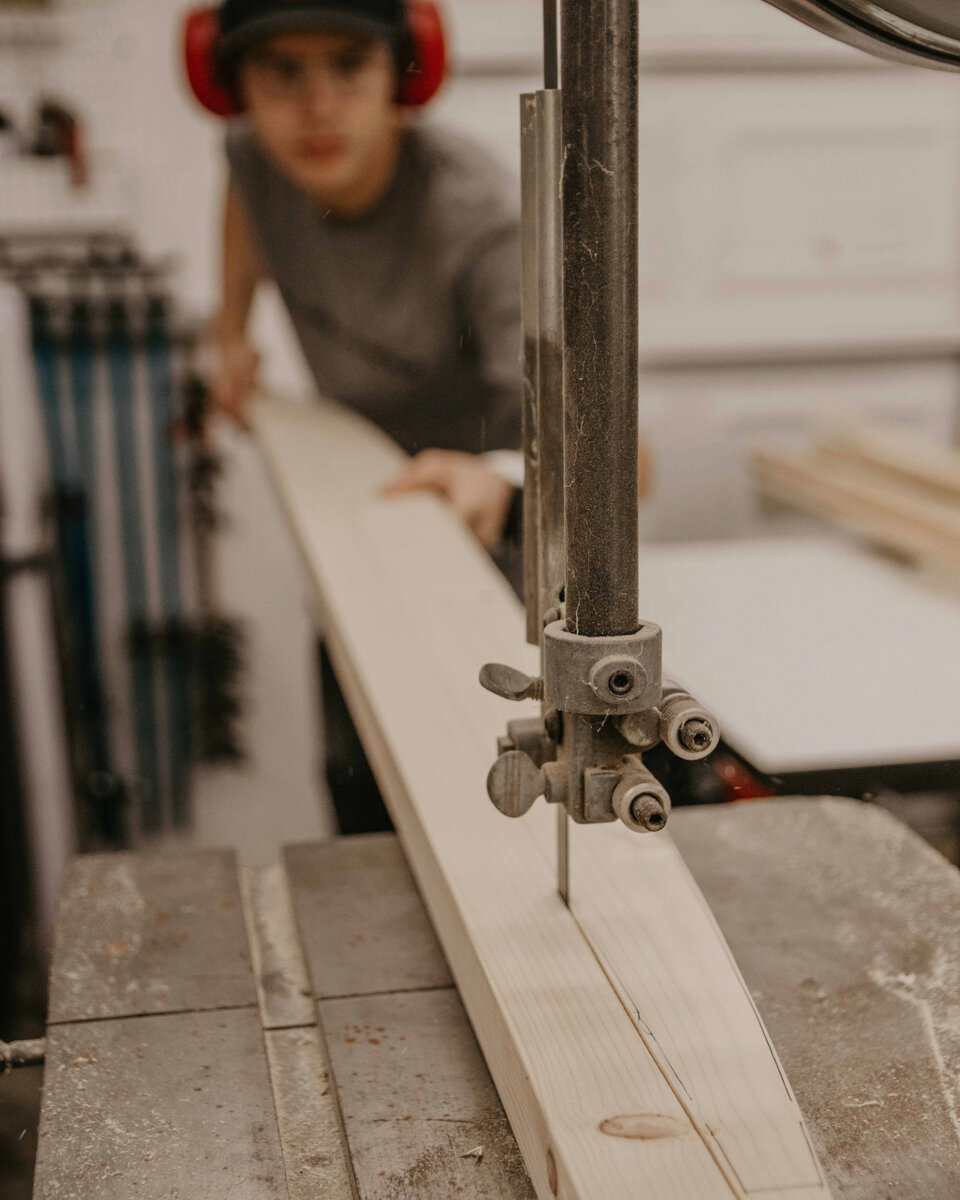
Cut Out All Profile Pieces
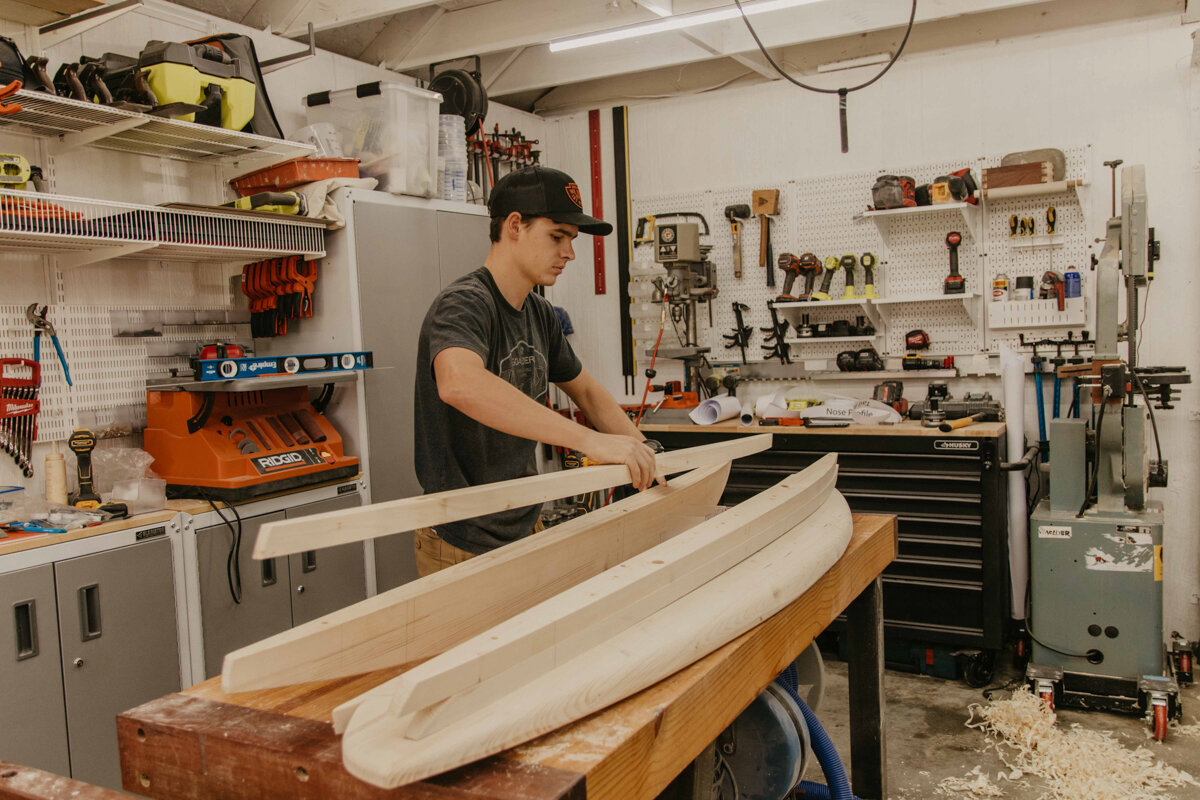
Here’s another one of those tedious processes. We started off using the jigsaw to cut out the first profile. That didn't last long as we only cut one out. But if you could just imagine, it took a very long time. It was very exciting to see the first one done though! You can totally use a jigsaw for this, it would take a while, but it can be done! We switched over to the band saw because, hello, it’s right there in the corner and we never use it and this is the perfect project to use it for. As Dylan, pushed the board, I was on the other end adding support upwards to keep the board from falling down. If you’re able to do this on your own, good on ya.
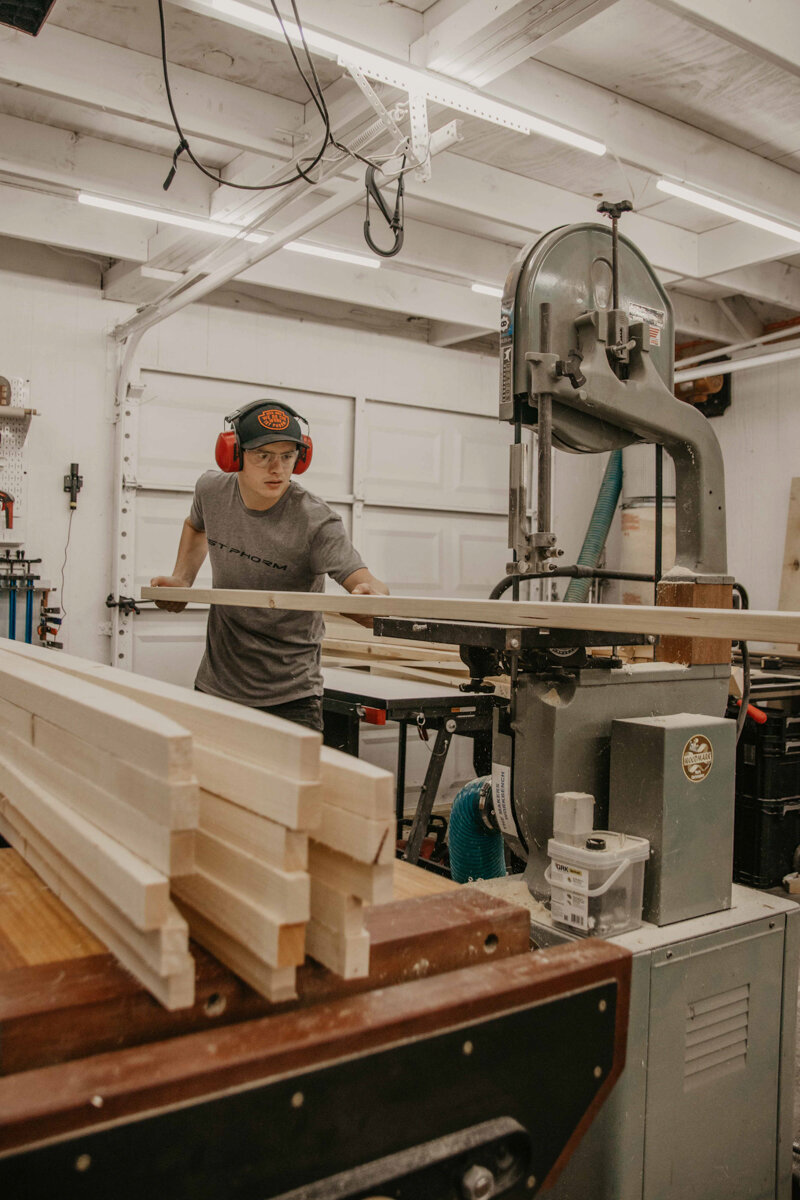
When we got all of them cut, I remember thinking that this was way too many and what were we thinking. It turns out it was the perfect amount! Funny how that works out.
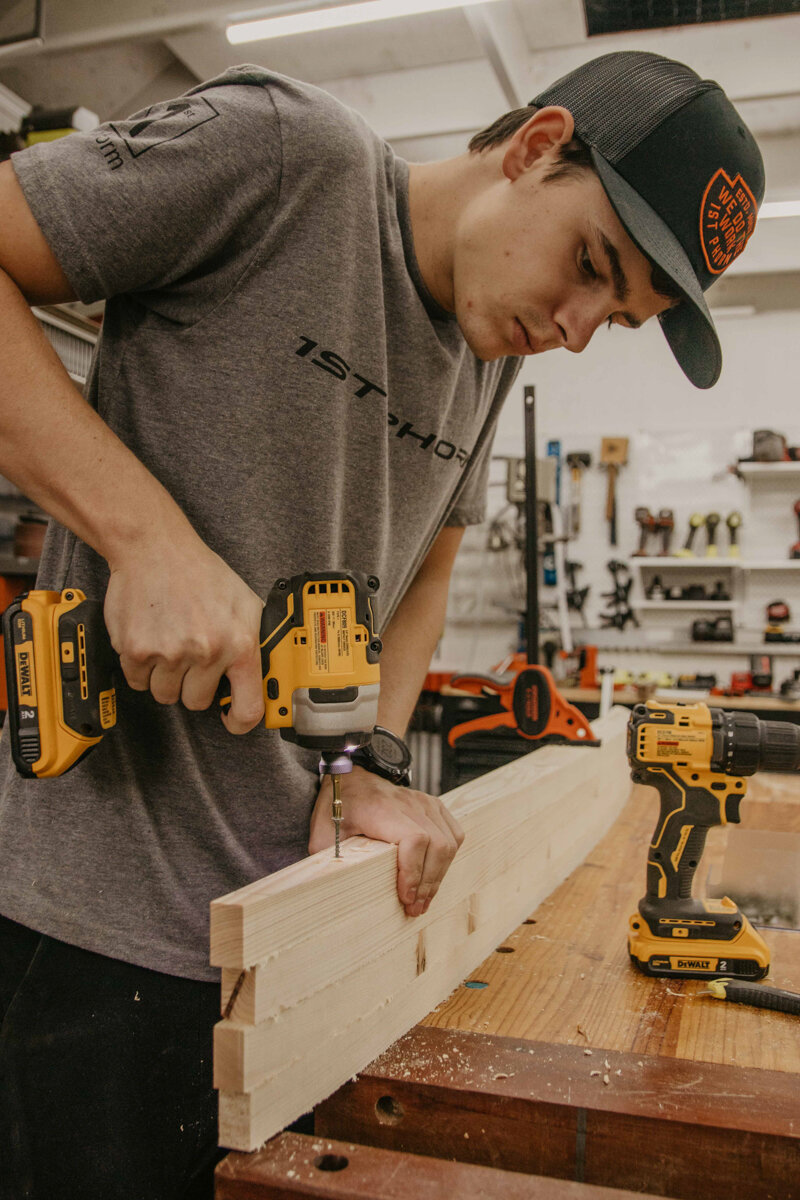
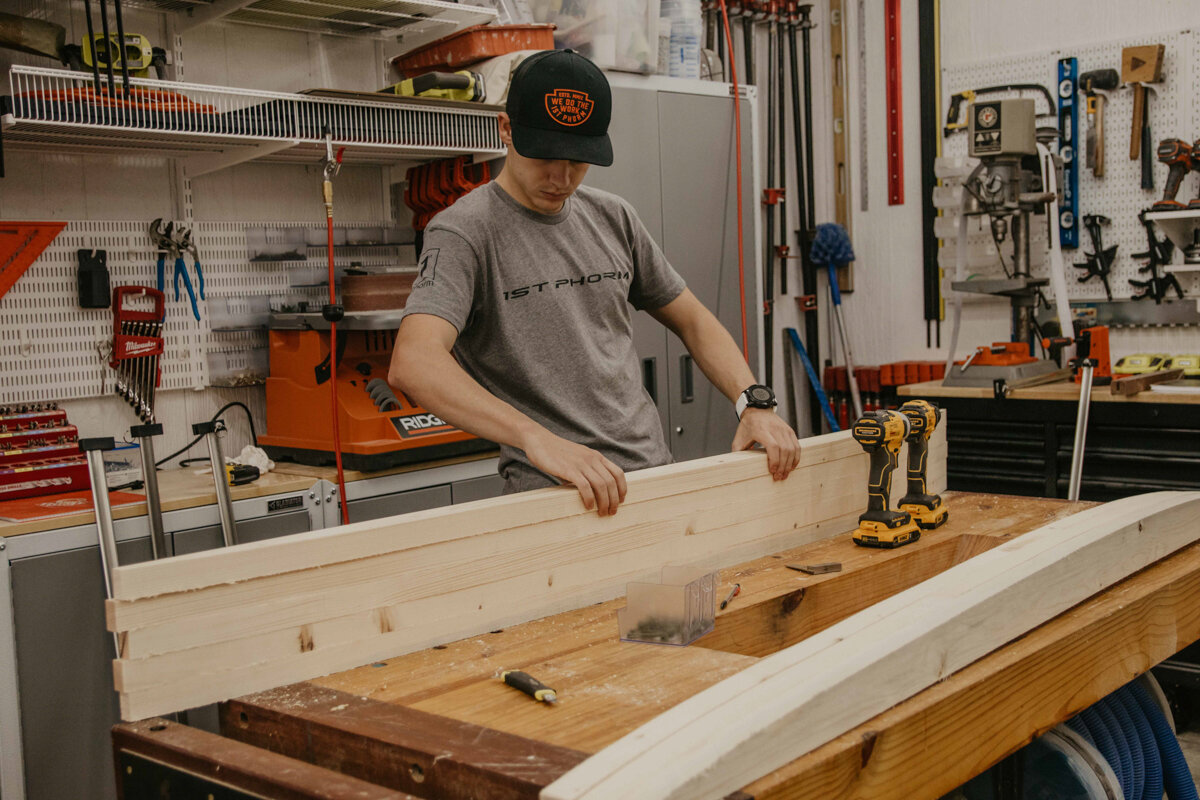
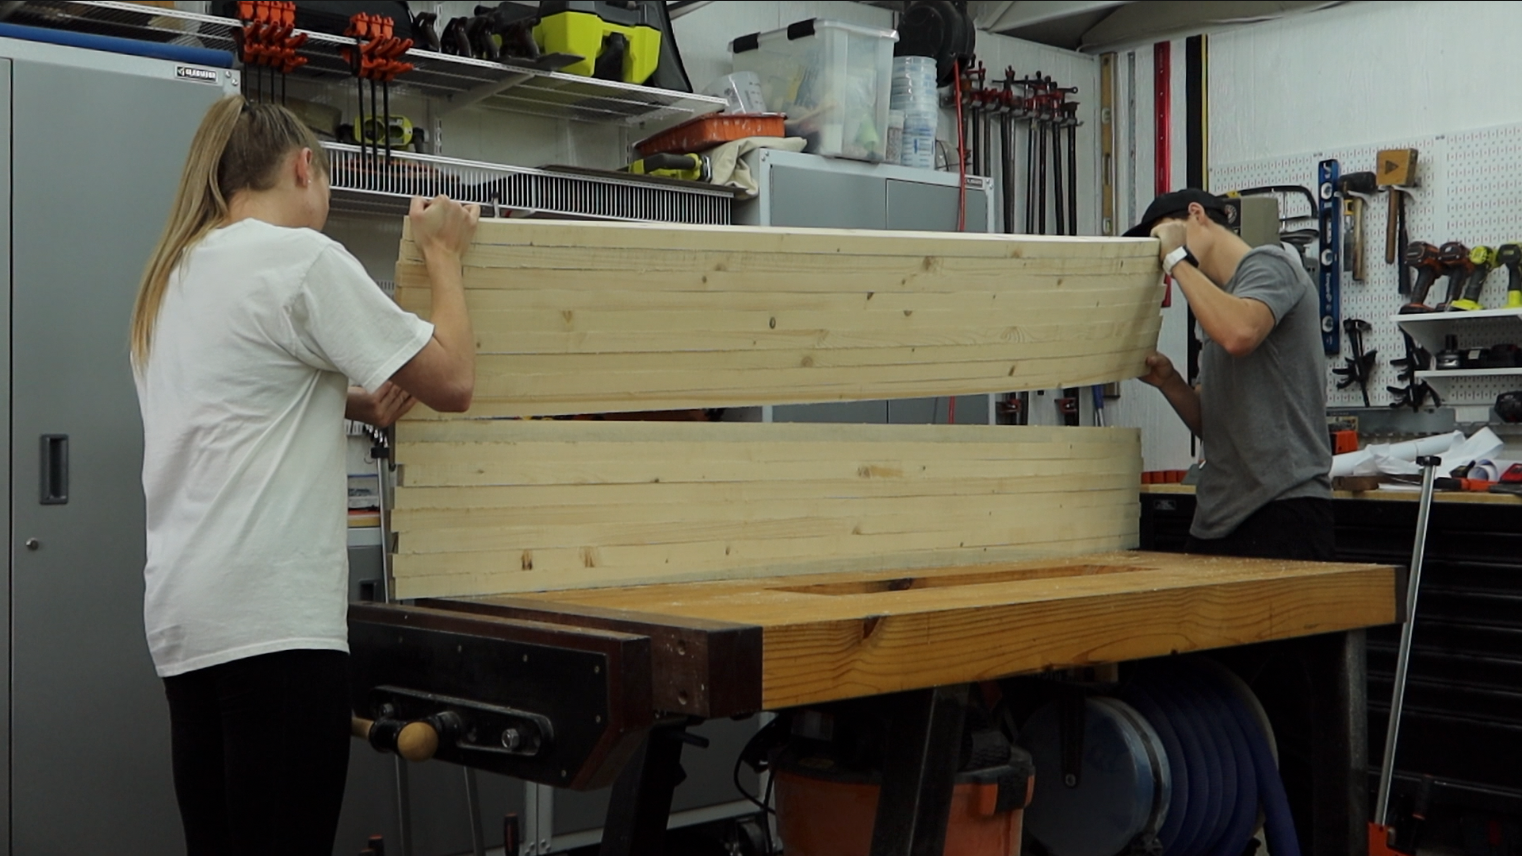
Screw One Half Together
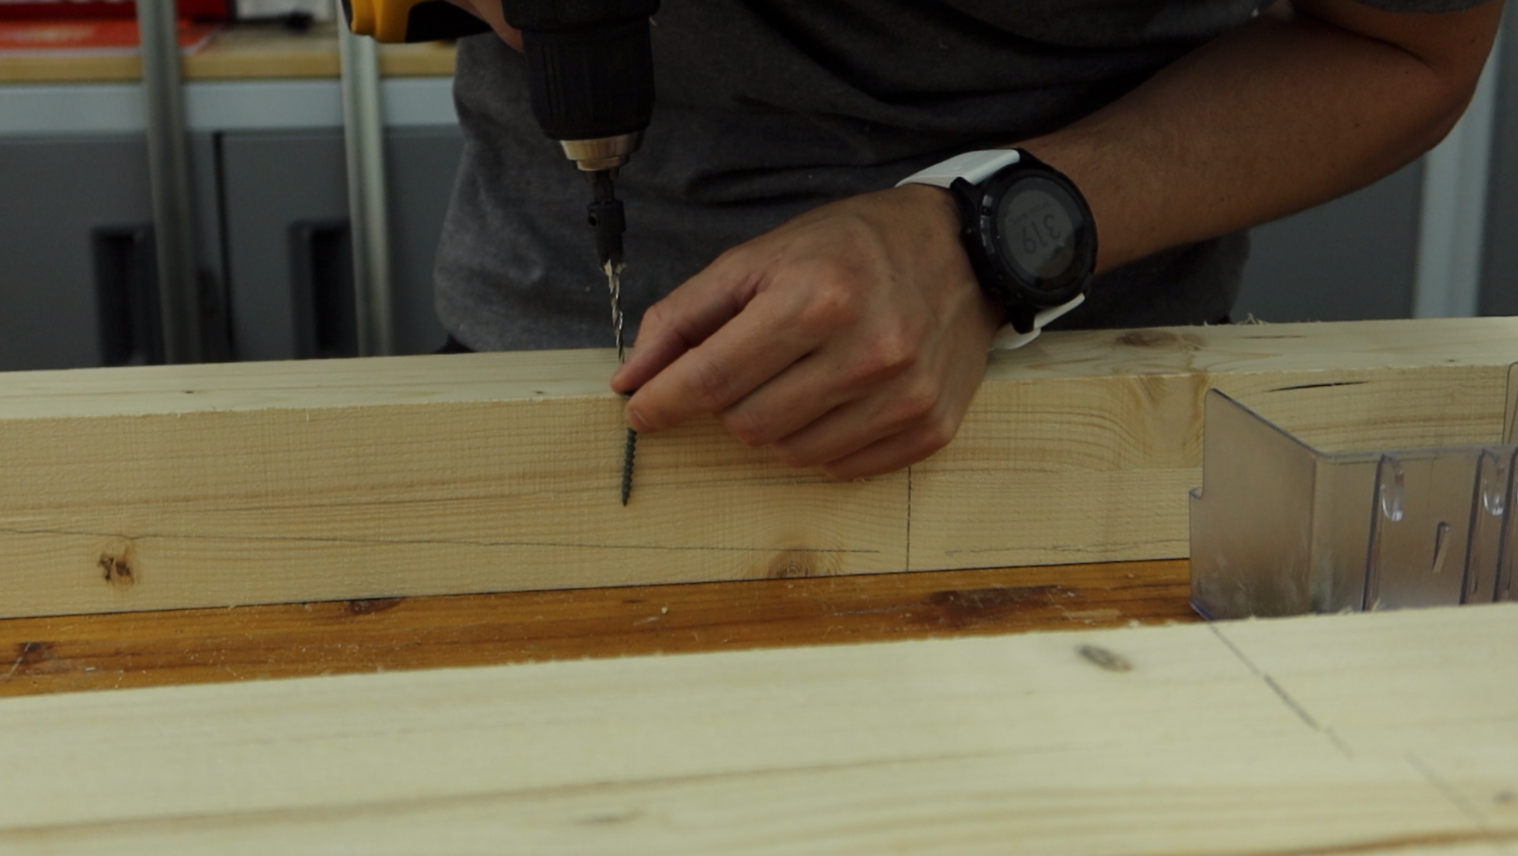
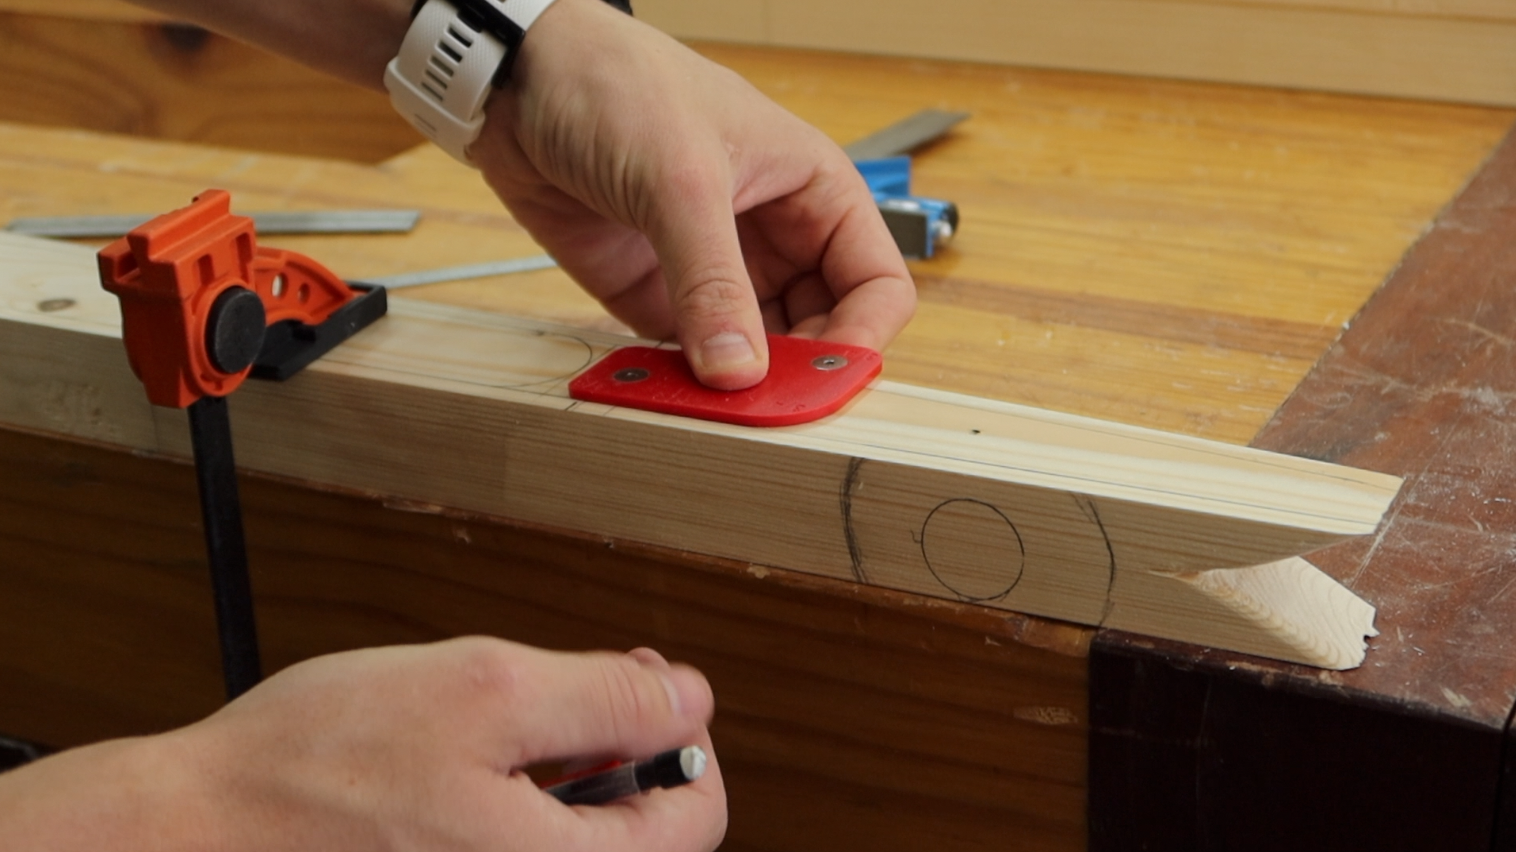
Now, we are going to be working in two halves. Try to stay with me here, it can get confusing if you don't know the rest of the plan yet. For the first half, we are screwing together each board. If you can imagine the board on the workbench being the outside of the board, and then working our way inward. I think it was 5 screws down the length of each one. Remember those, dividing marks? Now we can extend those down the side so we can line each one up.
Drills: https://homedepot.sjv.io/LGG40 (affiliate link)
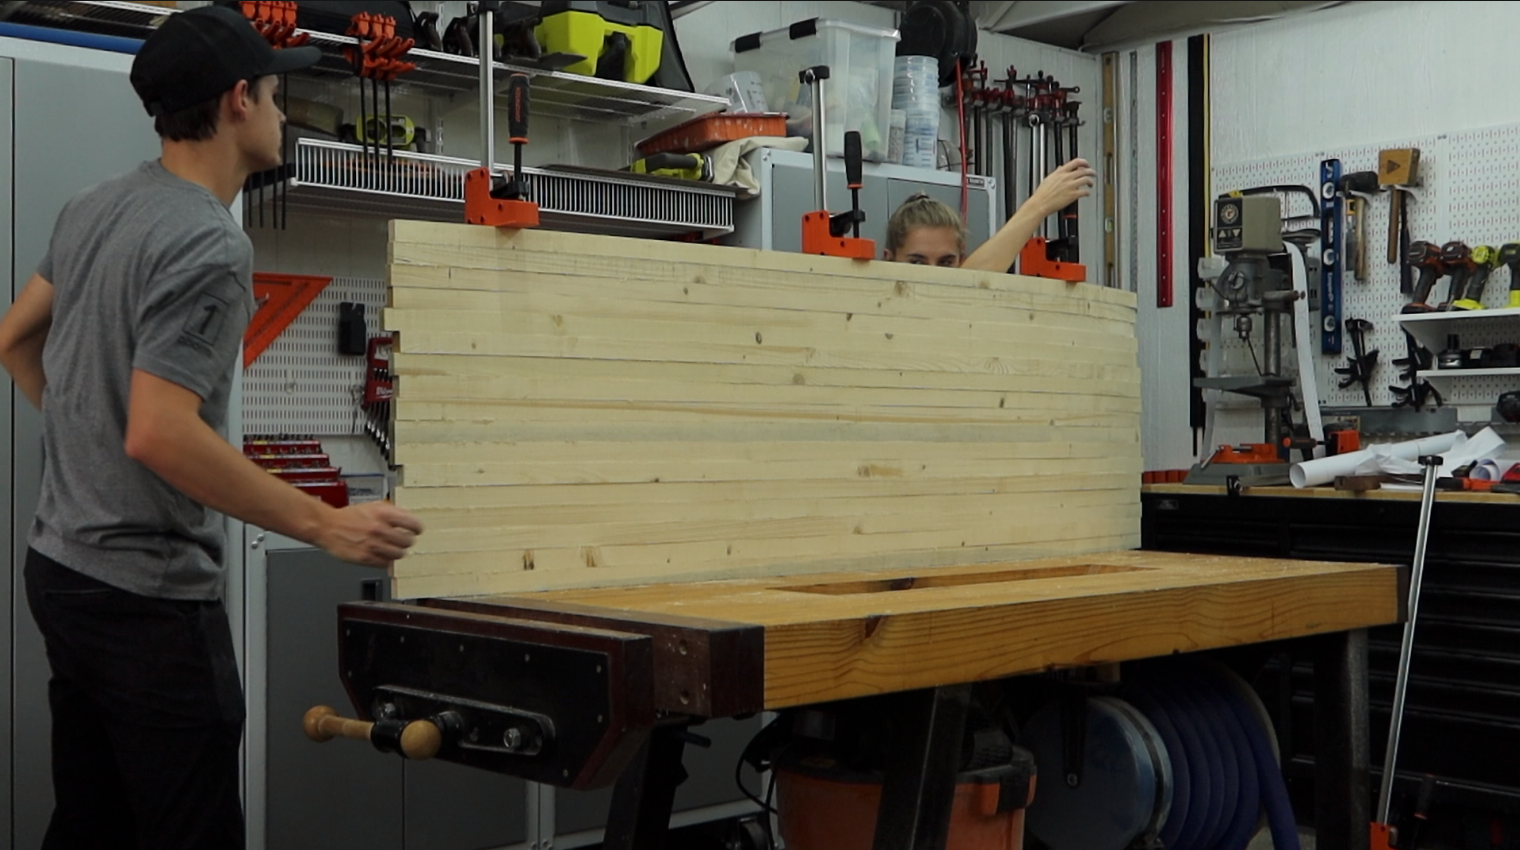
Screw The Second Half Together
Before we go any further and screw together the other half, we want to make sure we have each board placed where we want it. We should have done this with the first half, but we got a little too excited. Then we rolled back out our template and cut out the shape of the board and traced it to the blank. Also, making those dividing marks here. So now with the second half, you can see the curve of the board, we won’t be needing as many screws on the first few ones down on the ends because the screw hole will end up showing when we shape it.
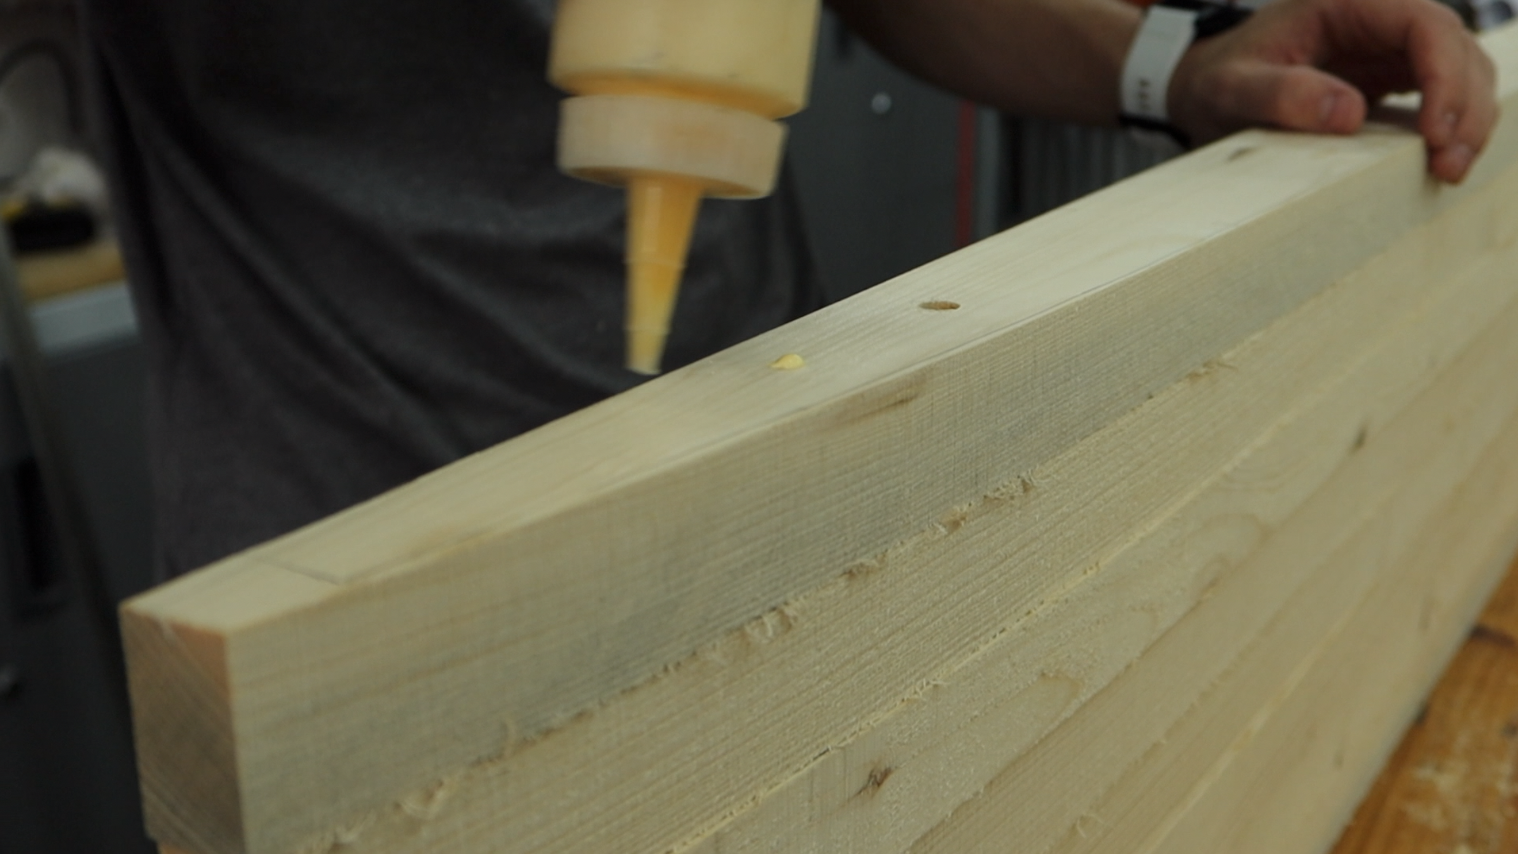
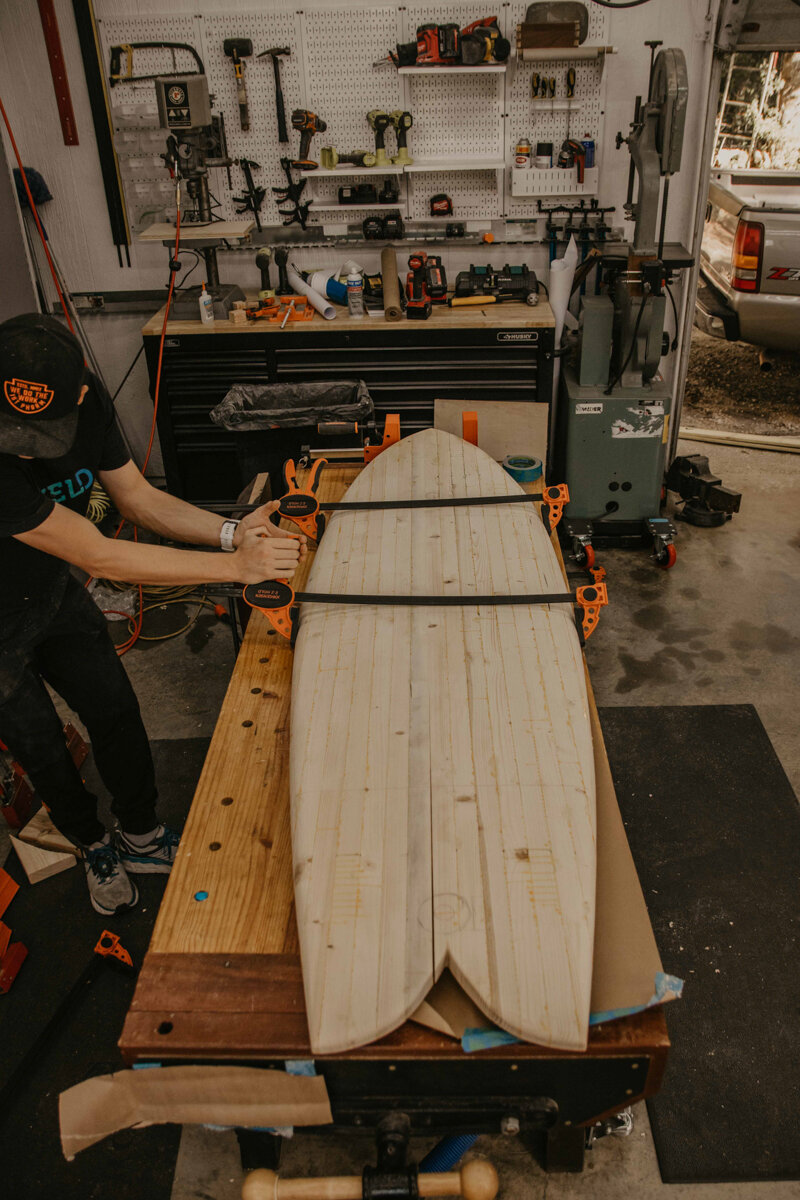
Glue Up The Two Halves
Once the second half was done, we need to glue up the two halves. With just a few drops of wood glue, maybe 5 or 6, down the length we will be able to break it apart later so we can hollow the boards out, we can clamp them together and let it dry. Also, making sure our dividing lines are all lined up.
Glue Bottle: https://amzn.to/2roKUeN (affiliate link)
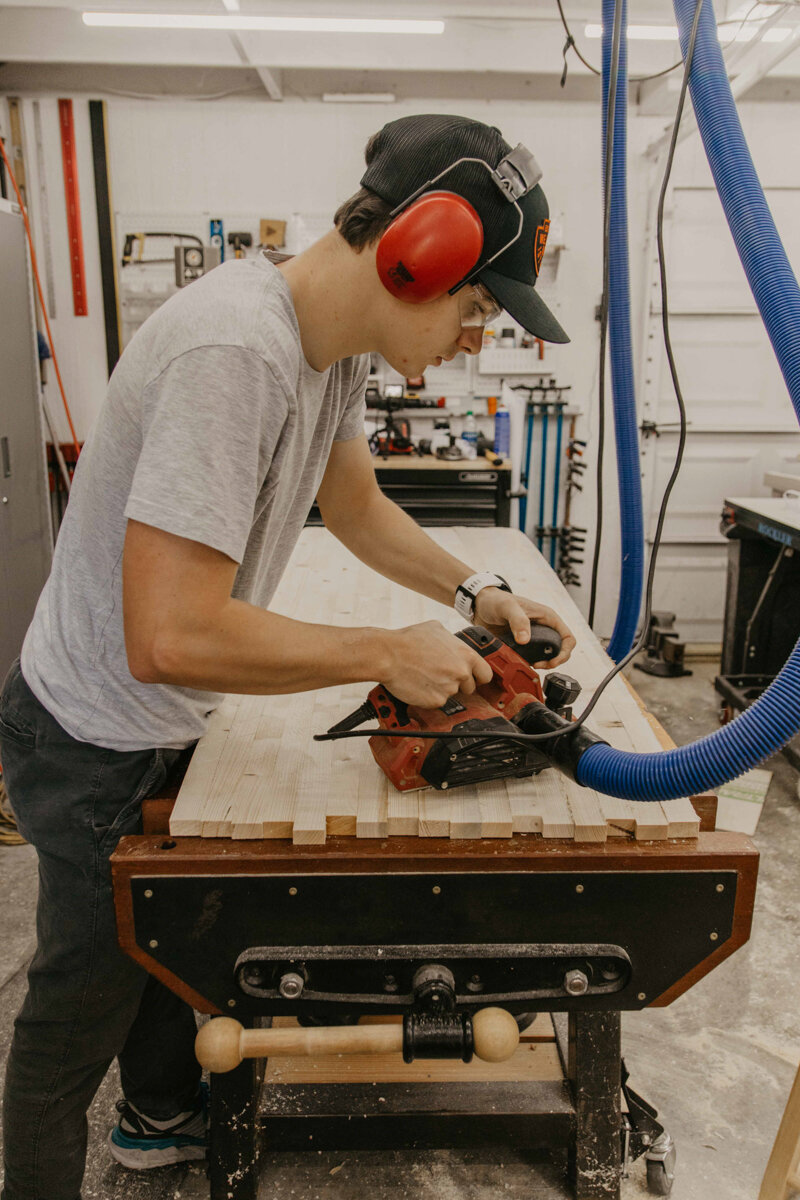
Plane The Blank Even and Level
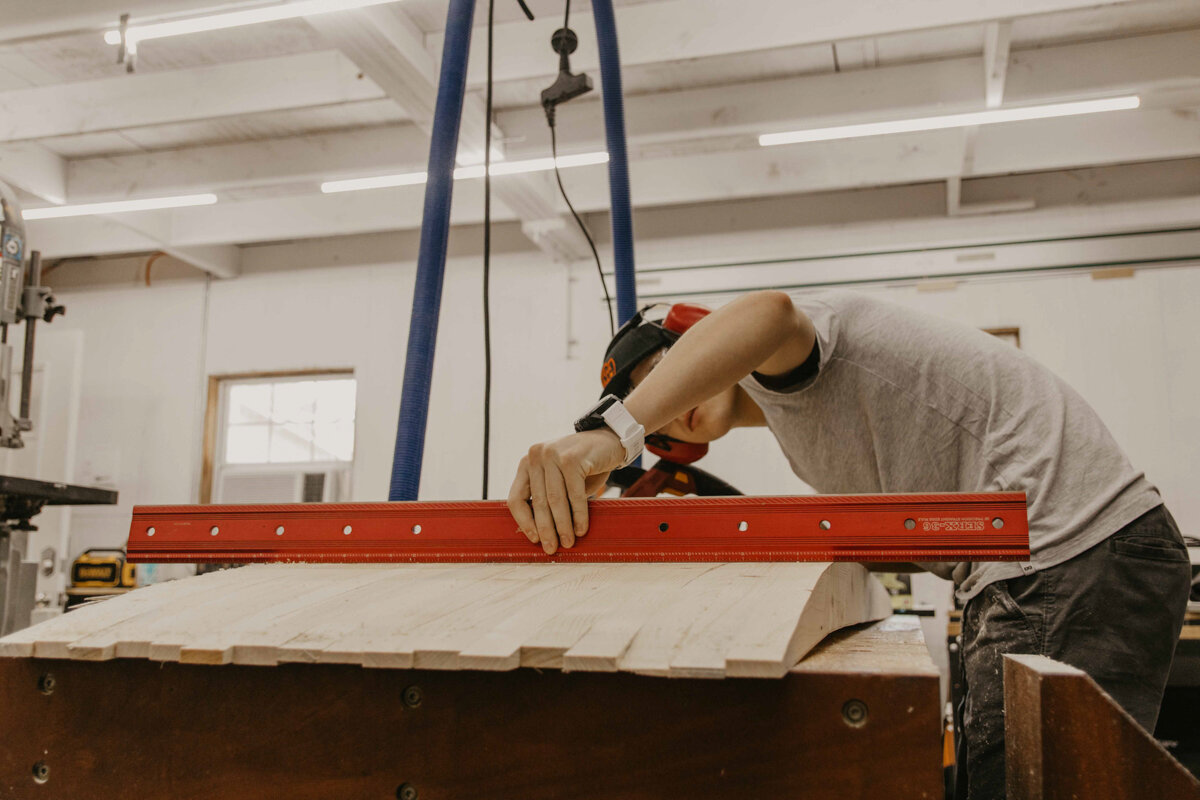
The next day was a very long, exciting day. We are going to get the blank level before we cut the whole shape out. Using our electric planer, Dylan planed away to get the majority of the work done. Then, he came in with a hand plane for the finessing. Every now and then we will come in with a straight edge and move it across the top and check to see where the high spots are.
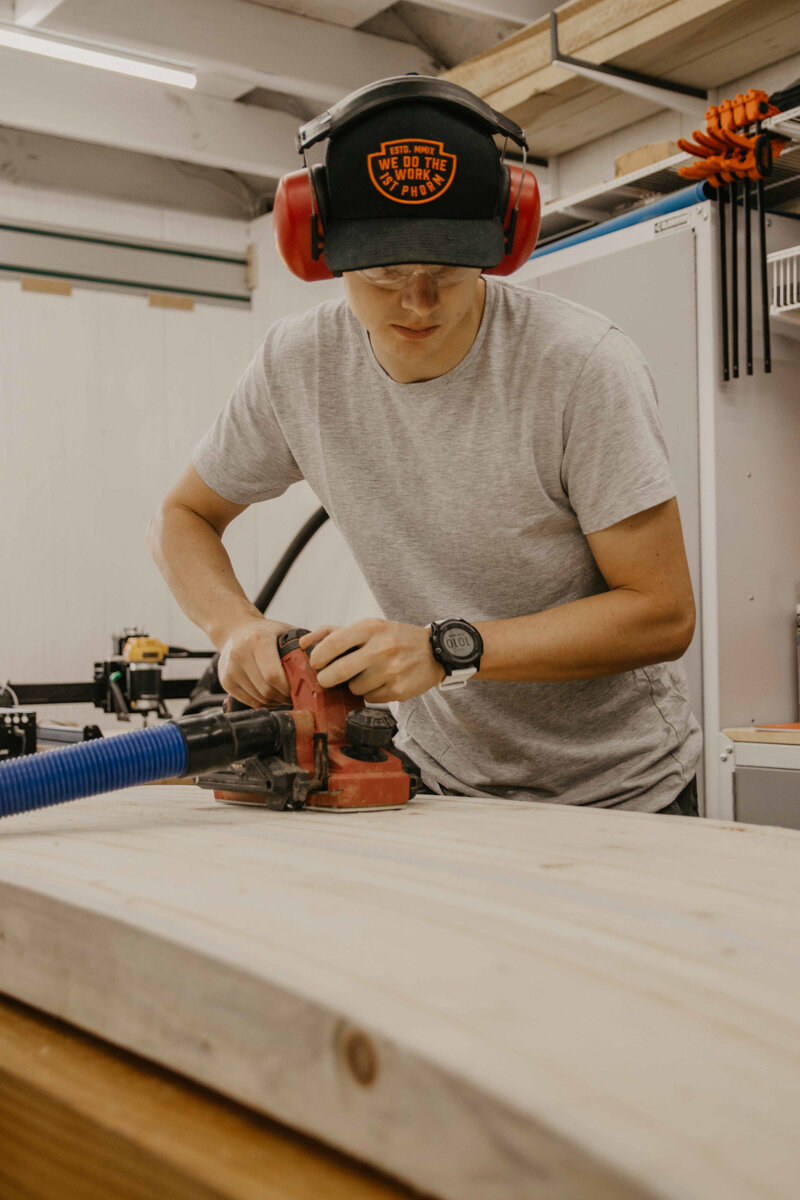
After the bottom was done, we got to flip it over and do the same process over again. Electric planer first, then the hand plane.
To see where we were across the whole blank, we took the straight edge all the way down, marking where the high spots where, so we can knock it out in one go and not keep having to switch and check every few minutes.

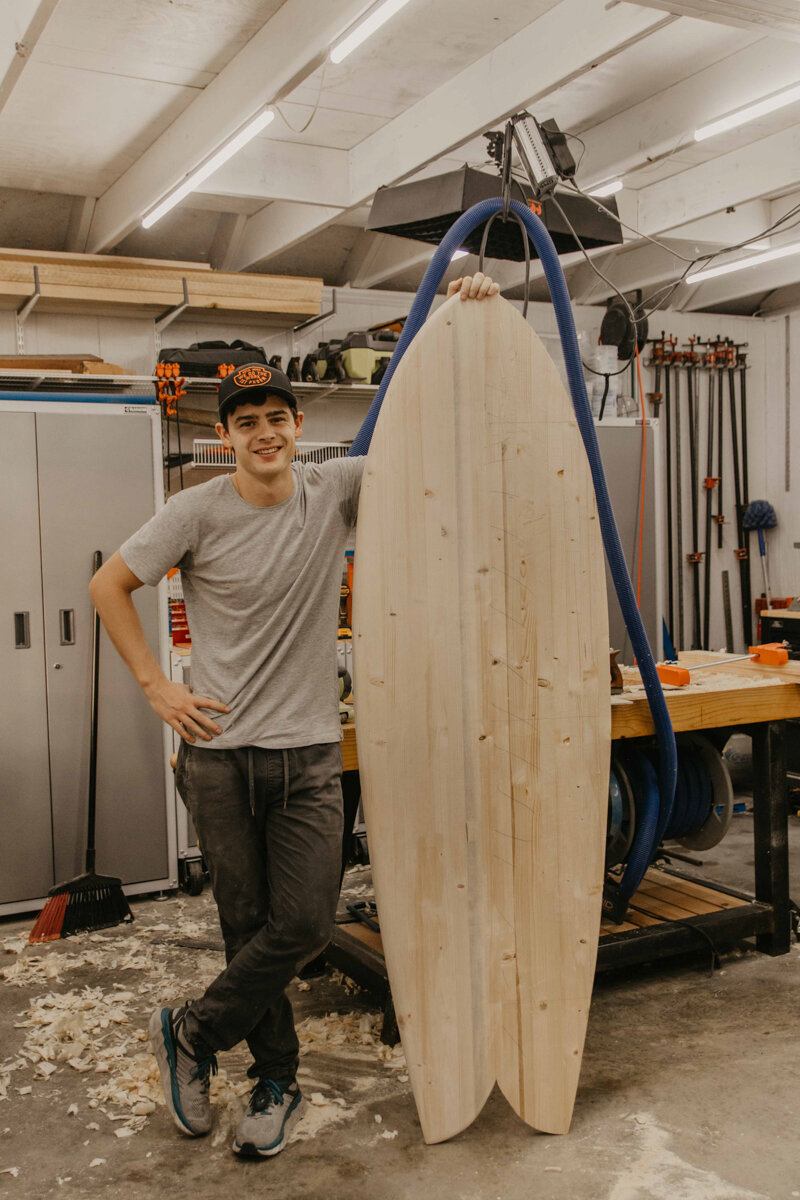
Cut Out The Surfboard Shape
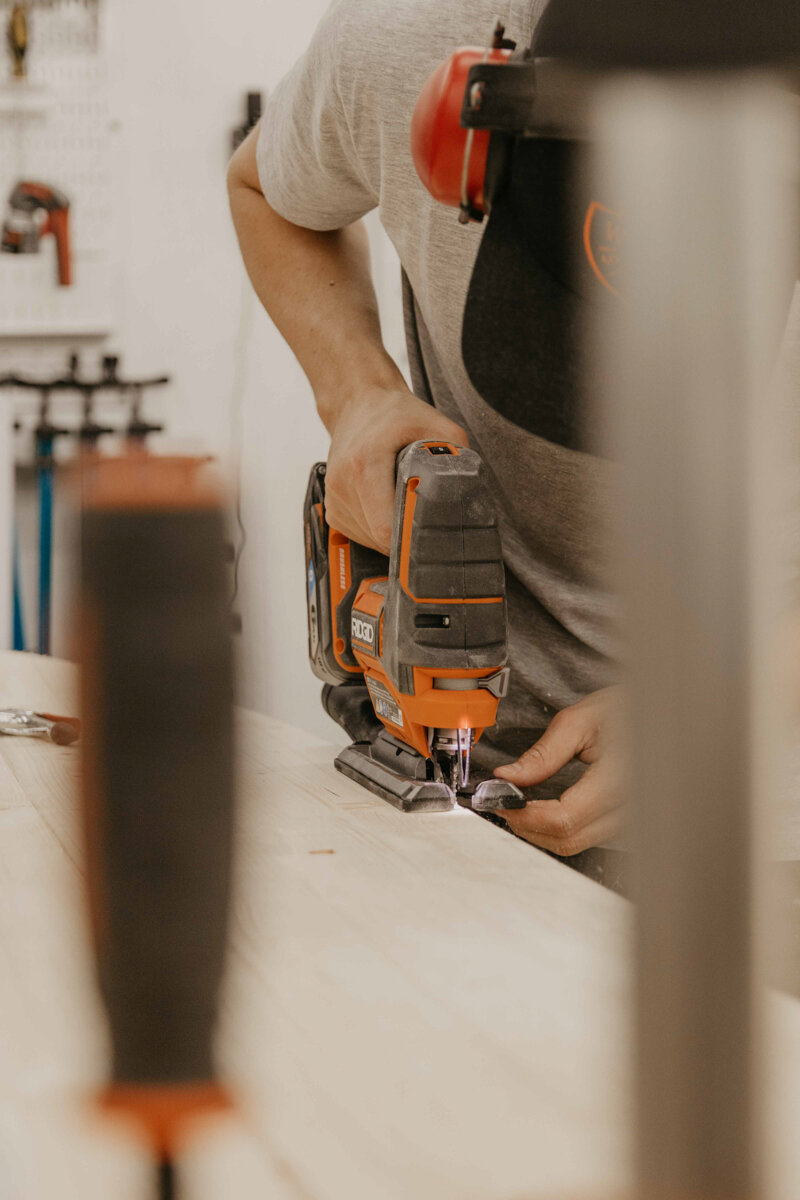
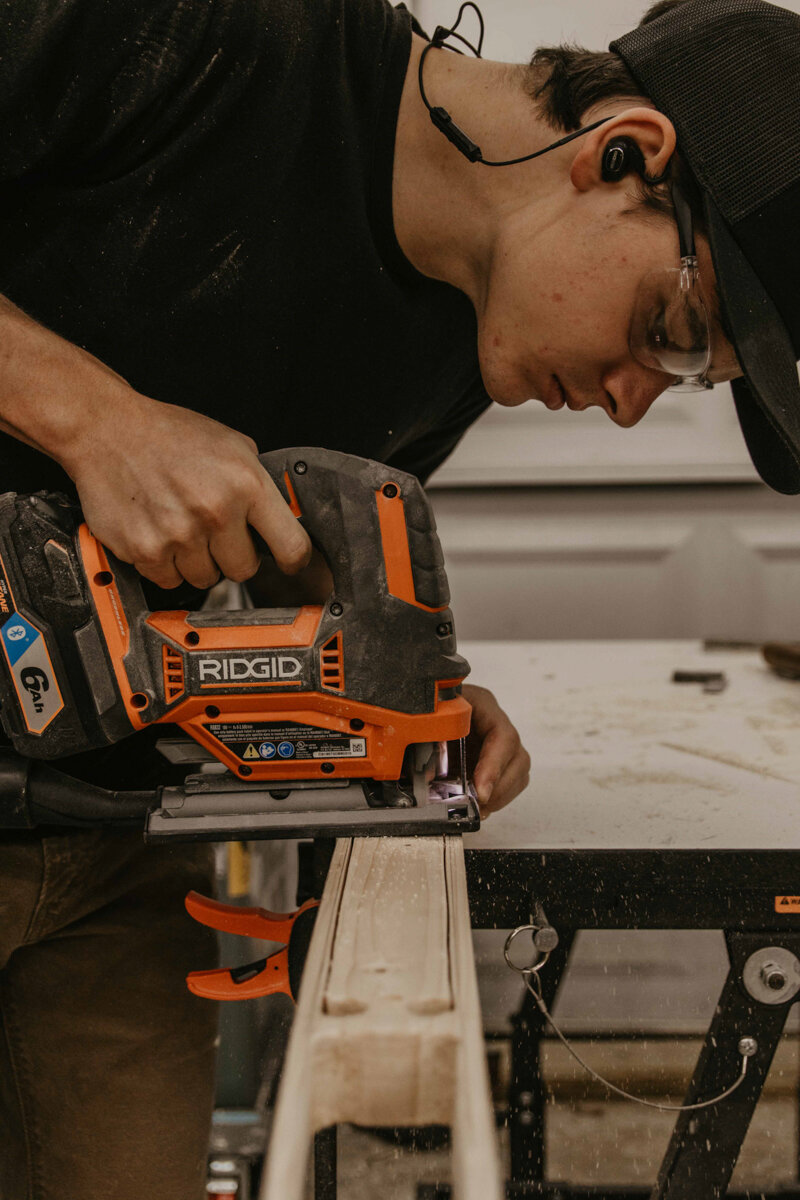
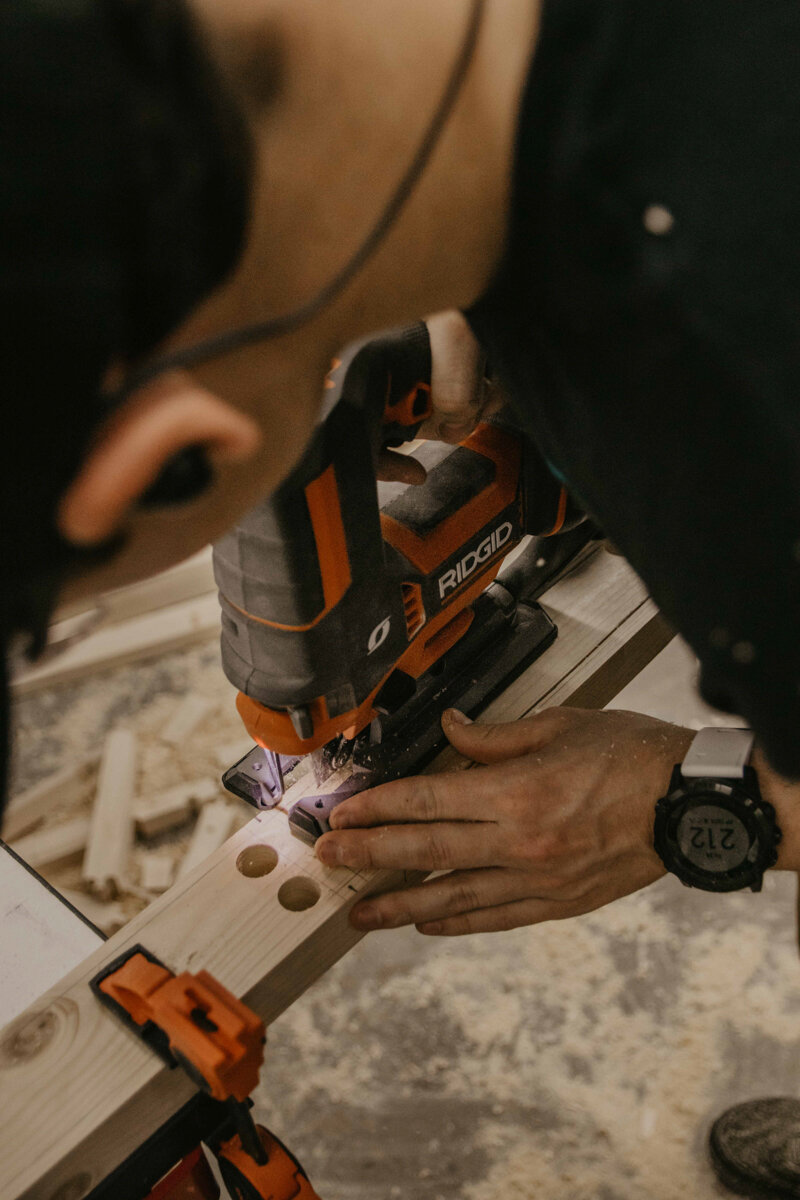
Once it was all nice, level and even, we rolled the template back out and traced it on the blank again. We found the middle of the board and made a mark, so we can line up the middle of the template to where we want it. We have it where the point between two boards is the center. Our first instinct was to cut this out on the band saw to be quicker, and I was scared. It was huge and really heavy and we quickly talked ourselves out of it before starting. So going back to the jigsaw with all the patience in the world, we went around and cut out the shape.
Jigsaw: https://homedepot.sjv.io/Jybka (affiliate link)
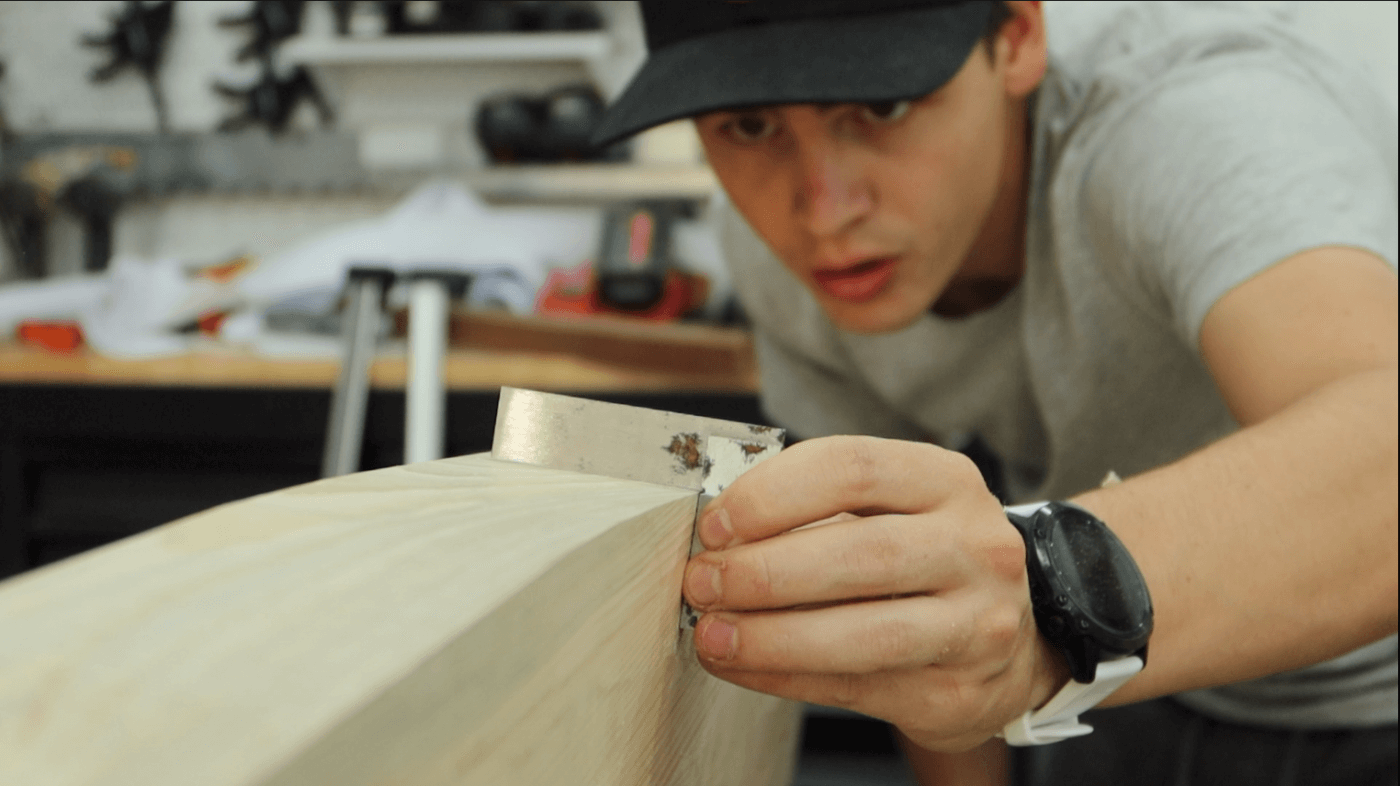
After it was cut out, we clamped it sideways to the workbench and started to level and square up the sides with a hand plane.
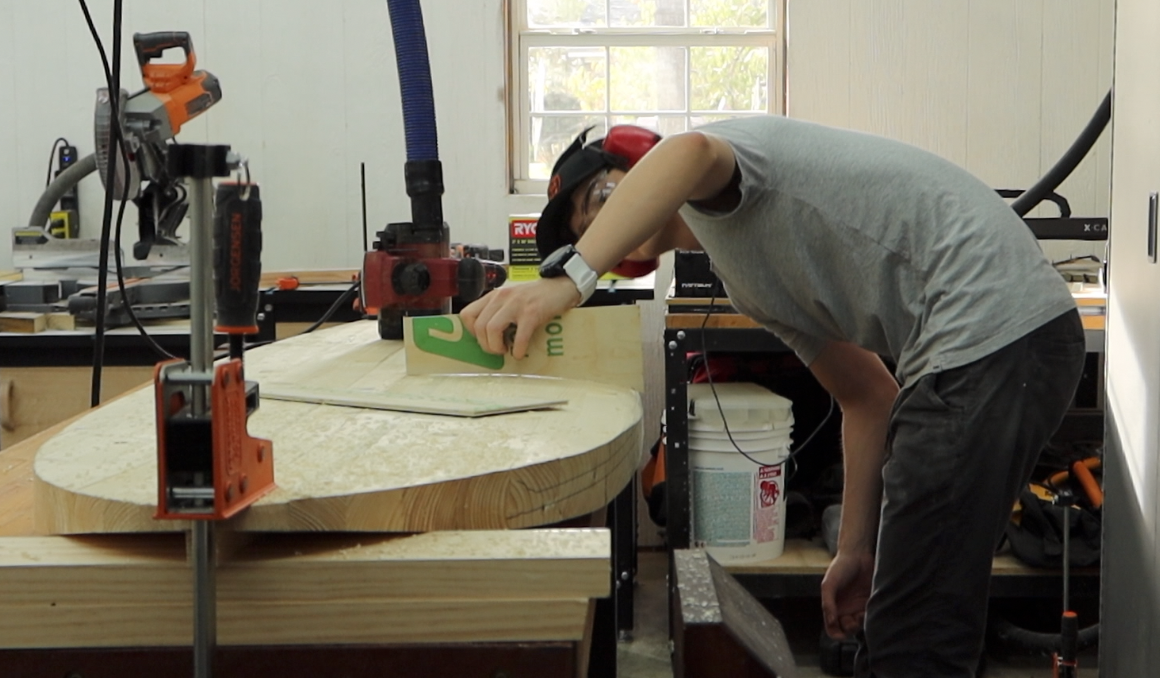
Make Curvature Templates
It’s almost time to get this shaping process on the road, but first, templates. They are our best friends in this project if you couldn't tell. We have templates for those dividing marks that separate the tail, center, and nose. These are going to allow us to make sure we have the roundness correct. Just got those cut on the band saw, tossed the inner piece and kept the negative space one.

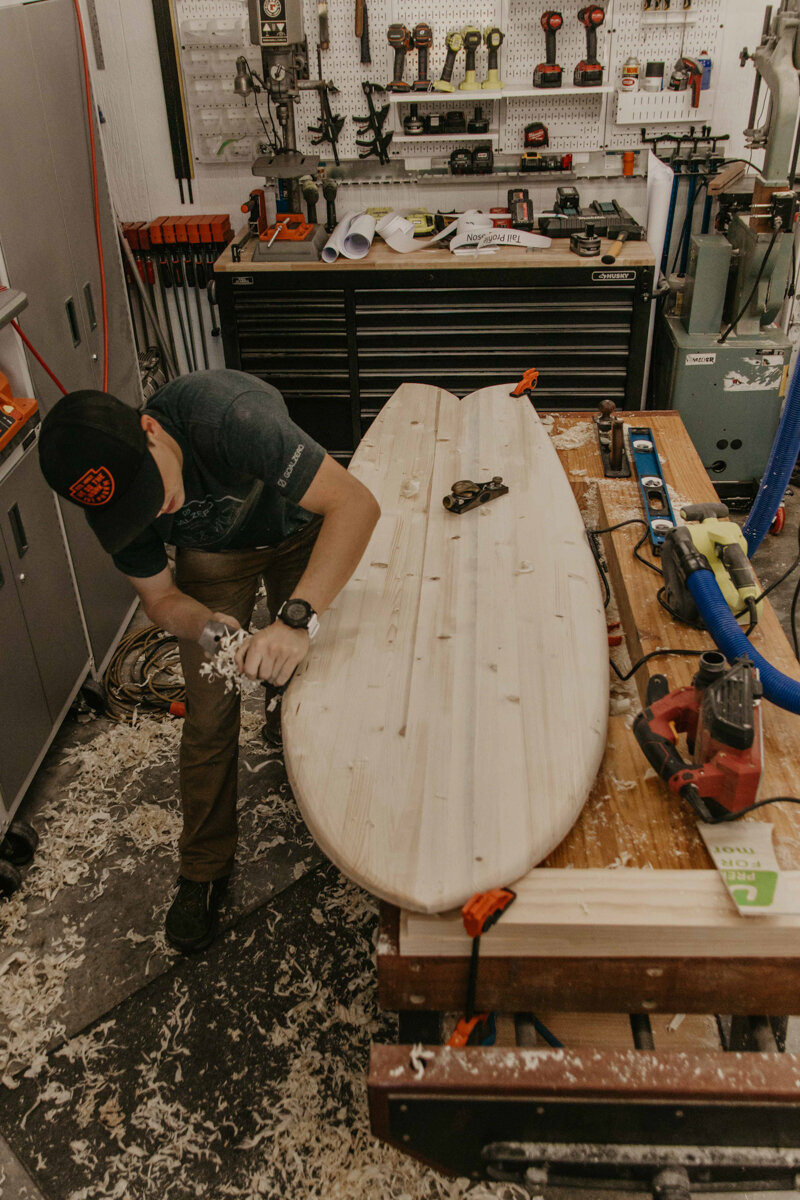
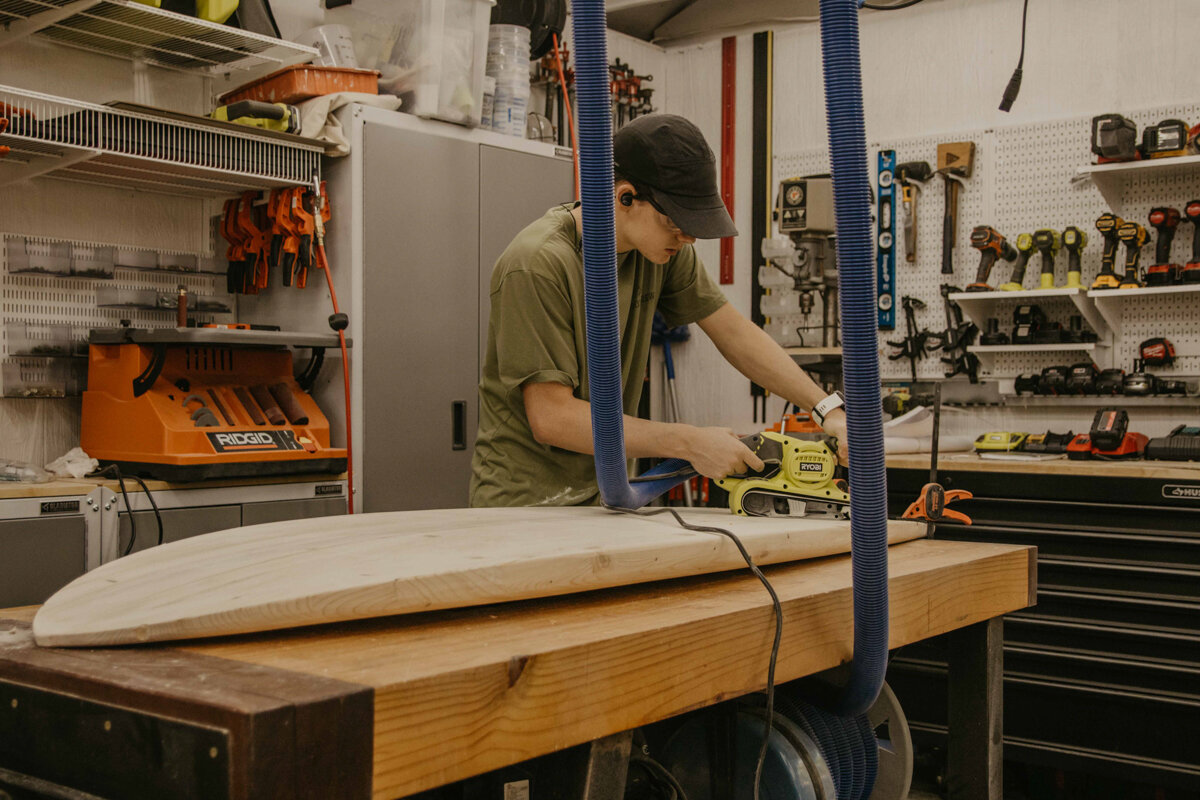
Start Shaping the Board
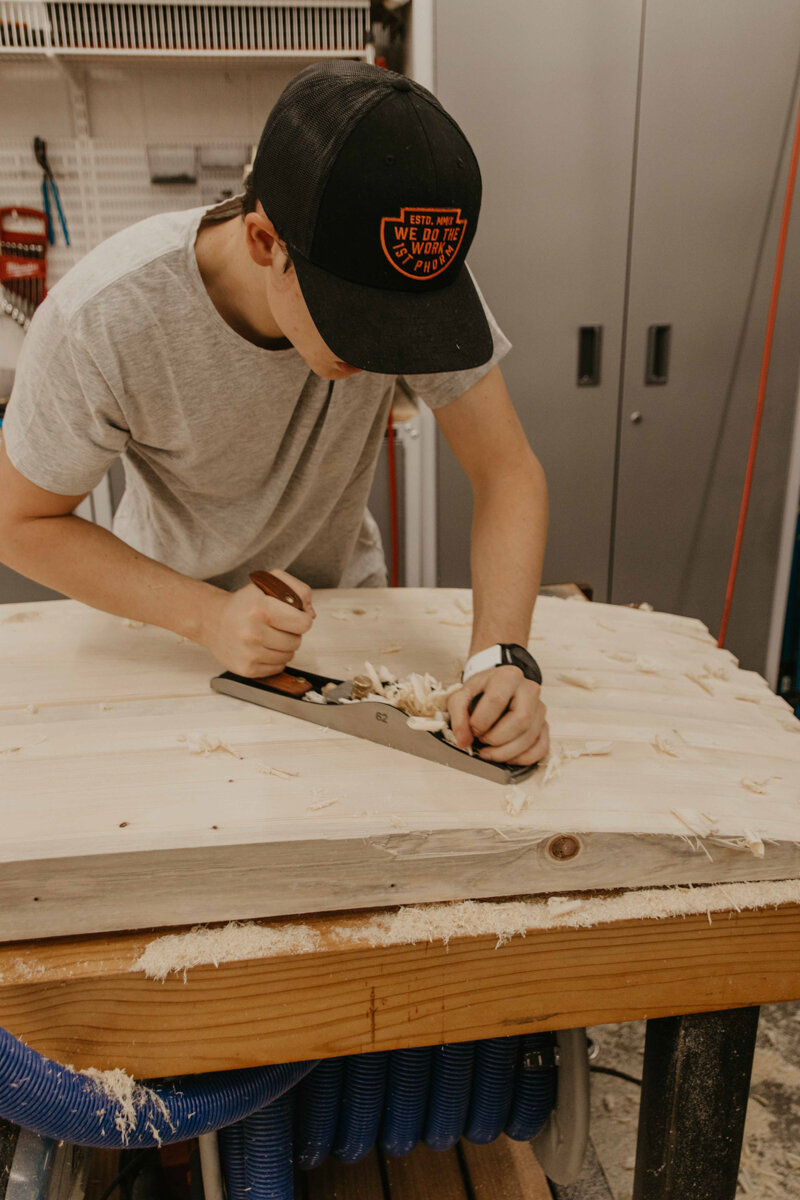
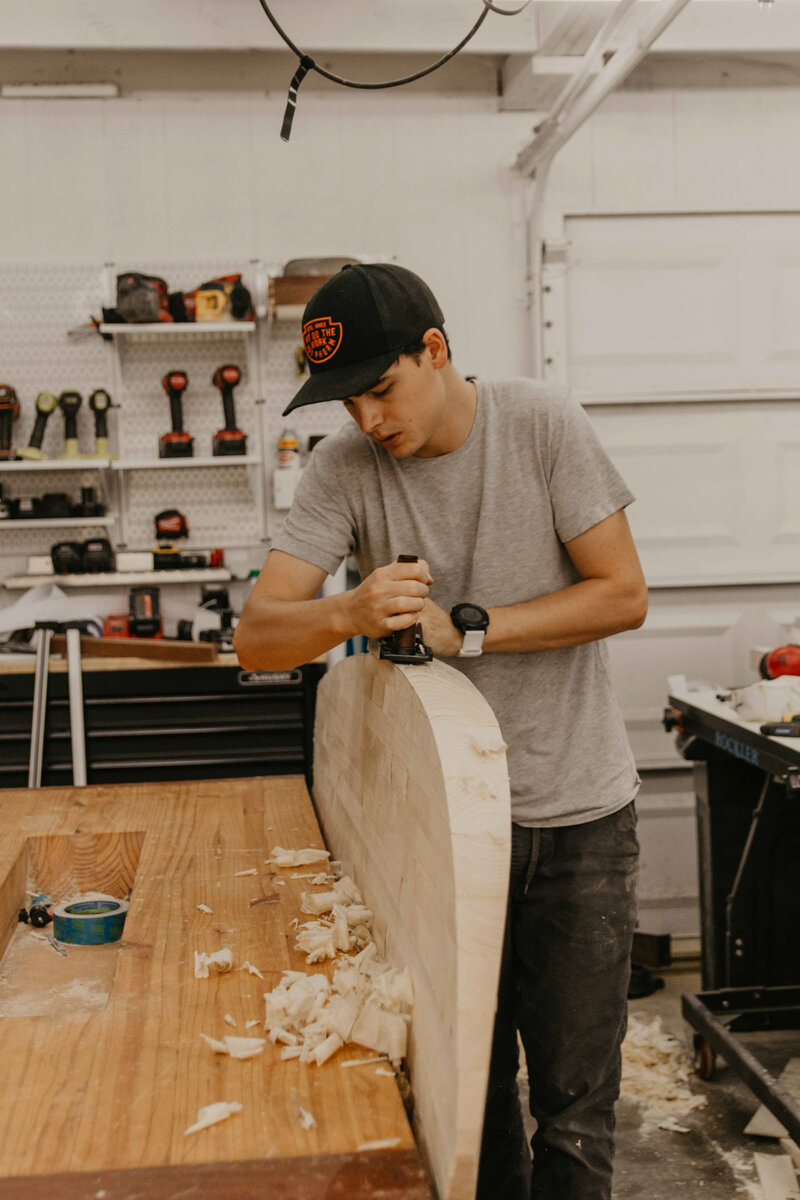
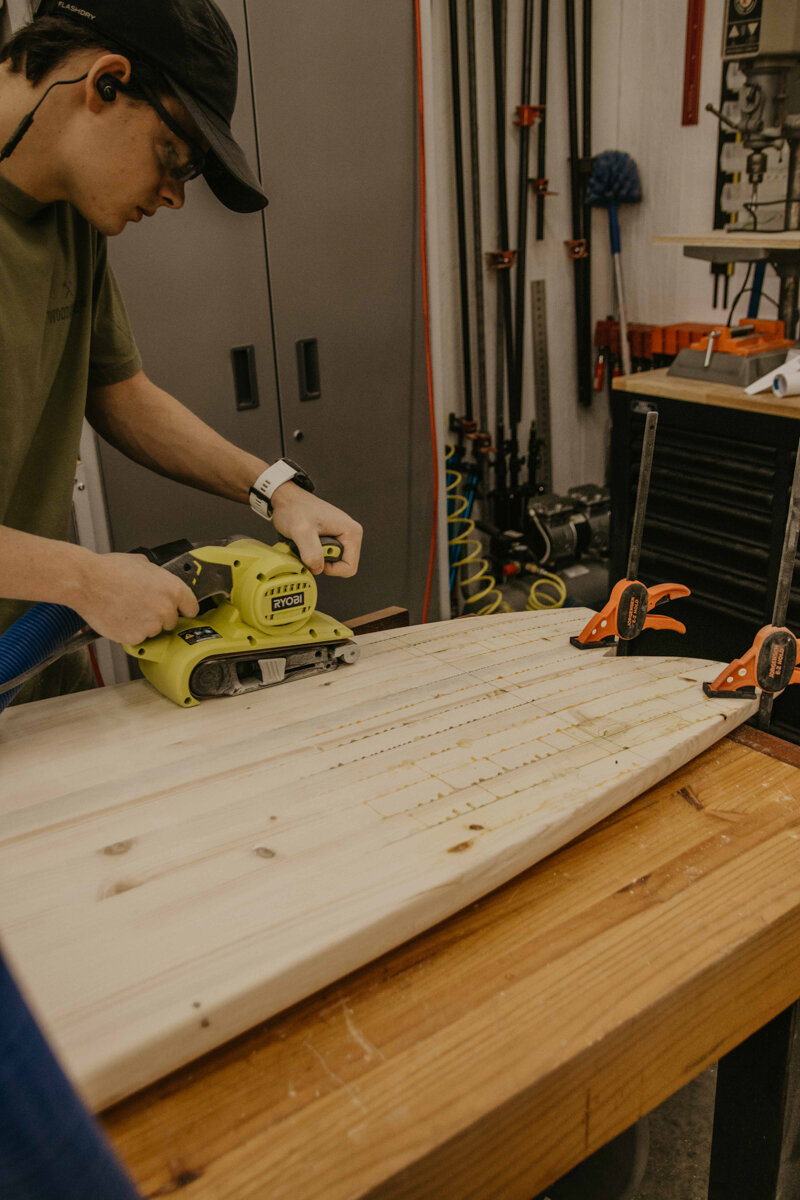
First off, we know we need the rails to be gradually curved down so the sides can be rounded over. Making 3 long marks down the board, we can make sure we keep going down as we got closer to the edge. This part isn't necessary as you pretty much take the line off with the first pass, but it's more to remind us. Now just as before, using the electric planer to get the heavy lifting done first. We will be working one half at a time and referencing the template often.
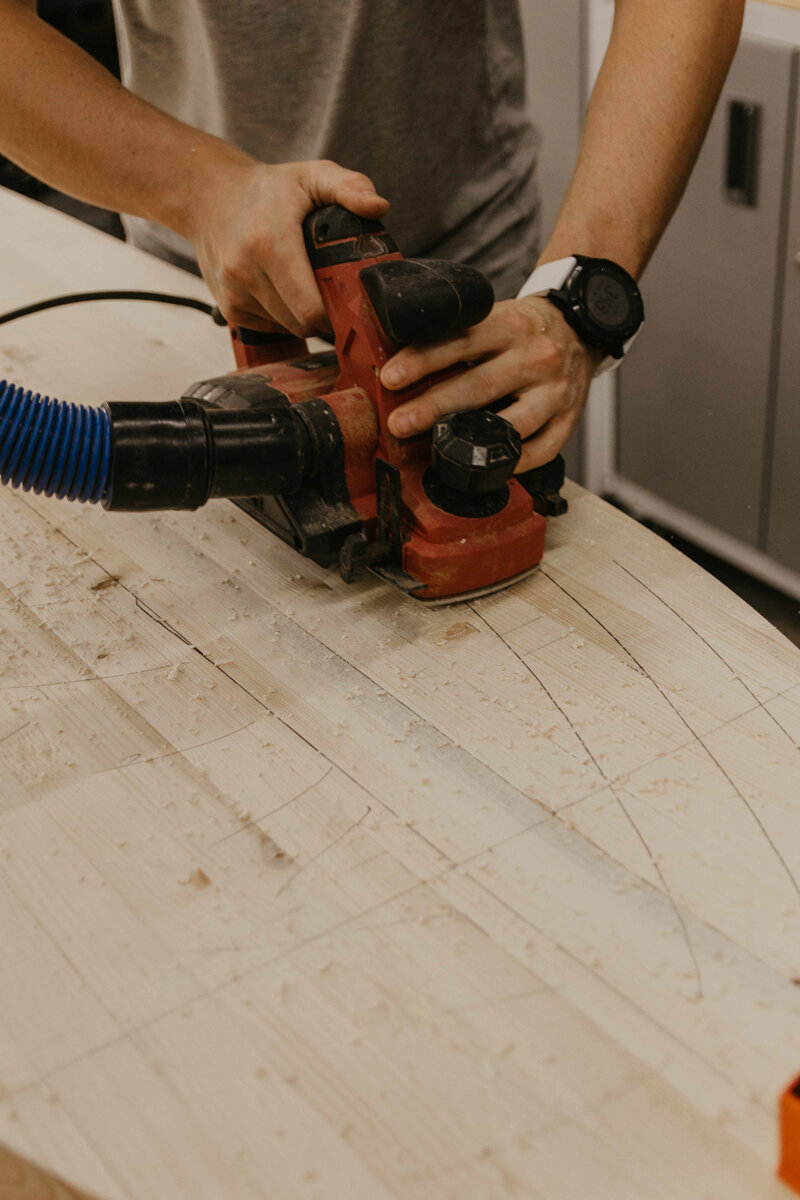
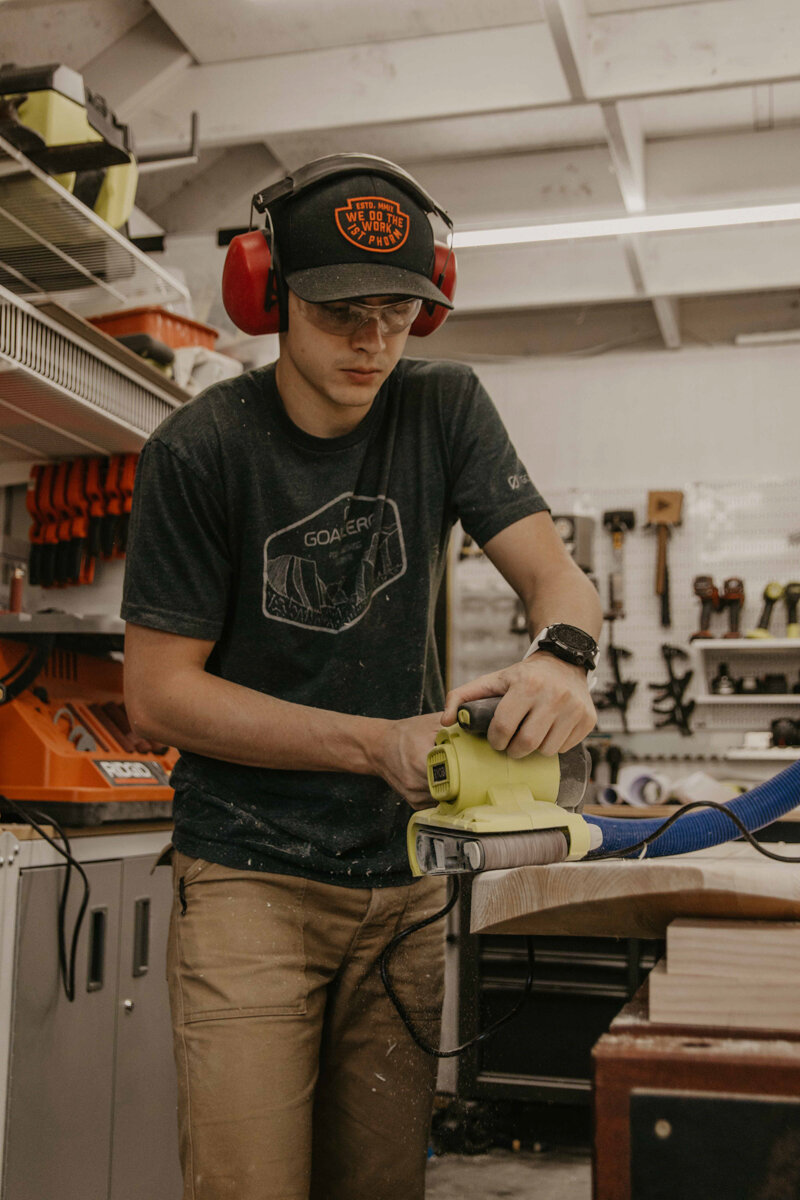
Eventually, when we needed a little more control and finesse again, we used the hand plane for the sides and to get that nose curve right. We brought out the belt sander to get everything smooth and to help get more of that nose curve going. It was all just a back and forth process between tools until we got it the way we wanted.
The next day it was time to do everything over again for the opposite side.
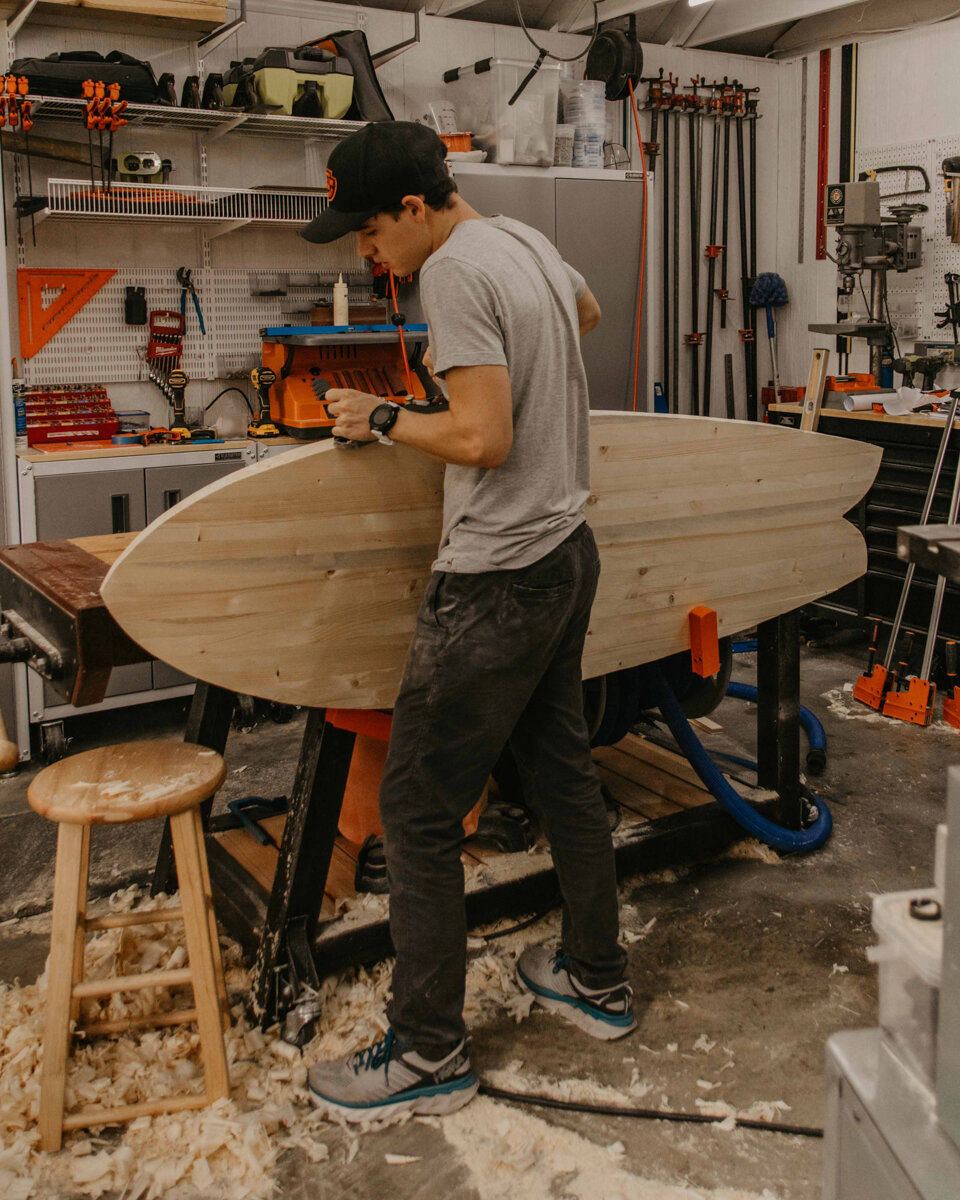
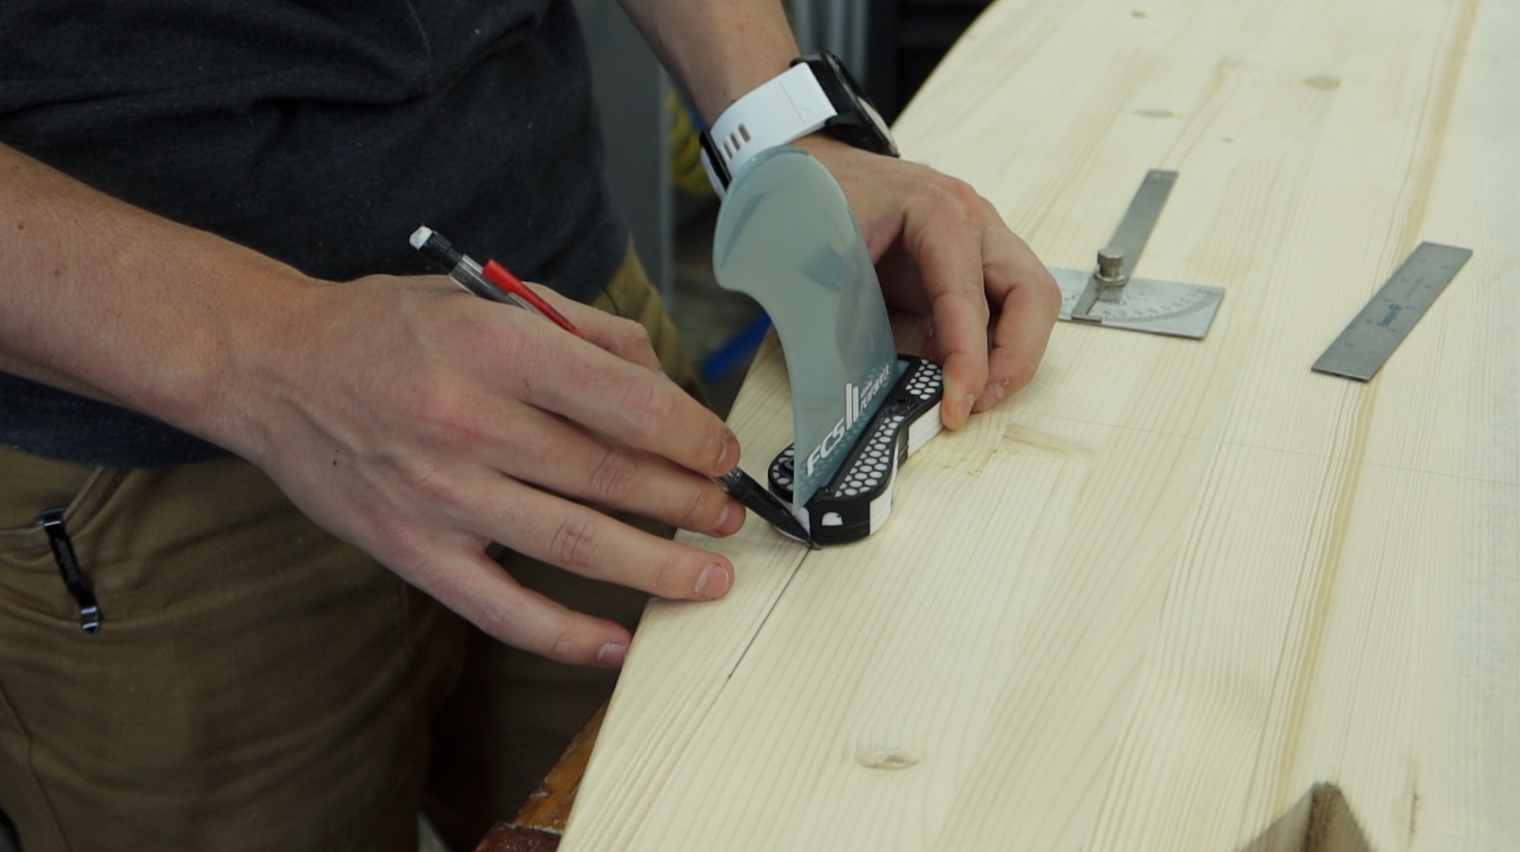
For the bottom, there’s not a whole lot of shaping going on, other than the rounding of those edges and giving it a good sanding. Before we take the board apart, we need to know where the fin boxes, vent, and leash plug are going to go. We traced around each one and marked out a space all the way around, so we know not to hollow out under these, except for the vent, you'll see in a minute.
Belt Sander: https://homedepot.sjv.io/Drrnb (affiliate link)
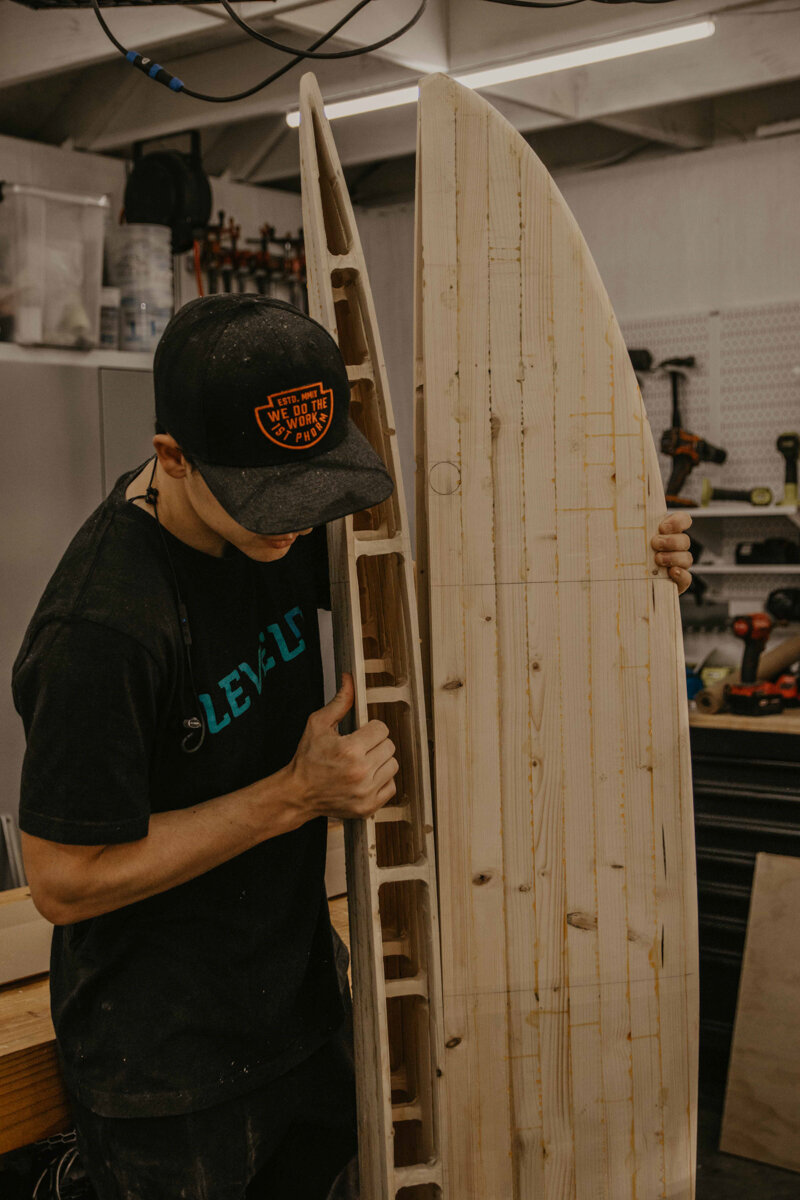
Flipping the board on it’s back, we need to number each one so we know where it goes back after they get hollowed and we put them all back together.

Hollowing Process
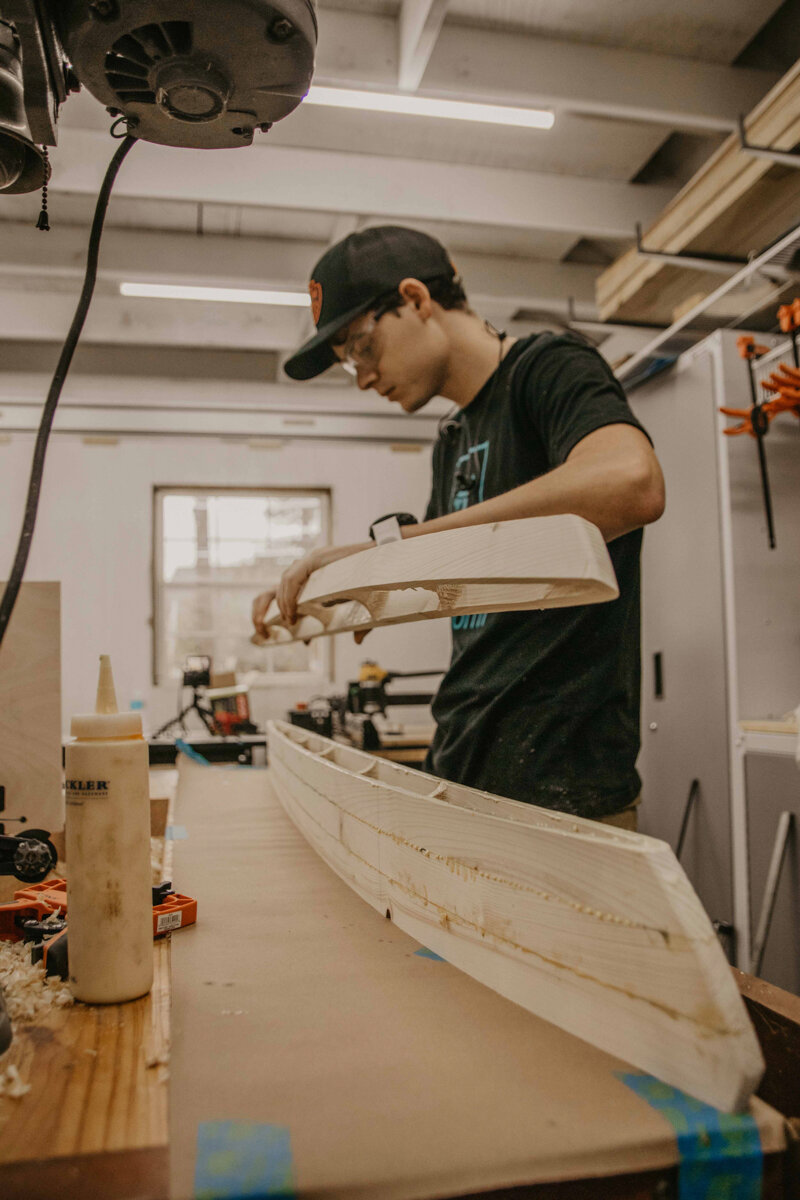
Now just to break it back apart where the glue is. We put a 2x4 underneath where the break needs to happen to force some upward pressure, and then Dylan pushed down one side while the other side was clamped to the workbench. Boom. Break.

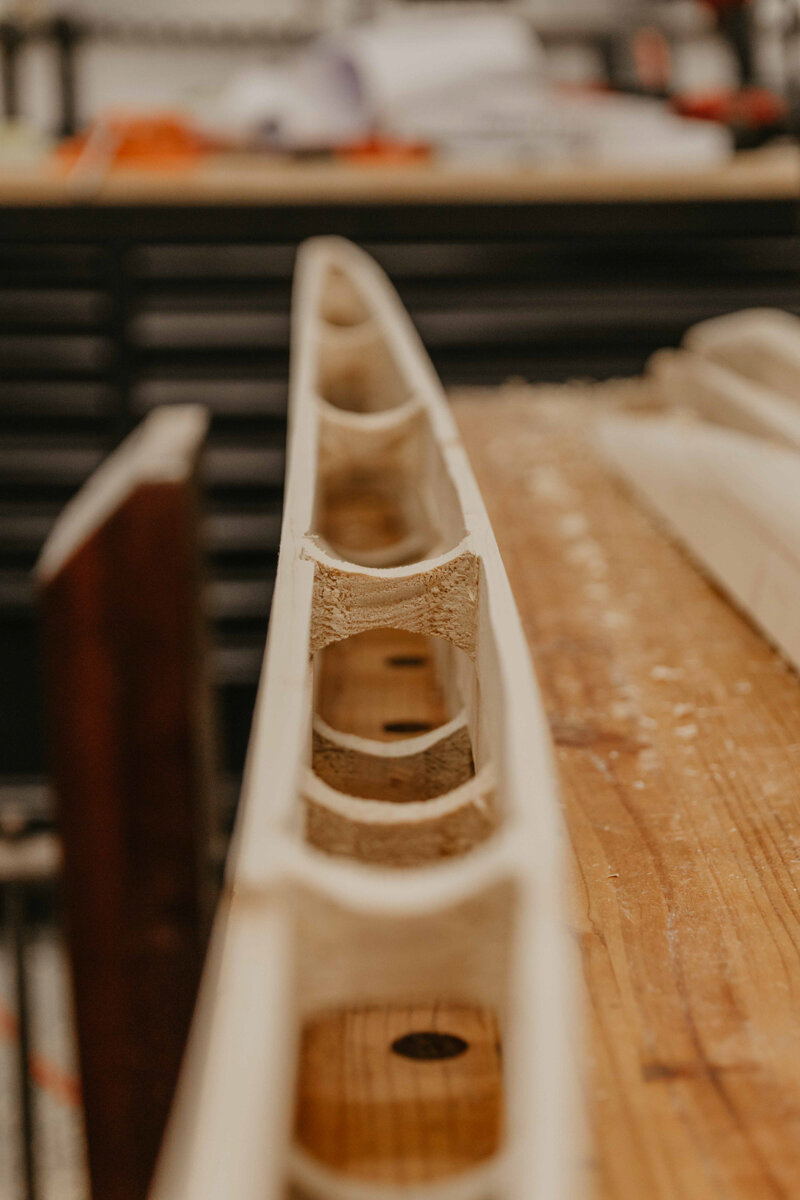
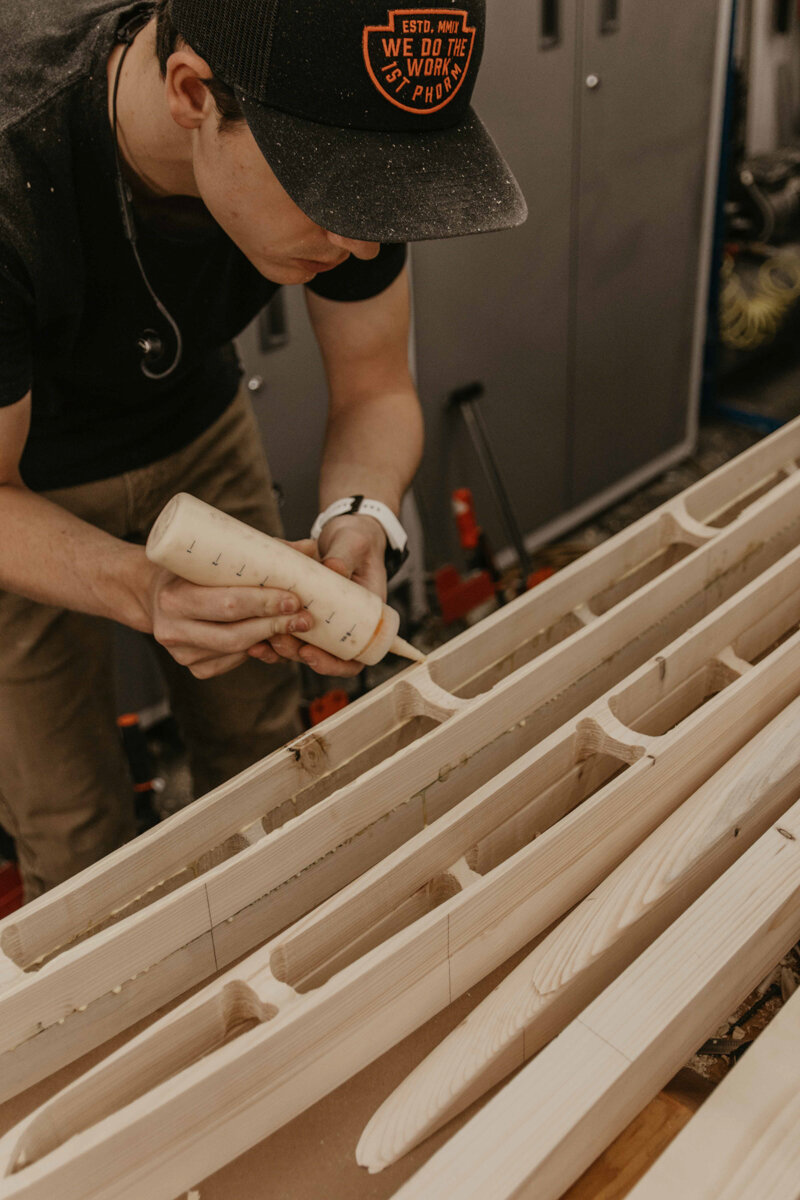
One by one, we unscrewed each piece keeping both halves separate. Starting with the first board, actually the middle board, we marked out 1/4” along the sides, that will be what material is left and what will make up the outer part of the board. Of course, we just can't take out everything, we need some support pieces. Using a small ruler, we first made a space where one of the dividing marks are. Then, using a rounded edge, we connected the spacer line to the edge line, so the support piece will be concaved on each side.
For the next support piece, we moved down to the end of the board marking where the tail dividing line is and making sure we avoid the leash plug. Up at the top is where the vent will be, so leaving in a little bit more material for the vent to sit nice and snug in.
We want to get as much material out as possible because the more material out, the lighter the board will be, but also keeping enough material at the very ends.
For the next board, we lined the one that we just did up even and then made the support pieces in between the ones on the other board. Basically staggering them. This will allow airflow to move throughout the board. If we were to line up the supports in the same spot every time, we would chamber off like five areas and the air would be trapped. So we kept doing this for every board for this half. After they were all marked, it was time to start hollowing.

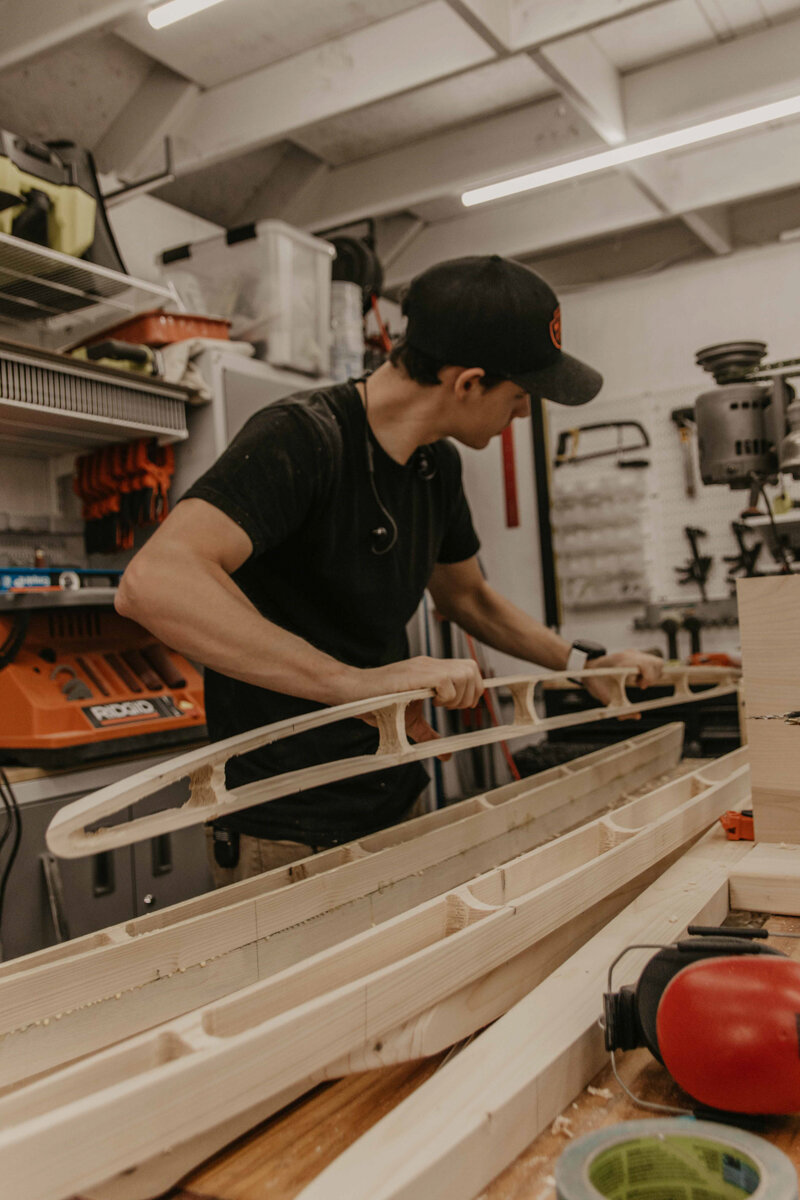
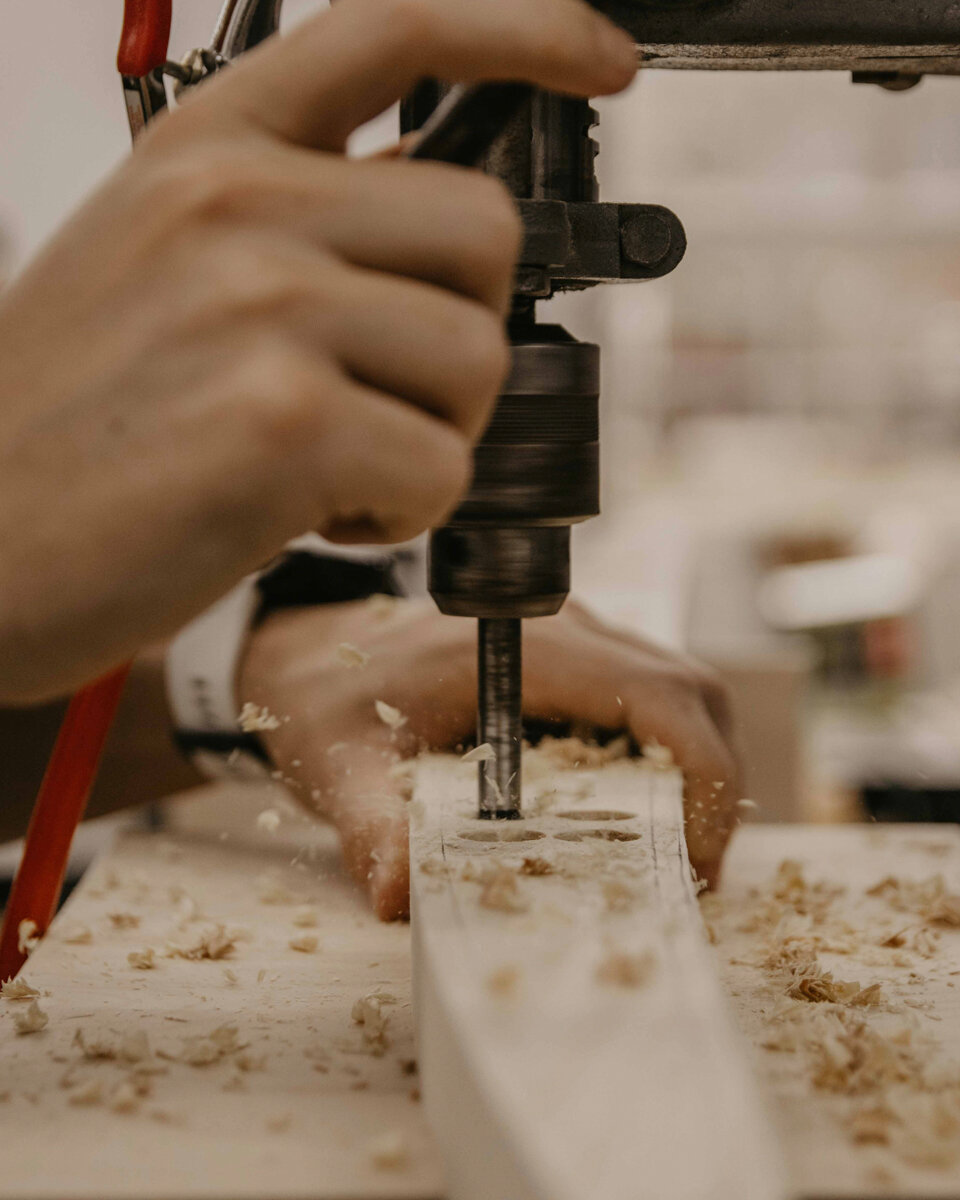
Over on the drill press, Dylan drilled out where we marked those curves on the supports so we can later use the jigsaw to cut out the rest. If you don't have a drill press you can use a drill and forstner bit. Remember this board is the one with the vent plug, so we used a router to take out the material up to the line we drew before. For the very end, we used ArborTech’s mini grinder to take out as much material as possible. We also used it to take down the support pieces into that concaved shape on both sides. We started off knocking out three boards first, so then when we start gluing one board at a time, we could be one board ahead. So this will go, glue two boards together to get started, wait 30 minutes, but be cutting out the next board during that 30. When that board was cut out, come back, glue the next board to the other two. Repeat that process until the whole half is complete.
For the last few boards where the curving is a lot and more of the board is actually the side, we used the Arbor Tech mini grinder to take out the material here instead of the jigsaw because we can’t cut all the way through.
As soon as that half was done, we left it overnight and came back in the morning to a dried half of a surfboard. The rest of the day consisted of hollowing out the other half just like we have been doing.
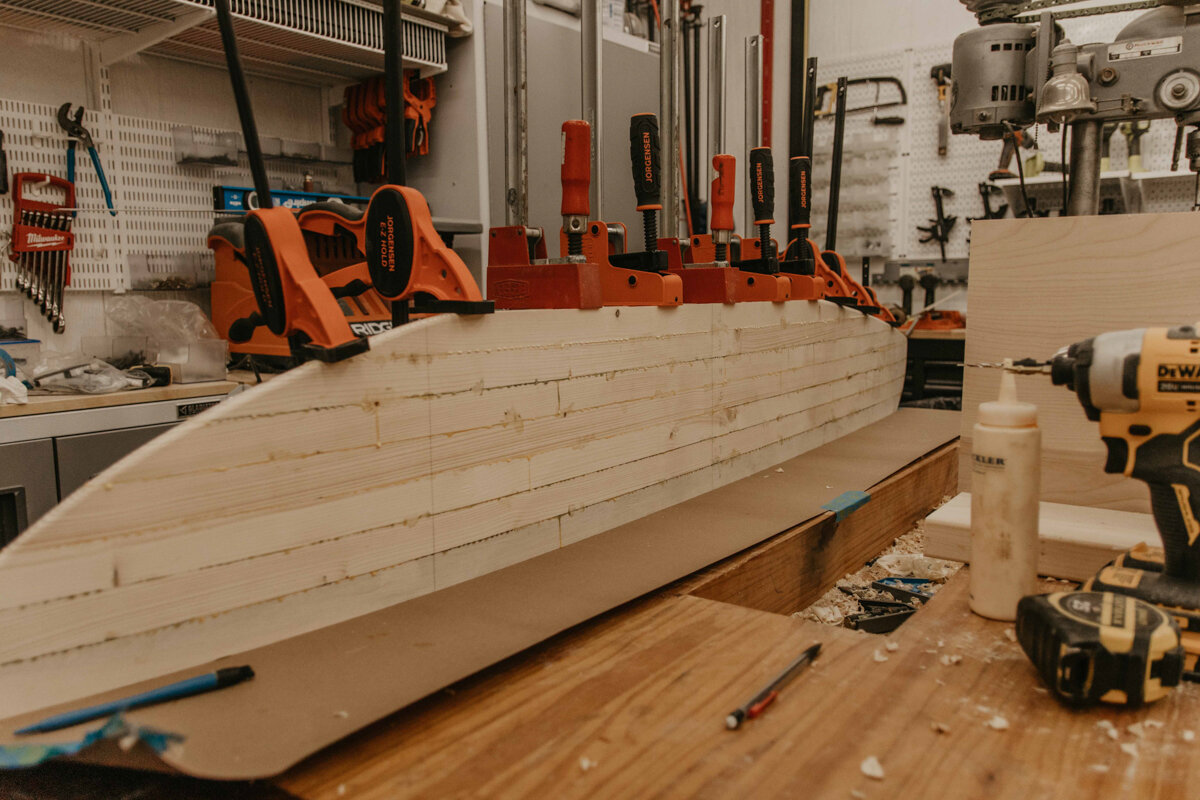
Glue Back Together The Two Halves
The following day was a big one. We get to glue the two halves together and have a full hollowed out surfboard! It was tricky clamping the nose of the board, and we had to cut out a little notch for the clamps to grab a hold of the wood. This was the last thing we wanted to do, but nothing else worked.
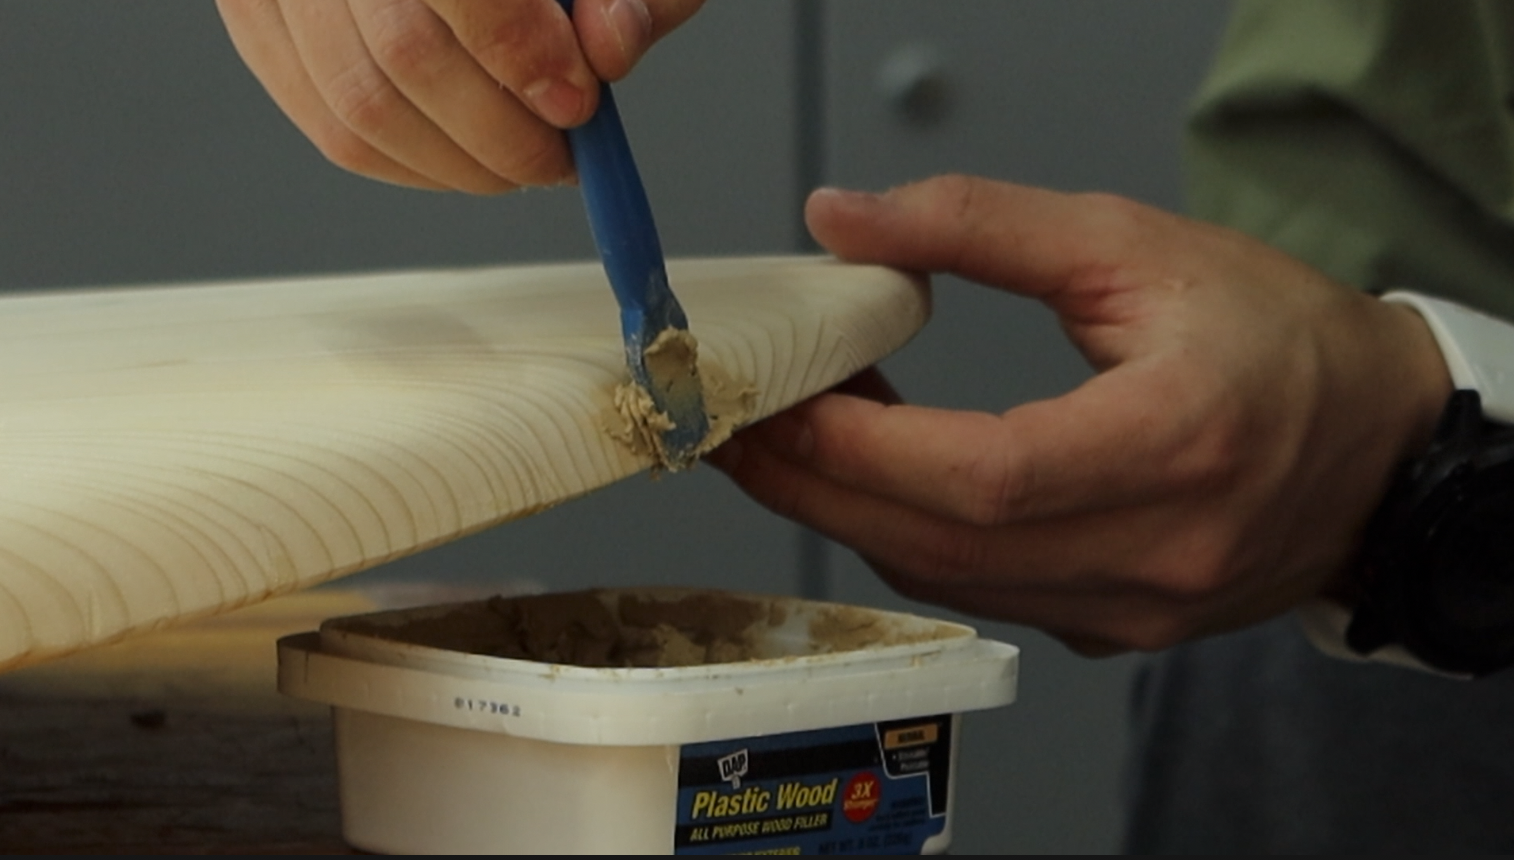
Sand and Fill In Holes
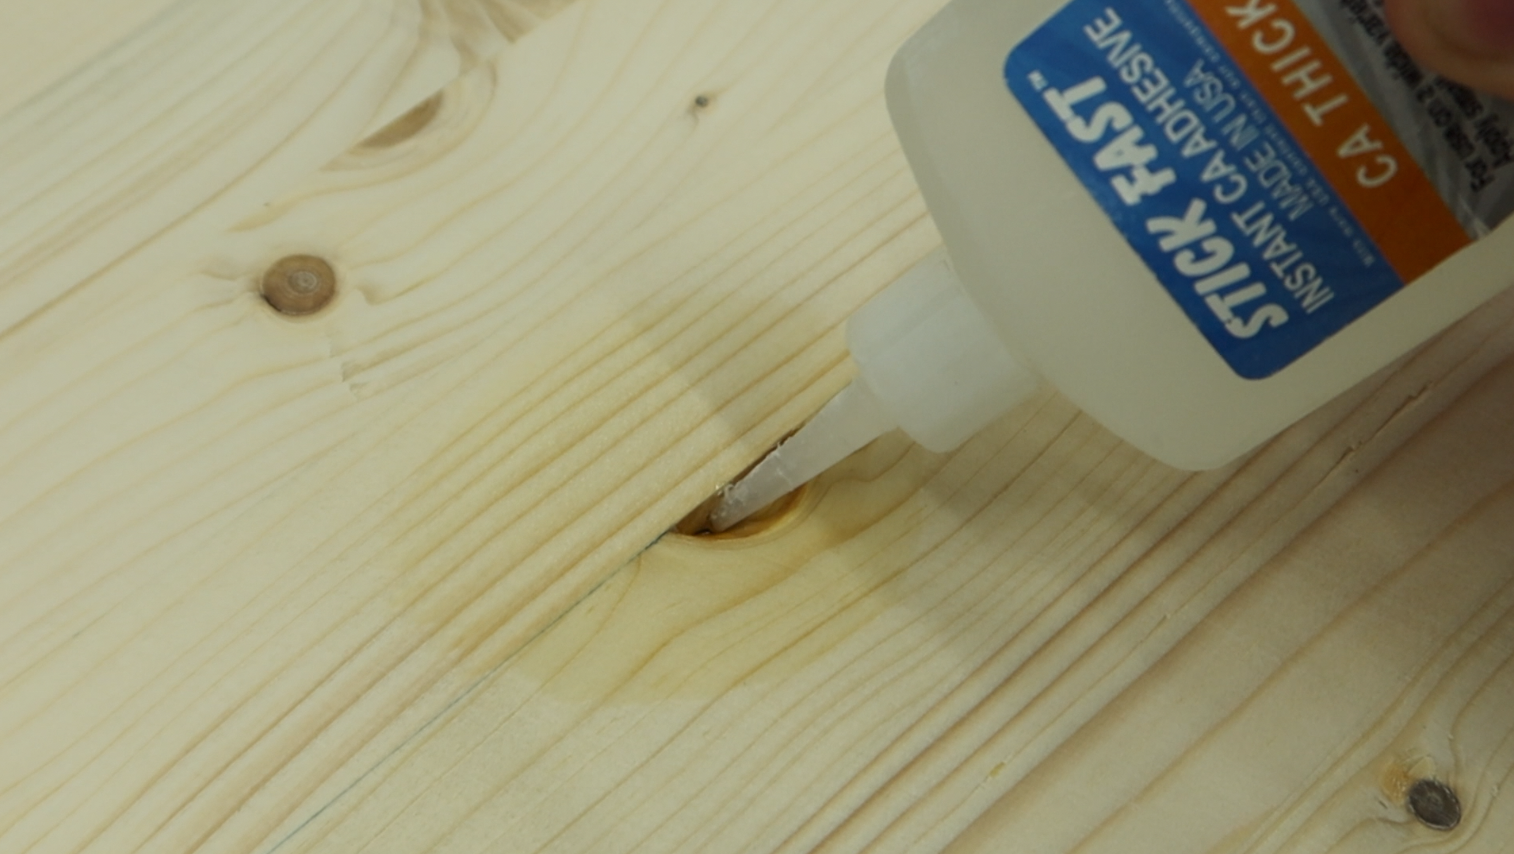
The next day was a sanding day. We sanded all the glue squeeze out down and off while also sanding the wood back down to smooth. We might not have lined up the boards exactly perfect, so just a little sanding will take care of that. After that, we needed to fill in all the knots with CA glue so no epoxy will run through them and get to inside the board.

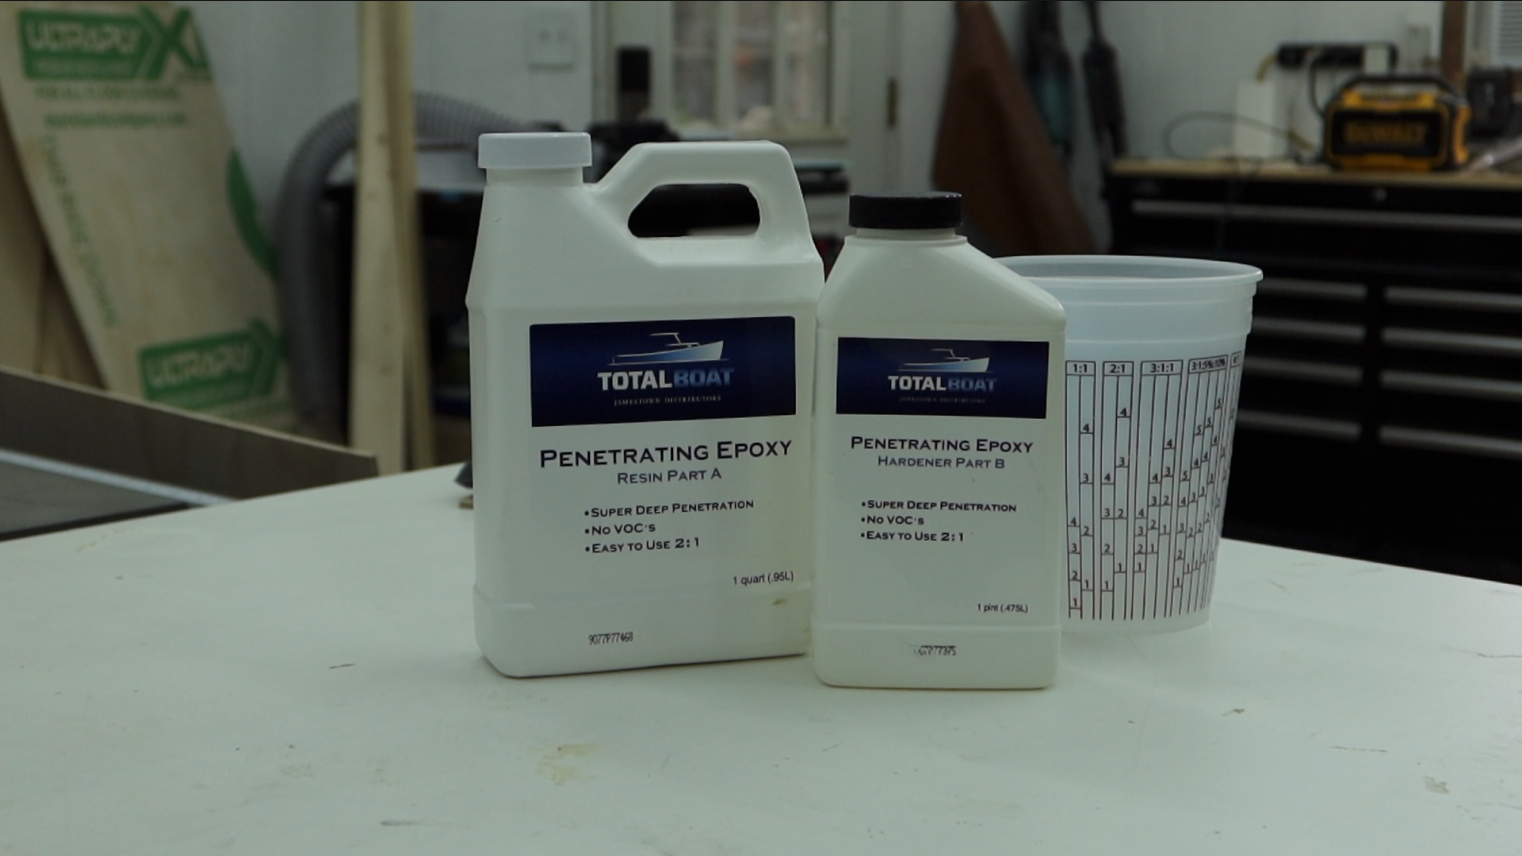
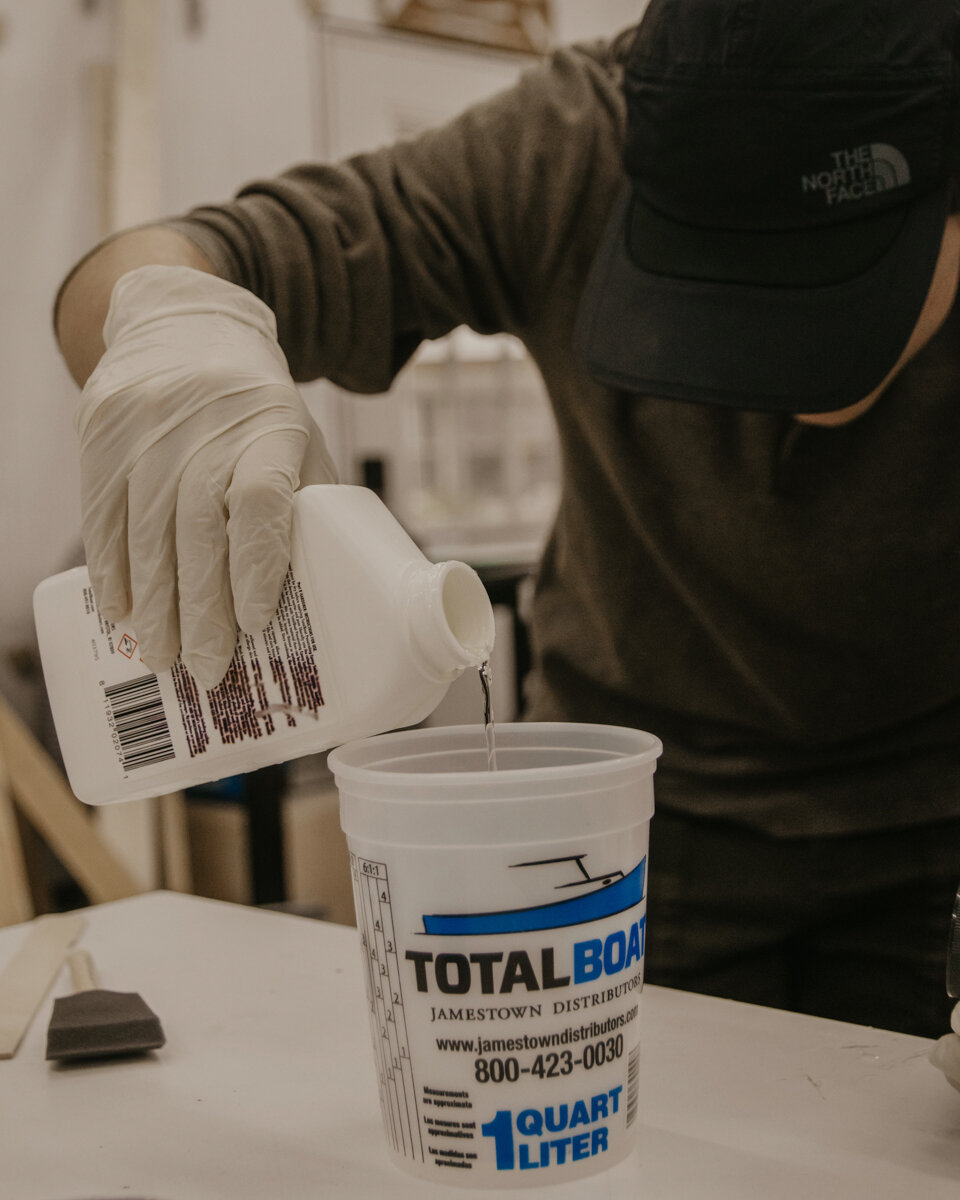
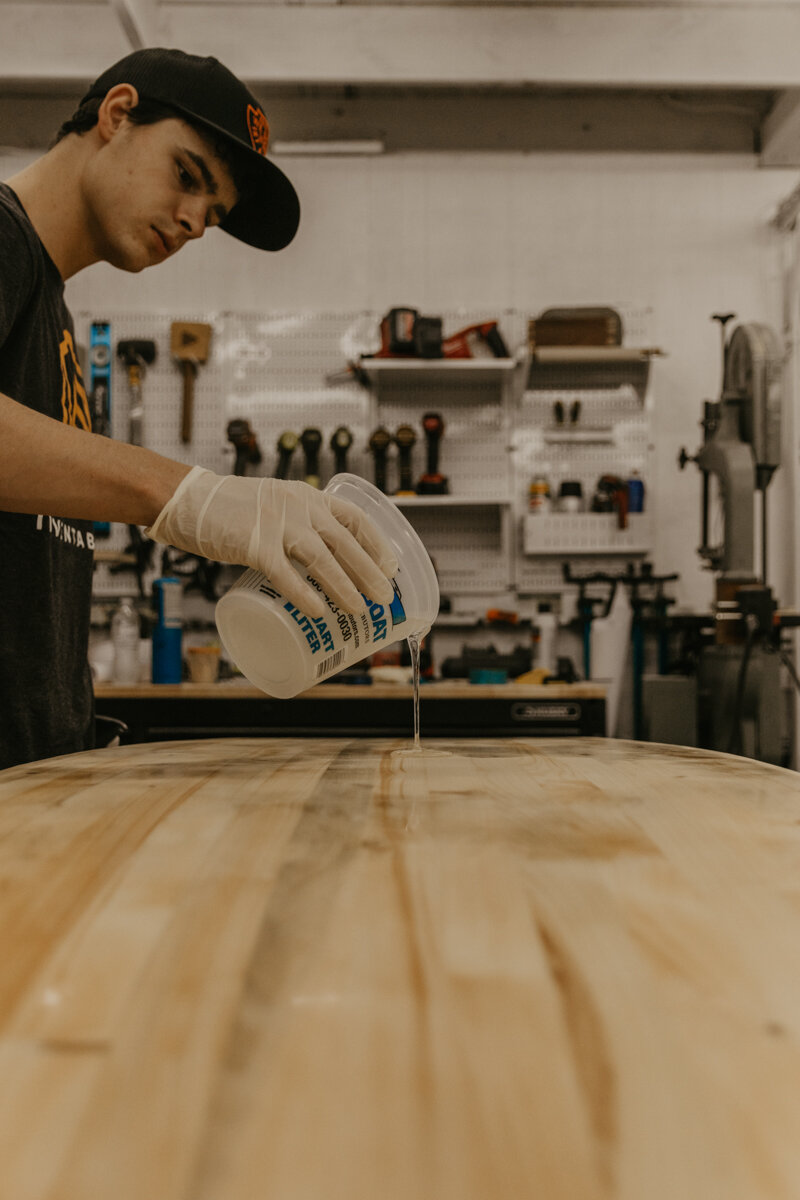
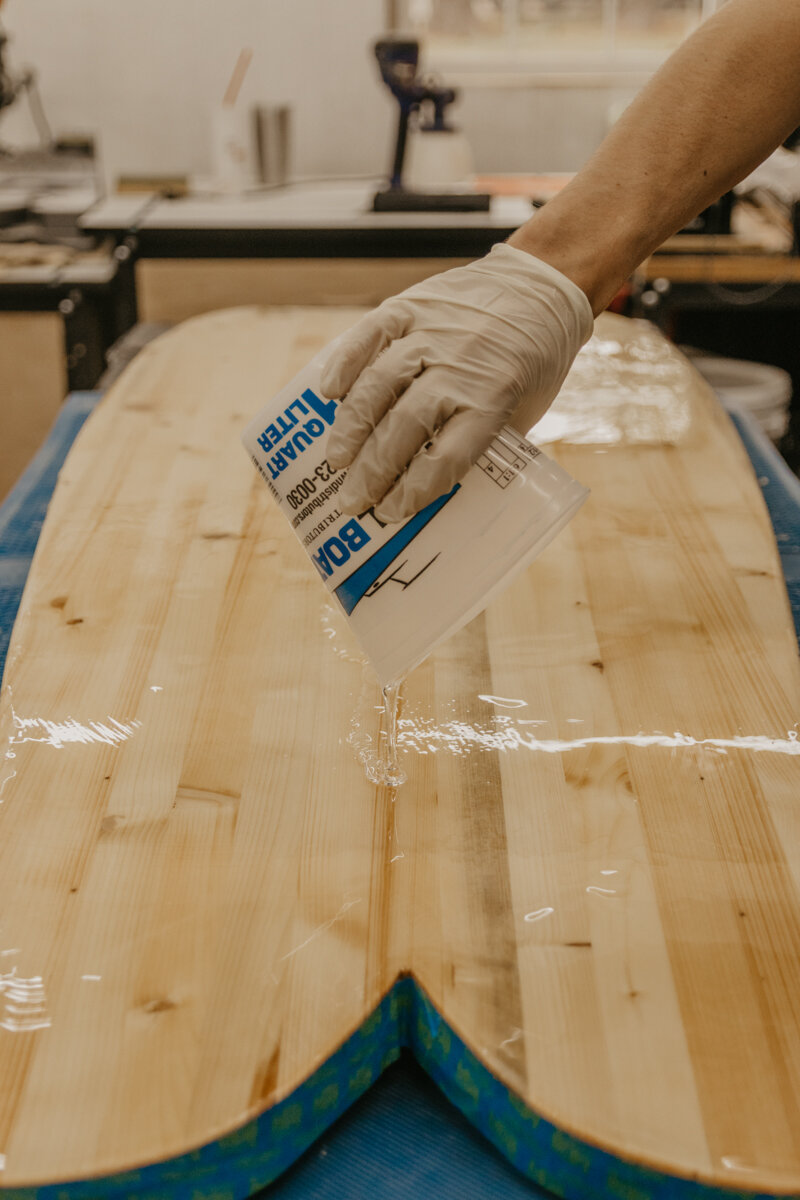
Add Epoxy
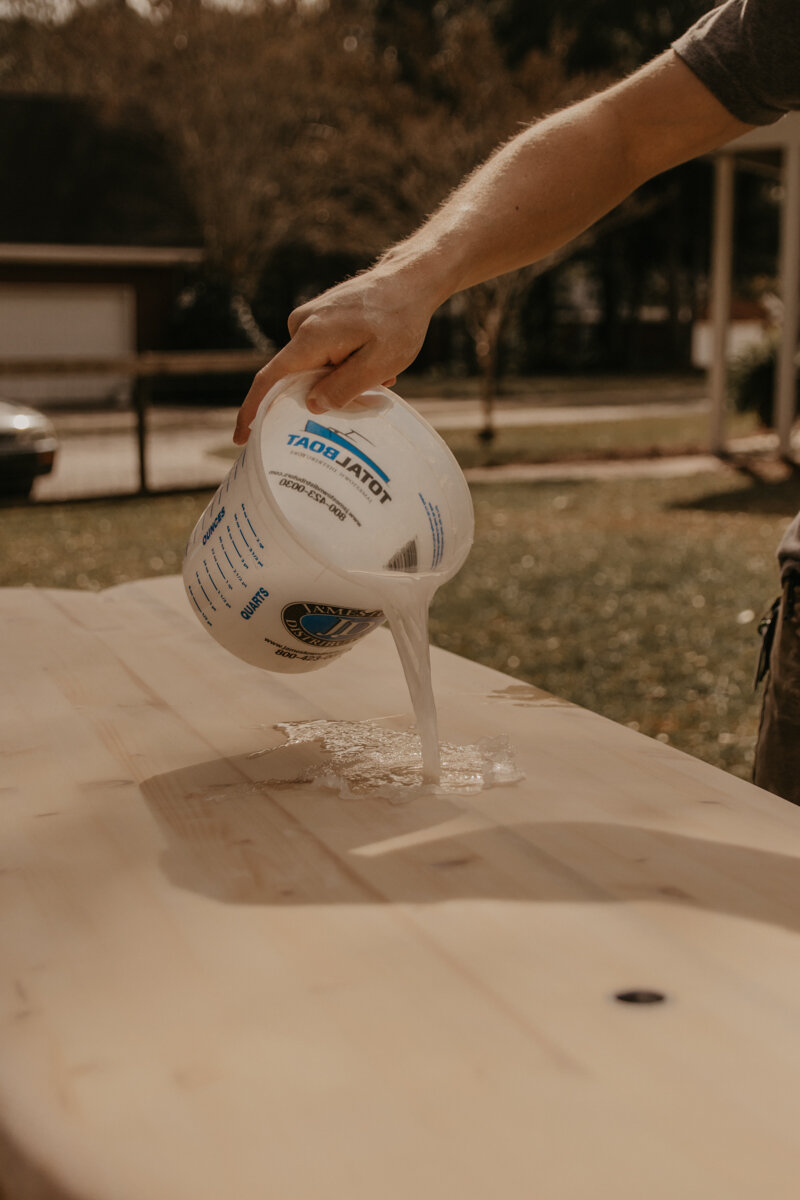
It’s finally the beginning of the end. Epoxy time! We are first using a penetrating epoxy from Total Boat, this is a 2:1 ratio resin to harder. This is going to be soaked into the wood and it’ll take a while to dry. This process will take multiple days considering we are doing two layers on the top and bottom, and before we can flip the board over, the epoxy has to be dry. To help get bubbles out of the epoxy, use a blow torch or heat gun and just quickly run over the epoxy to bring the air to the top and out.
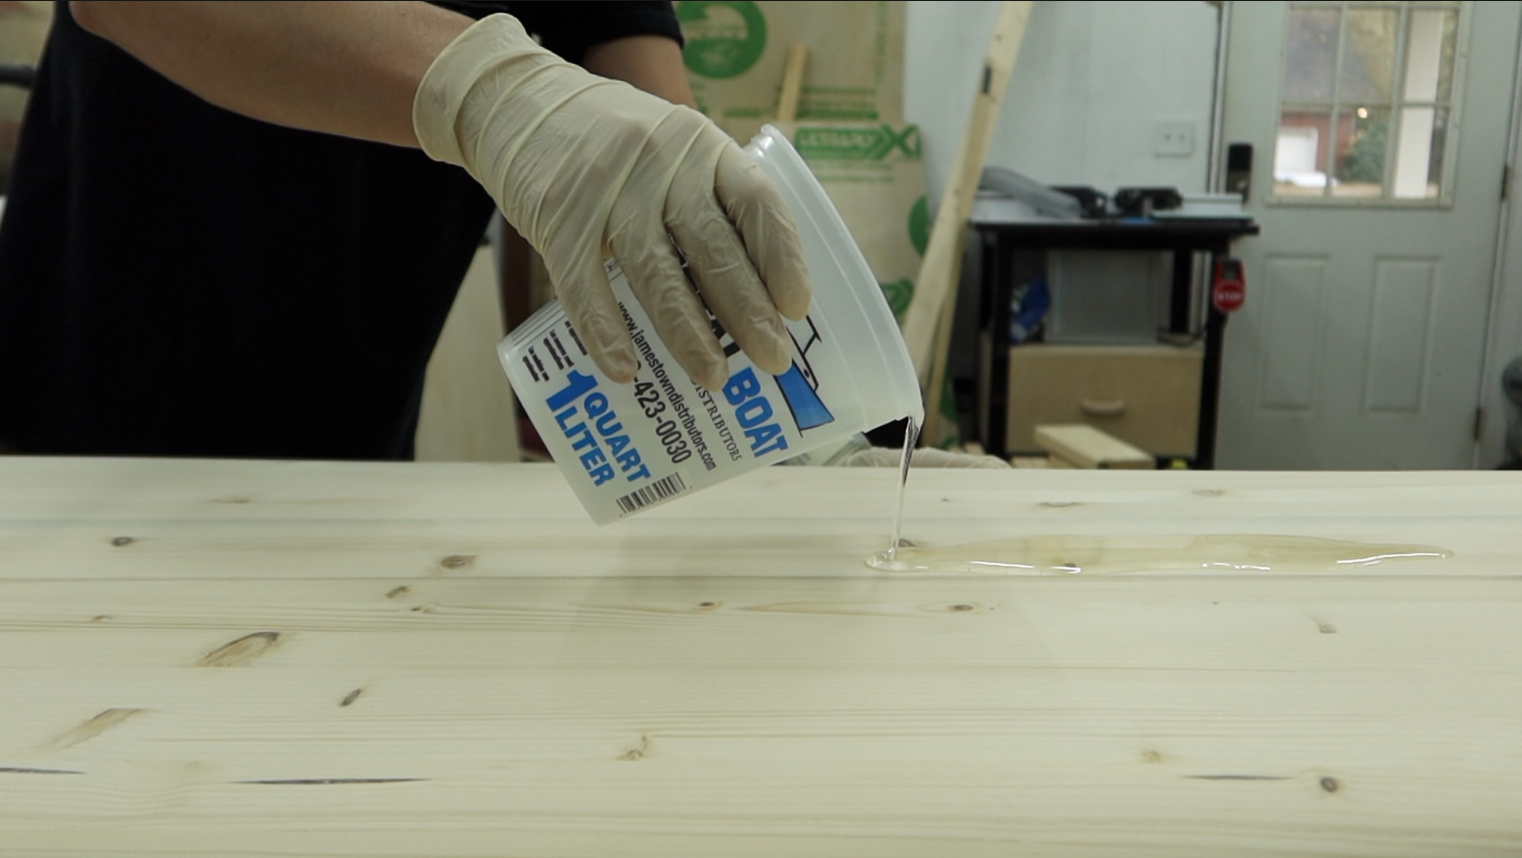
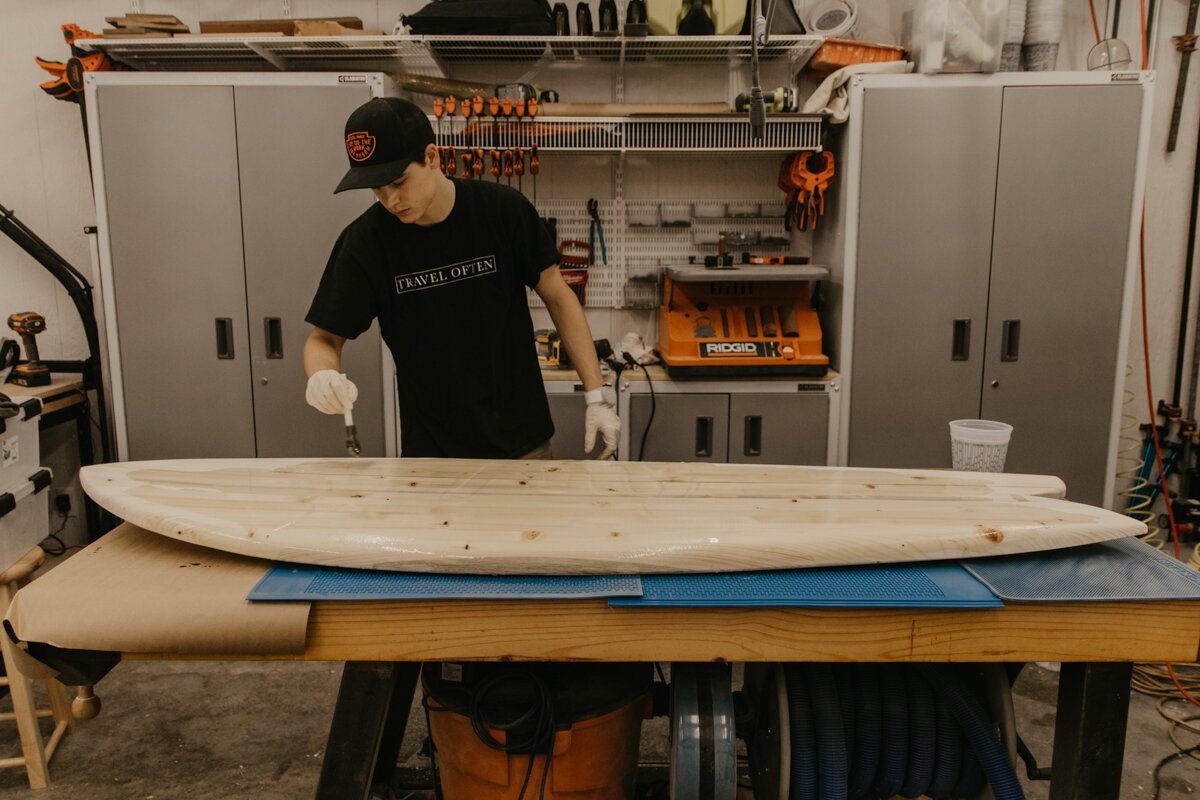
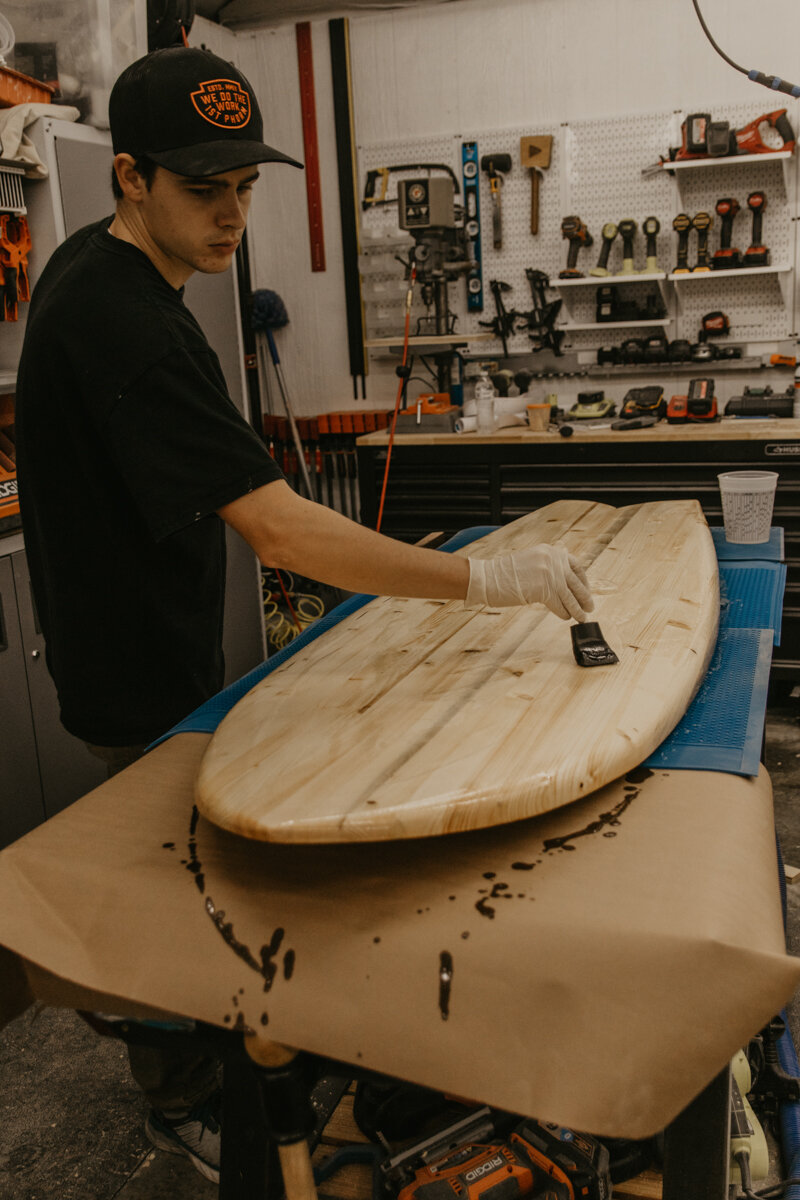
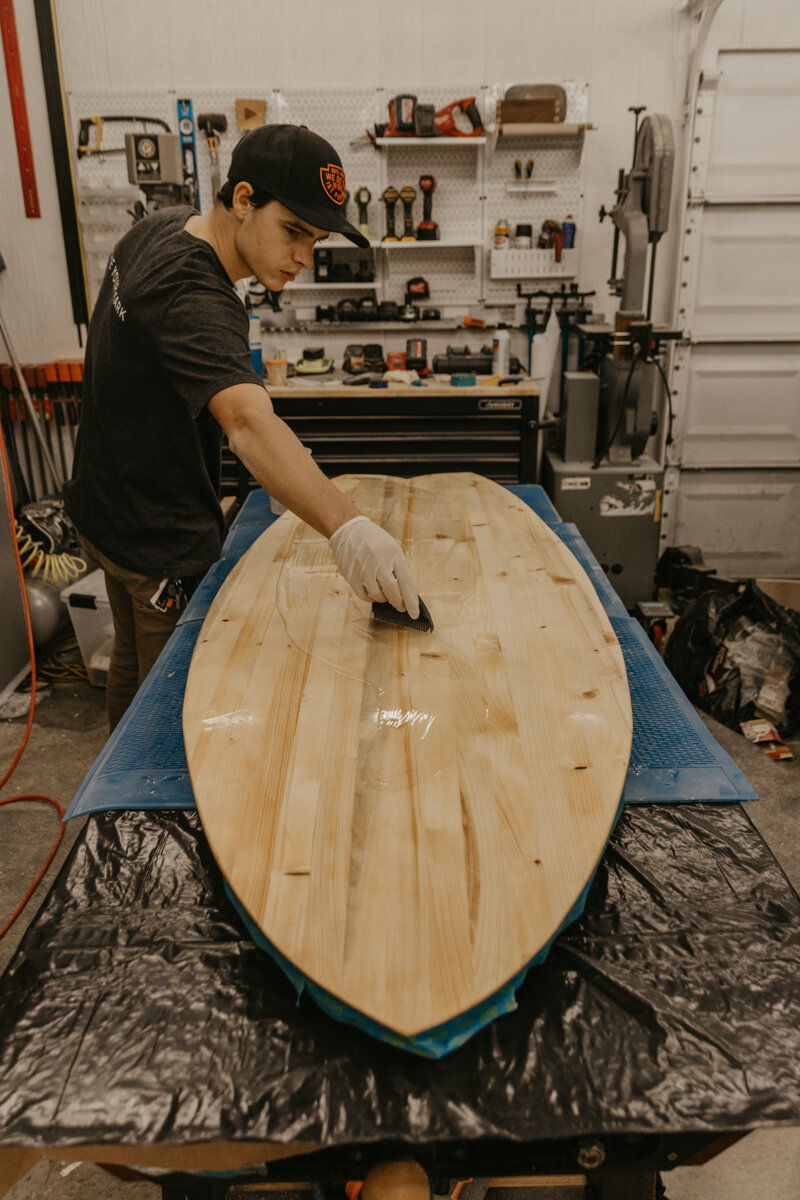
After all those layers are finished, we are going to give it a good sanding before the final layer. In the next part, we are using a High-Performance epoxy from Total Boat. This will be just one layer on the top and bottom.
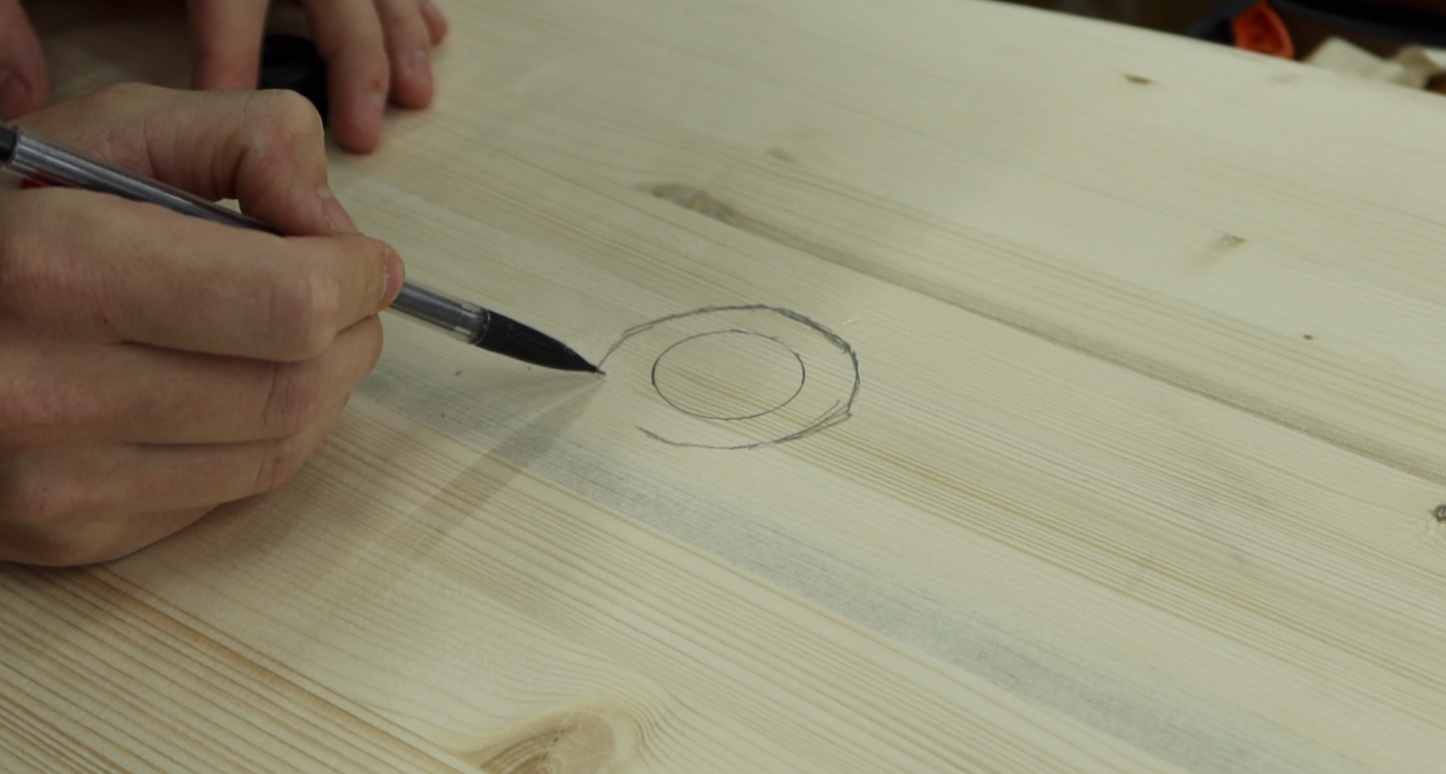
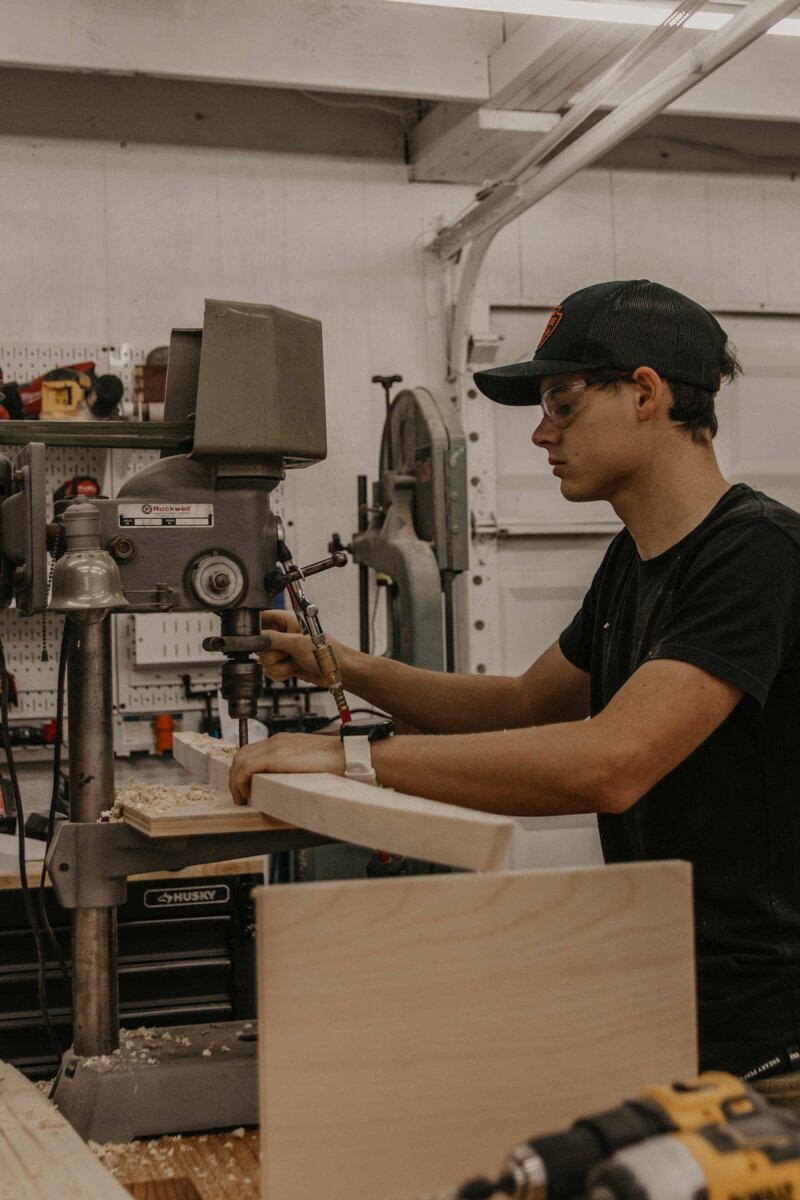
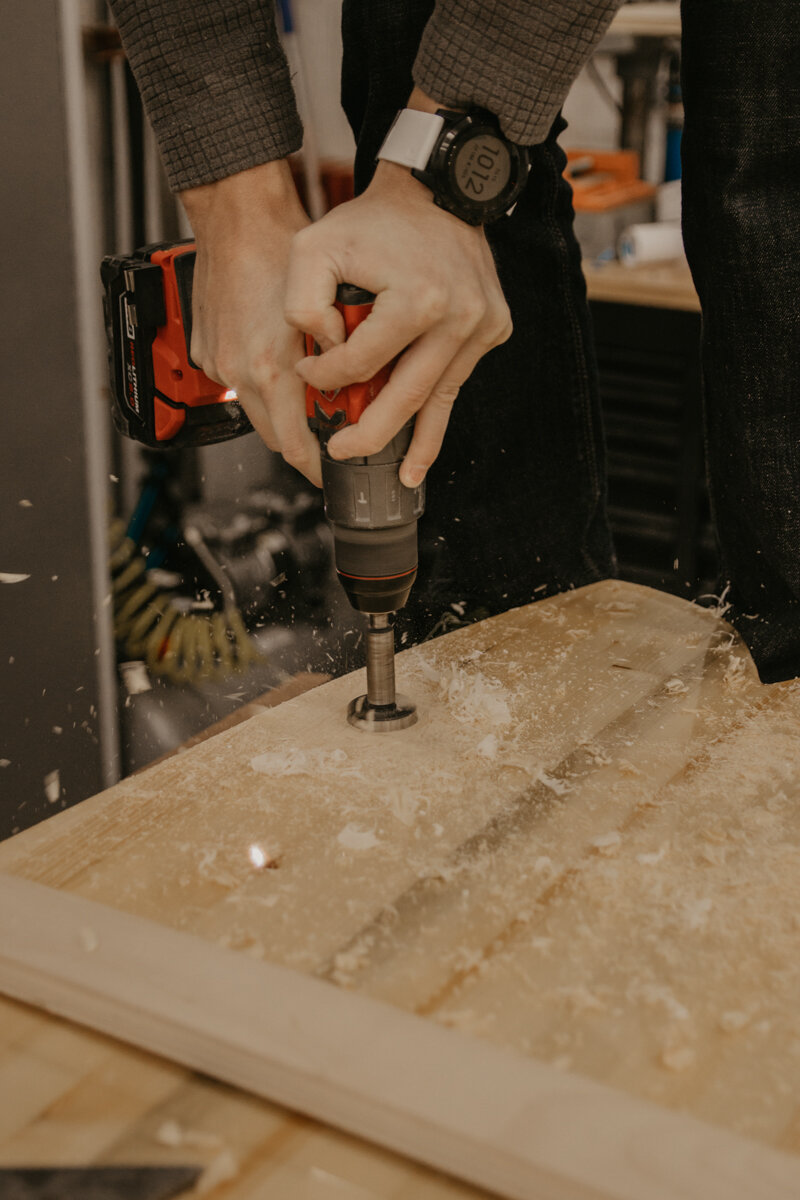
After that is dry, we need to drill for the leash plug and vent. Before we ever started with the epoxy, we marked off/drilled a tiny hole where each of these are going to go. Now that the epoxy is on, we can go back to those marks and drill a hole down to them through the epoxy. Next is getting a Forstner bit, the same size as the plugs, and drill out the material for those. The vent plug we need to drill all the way through to the inside of the board, and for the leash, we just need to go down far enough so that it'll sit flush.
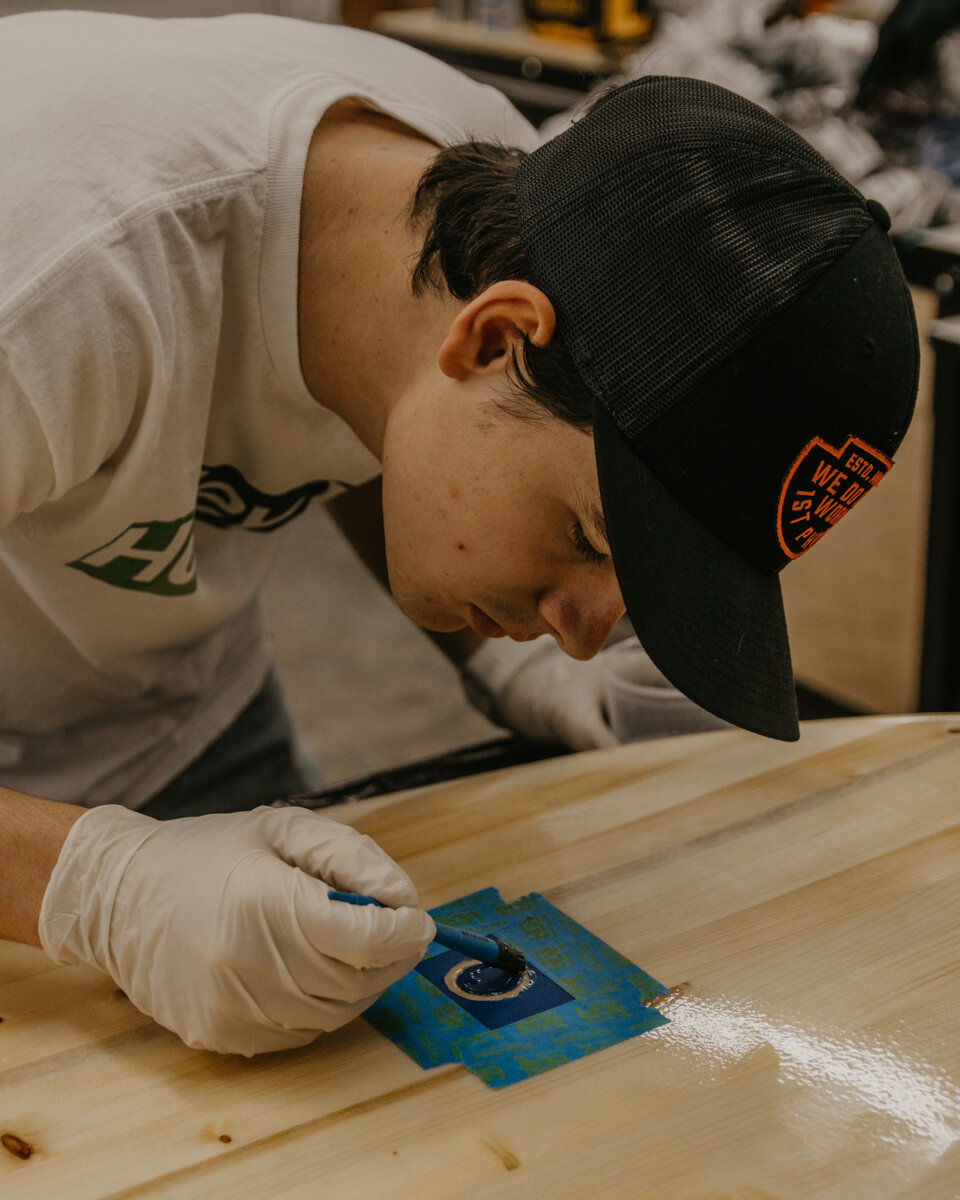
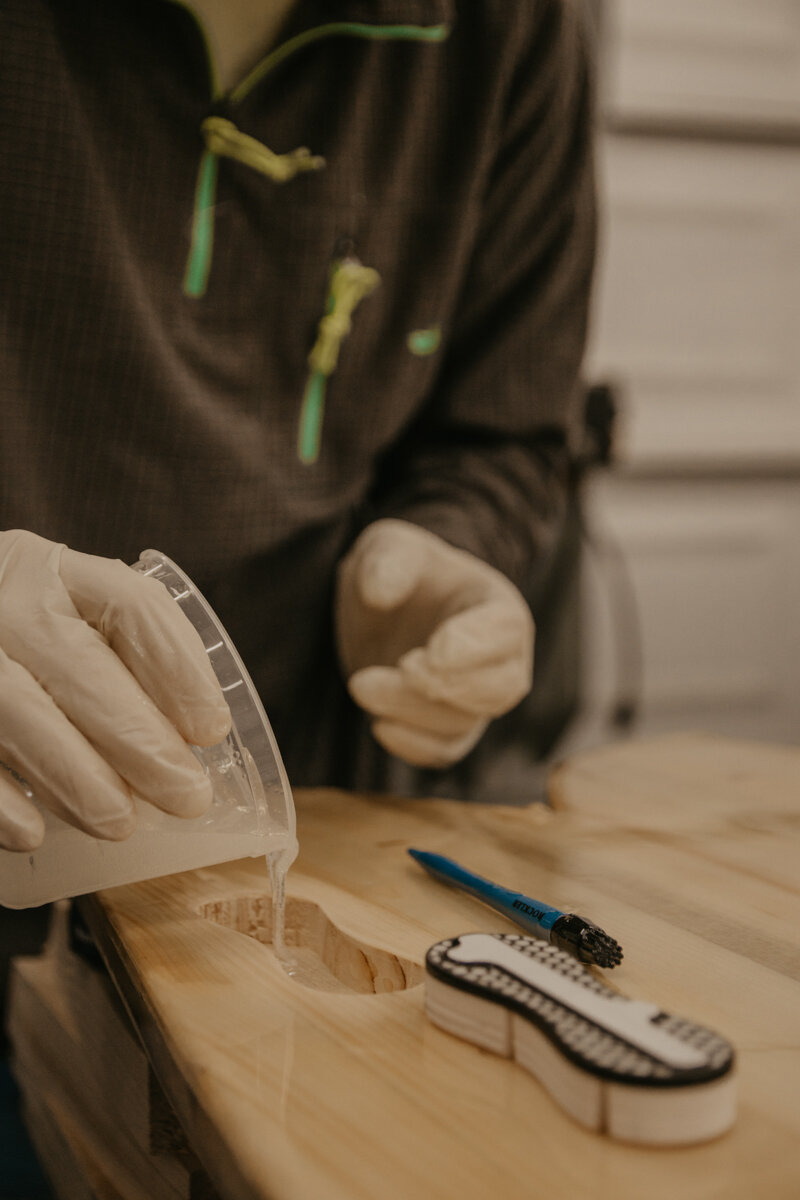
Now we are going to tape off the area so that epoxy won't go where it's not needed. We mixed a little epoxy for the leash plug and secured it into place.

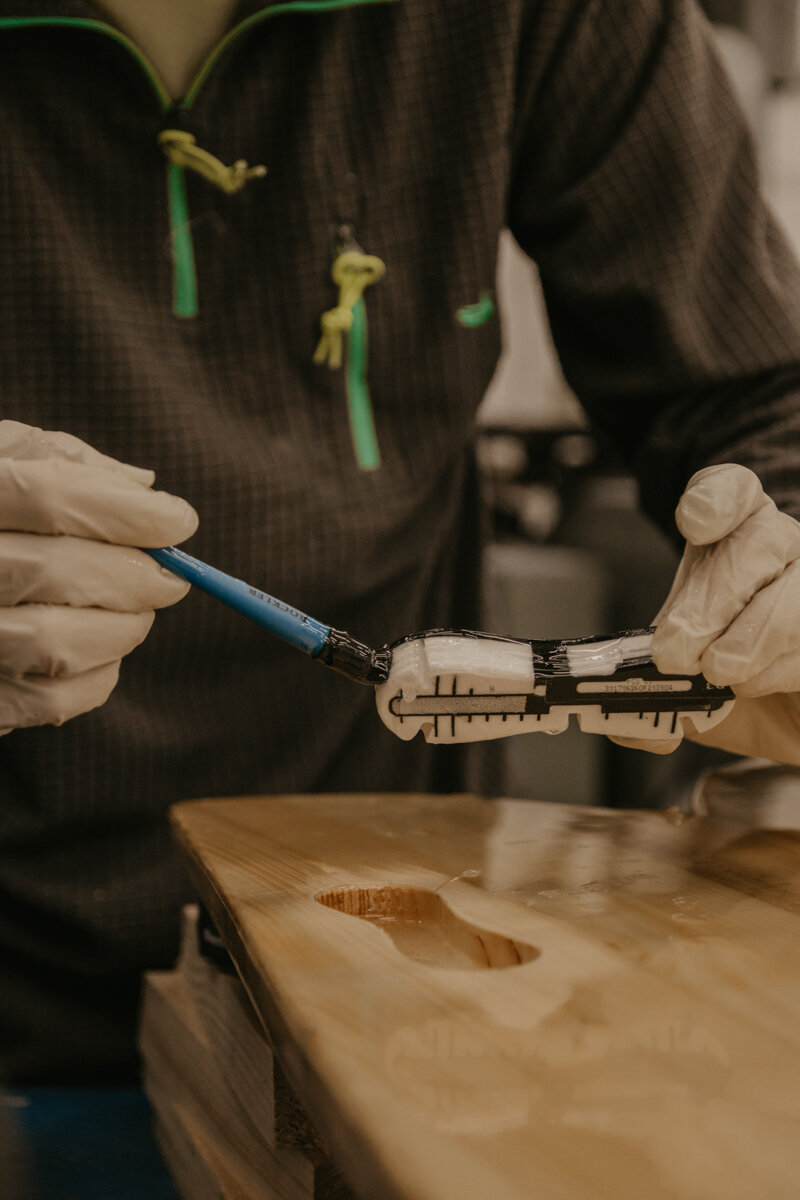
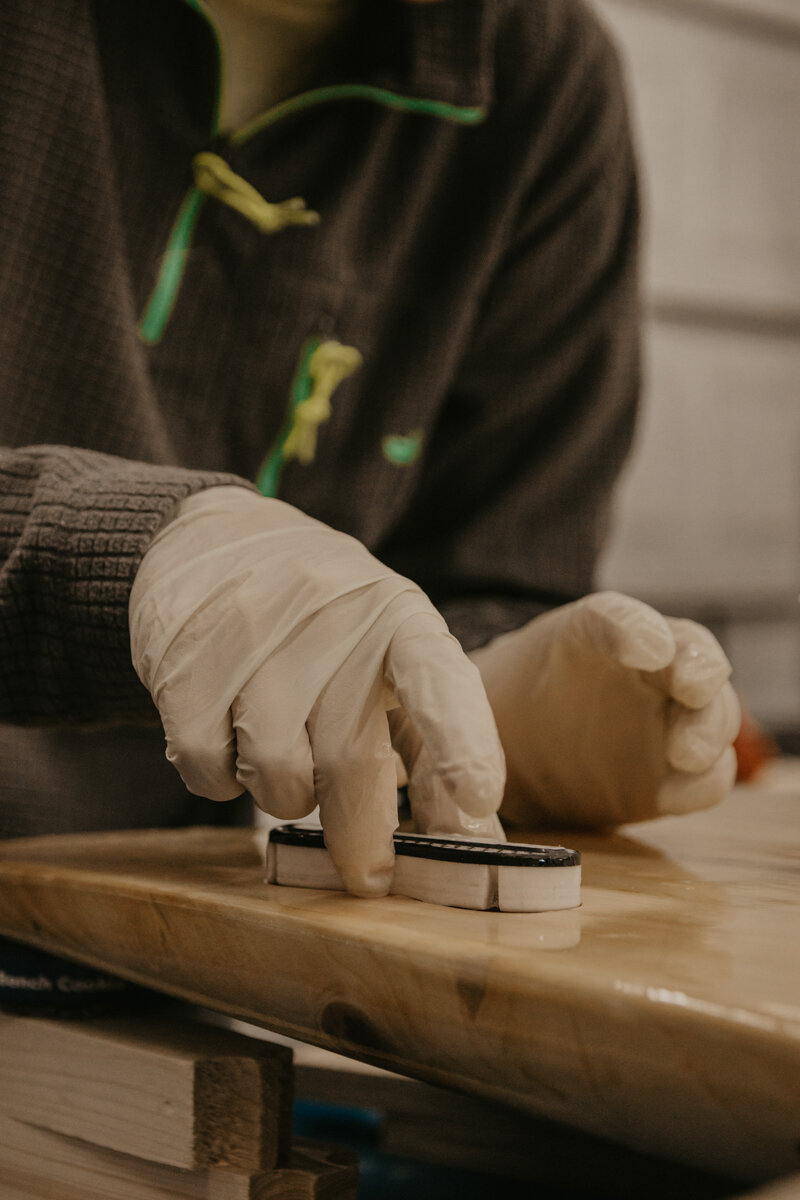
For the vent, we need to have it sealed around the edges so epoxy won't sink into the inside. We used water weld and molded it around the outside of the vent. Then placed it into the hole making sure we don't push it through. A hex key came in handy for this part. We also put a piece of tape over the hole so epoxy won't go through. Now, just fill up the outer edges with epoxy and let dry.
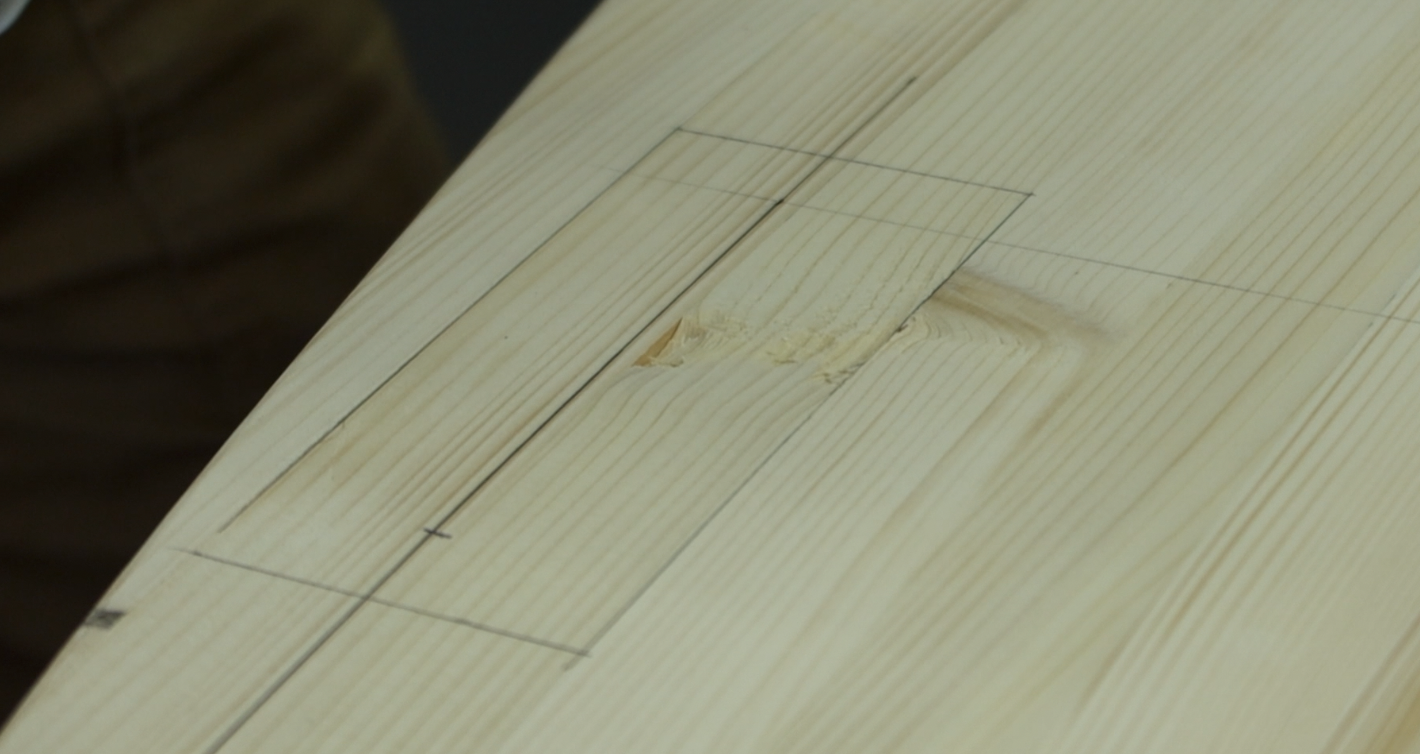
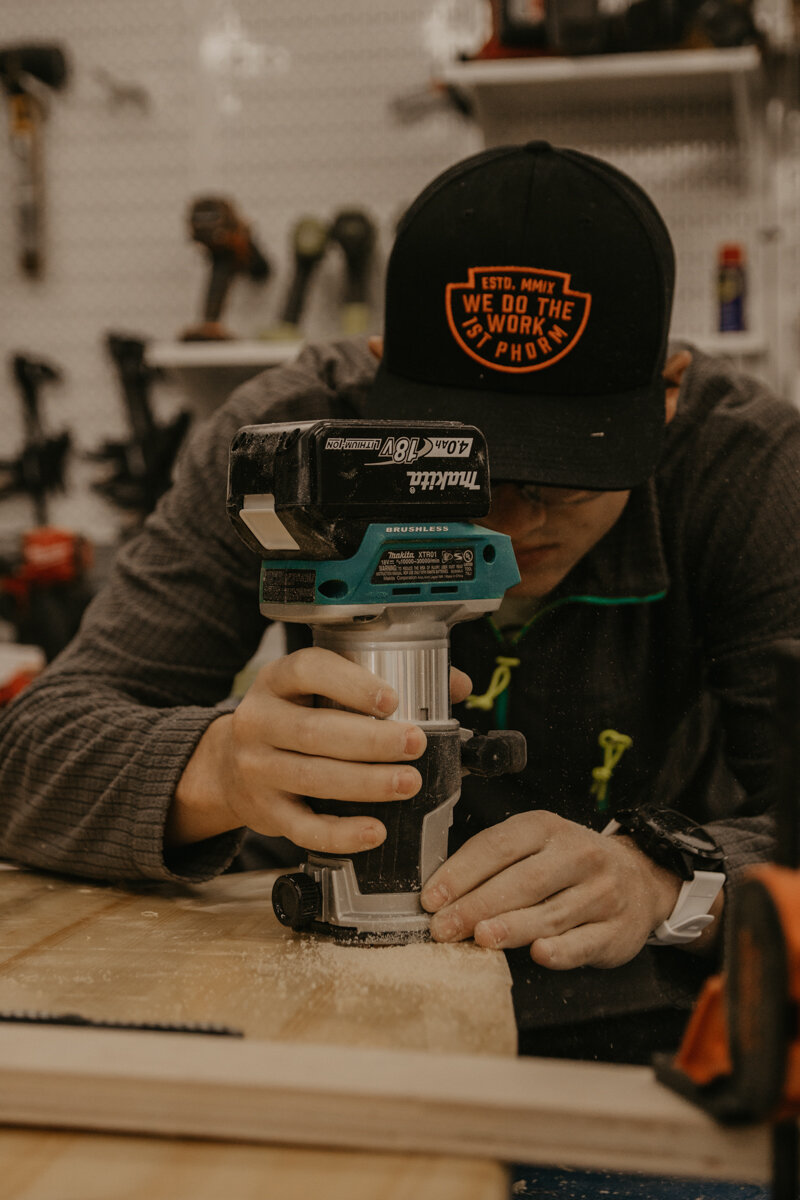
It's time to flip the board over and make the holes for the fin boxes. We also marked where these needed to go before epoxying the board, so just referring back to those, and tracing out the boxes. Then using a Forstner bit, we drilled out the two outer circles and we will use a palm router to get the rest of the material out. Then again, filling the holes with epoxy, brushing on epoxy around the outer edges of the boxes and putting them into place. These boxes did come with these stickers you put over the where the fins go so no epoxy in there either.
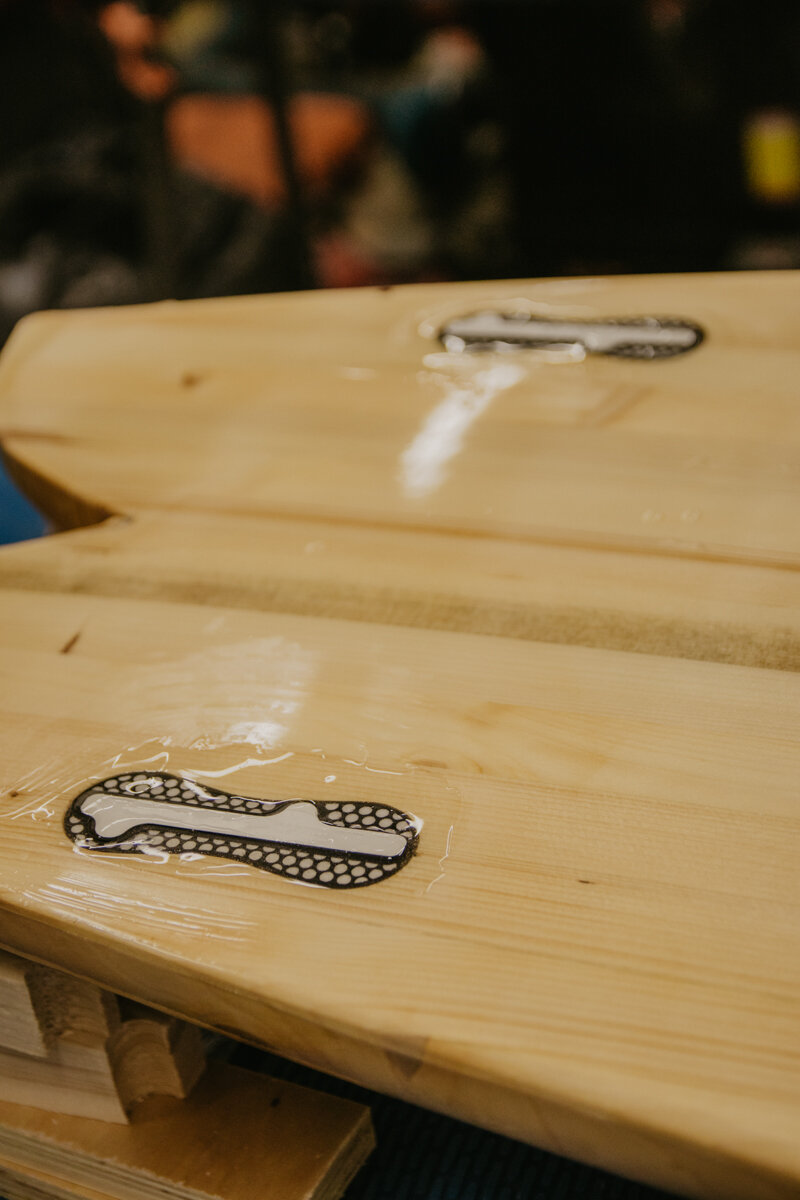
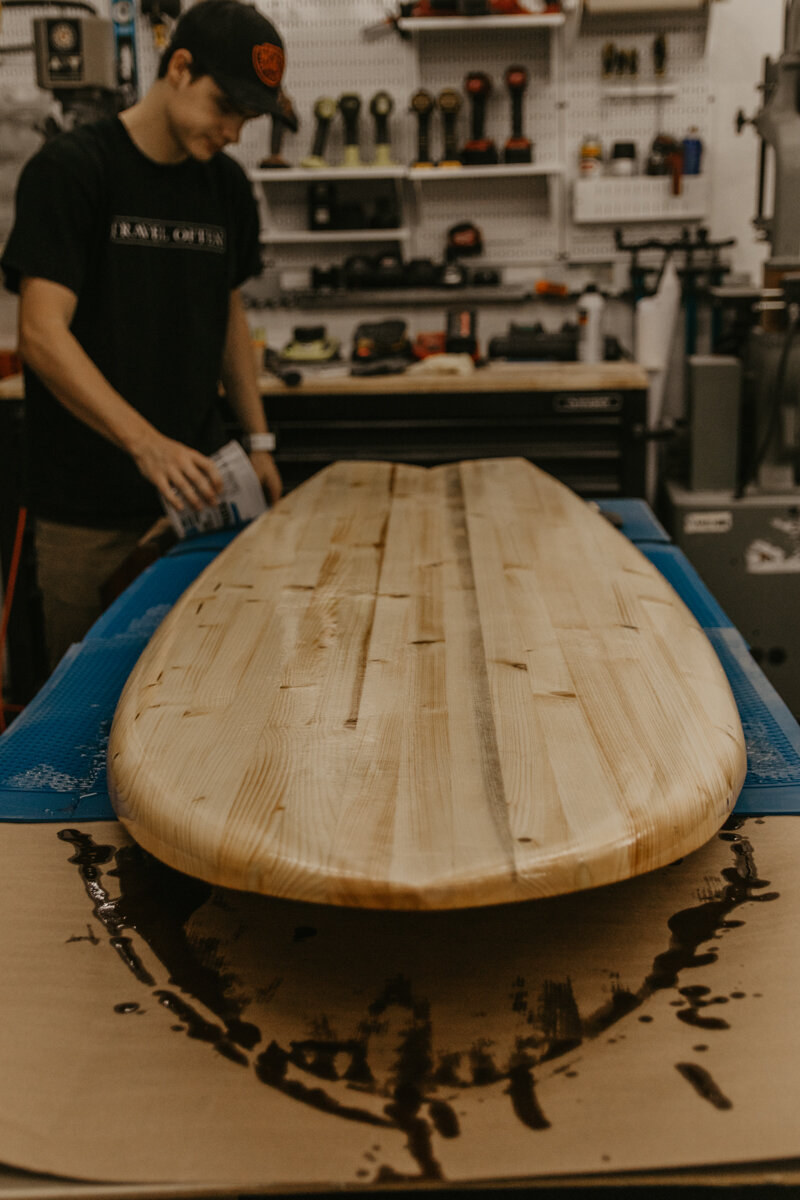
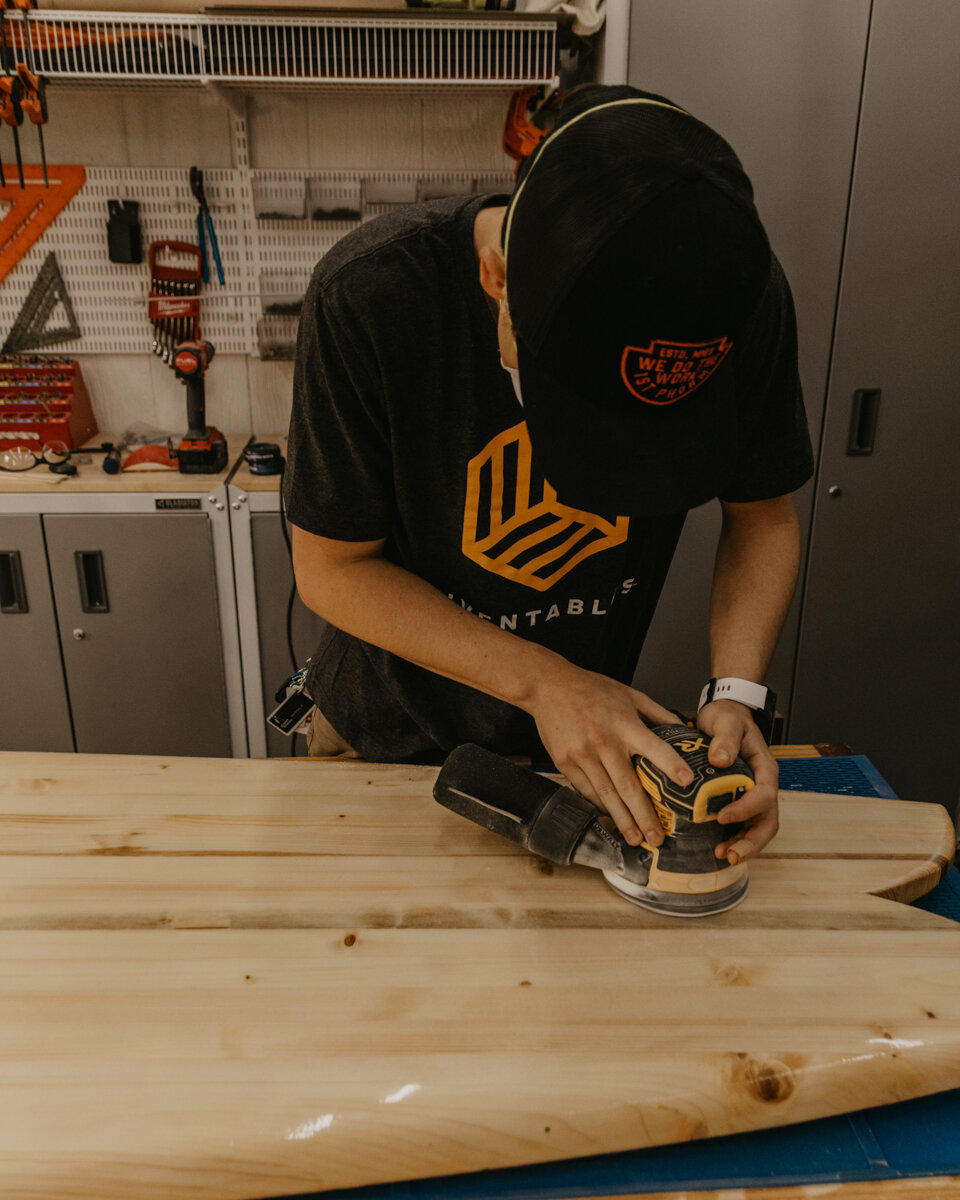
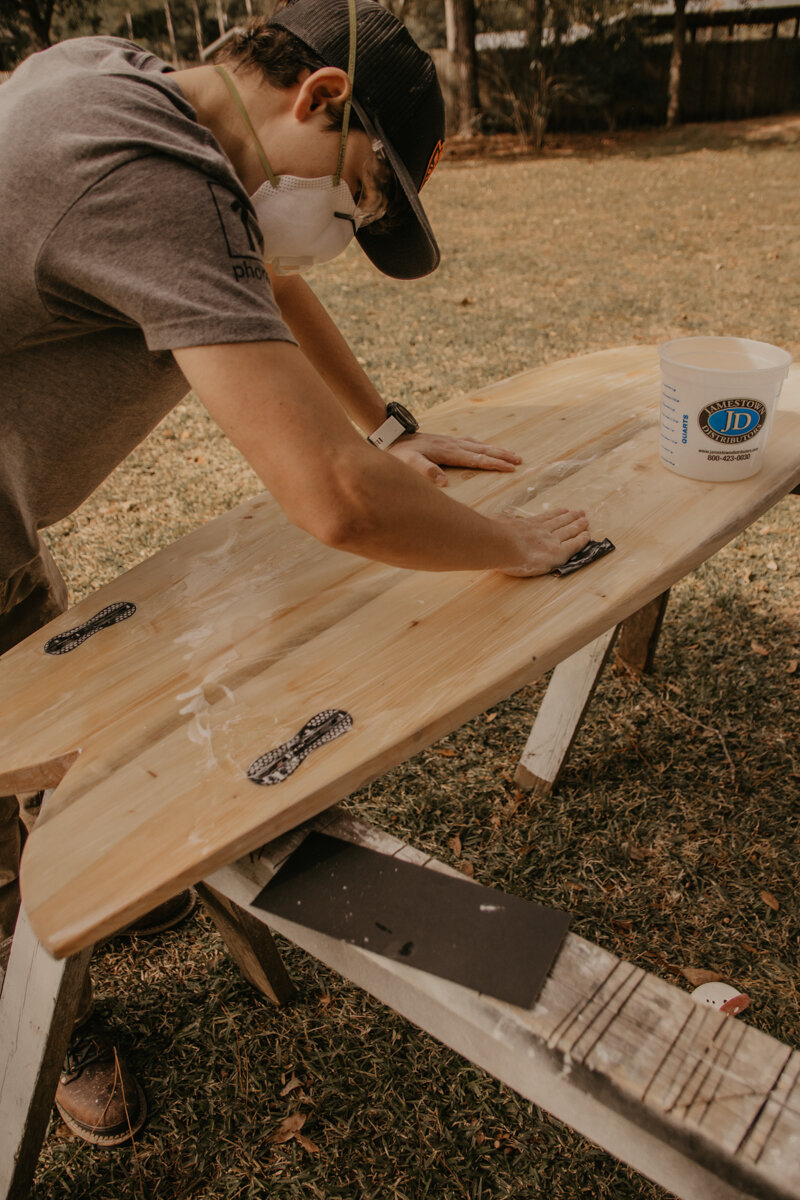
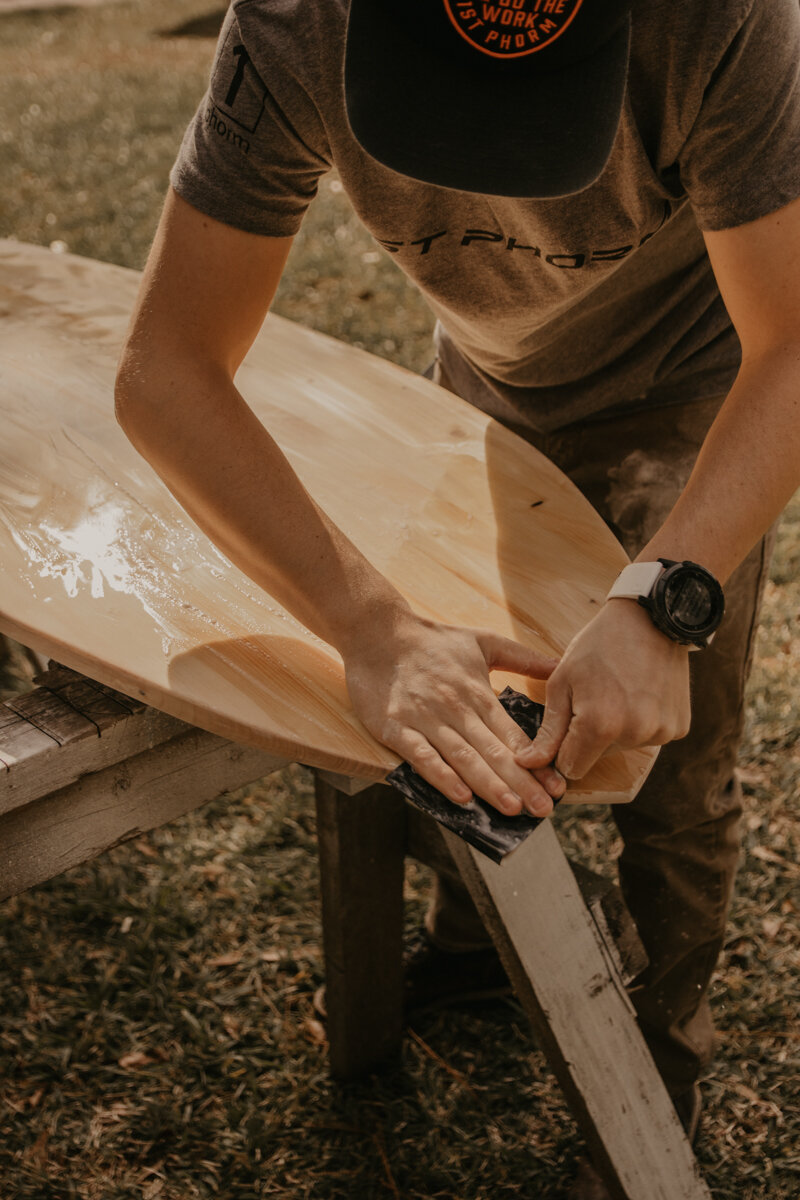
After those were dry, time to take this thing outside and give it a good sanding. We first used the orbital sander and then used high grit sandpaper (800 grit) with water to make it EXTRA smooth. This even gives it a matte look which we love, but you could go up to 2,000 grit sandpaper and get it more glossy. Last but not least, a final coat of Halcyon Clear Varnish (http://bit.ly/31nufVU). THIS BOARD IS DONE!

If you are interested in building your own DIY Wooden Surfboard, we do have a set of plans here with everything you need! This project was worth every bit of work and every bit of the month-long build. It turned out so beautiful and we couldn't be more proud!
