Teardrop Camper: Crafting Your Perfect Adventure on Wheels

Are you a nature enthusiast who loves hitting the road and exploring the great outdoors? If so, you've probably considered the idea of owning a camper to enhance your adventures. Among the many options available, teardrop campers have gained immense popularity for their compact size, affordability, and charming retro appearance. But why buy one when you can embark on an exciting journey of building your very own teardrop camper? In this blog post, we'll guide you through the process, from conceptualization to the final touches, as you build your very own teardrop camper.
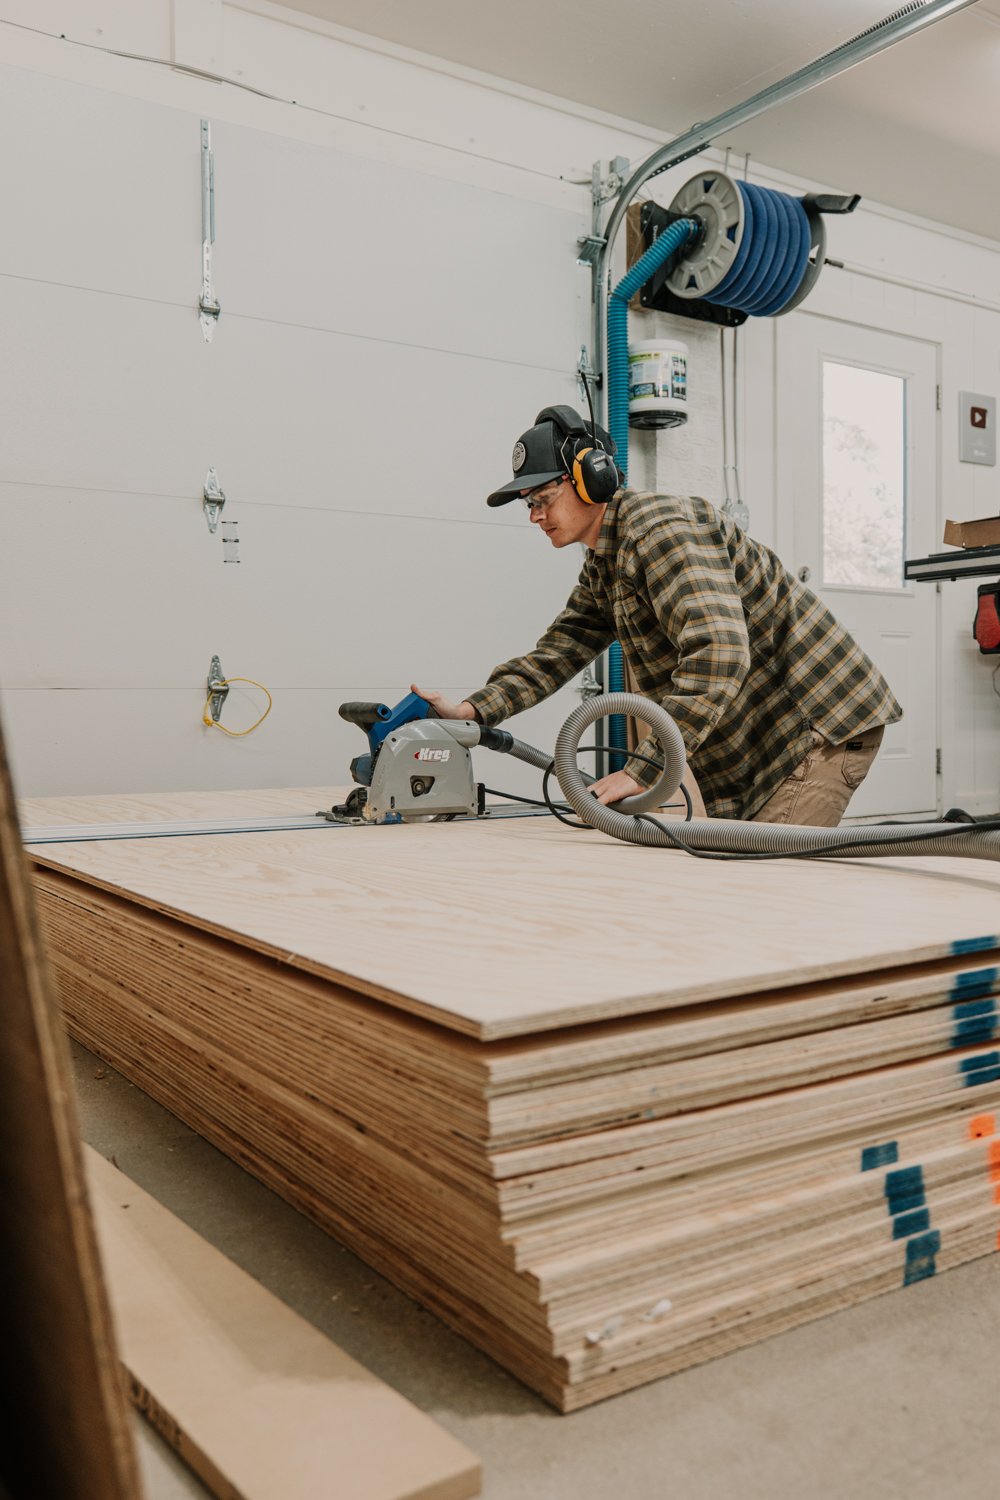
We are so thrilled to share with you our DIY Teardrop Trailer build! Let me preface the DIY part first because I’m sure there will be a ton of questions/concerns over that phrase. Even though we used a CNC to cut out the shell, this is 100% a DIY build. We have never built a camper before and used the tools we have available. This does NOT mean you need a CNC to build a teardrop. In fact, we have a SketchUp file available for this project where you can take every single measurement from! Jigsaw, router or circular saw, any basic tools can get this build done.
SketchUp File: https://www.woodbrew.tv/store/p/woodbrew-teardrop-camper-plans
Products Used
I want to break down the products that we bought into categories to make it easier to skim over. If you want to see our whole Amazon list, you can view that here: https://amzn.to/3NXSaVv just note that there are other things we bought that are not from Amazon.
Plywood ~ $1,200
23/32 ARUPLY Plywood
1/2” Sanded BCX Plywood
5.2MM Birch Plywood
Trailer ~ $1,550
Electrical ~ $430
Finishing/Waterproofing ~ $1,200
Adhesives
Hardware ~ $170
Windows
Seals
We roughly spent a total of $5,200 on this teardrop trailer build!
All of our videos on this build are in this playlist and we could not recommend it enough if you are looking to build something similar!
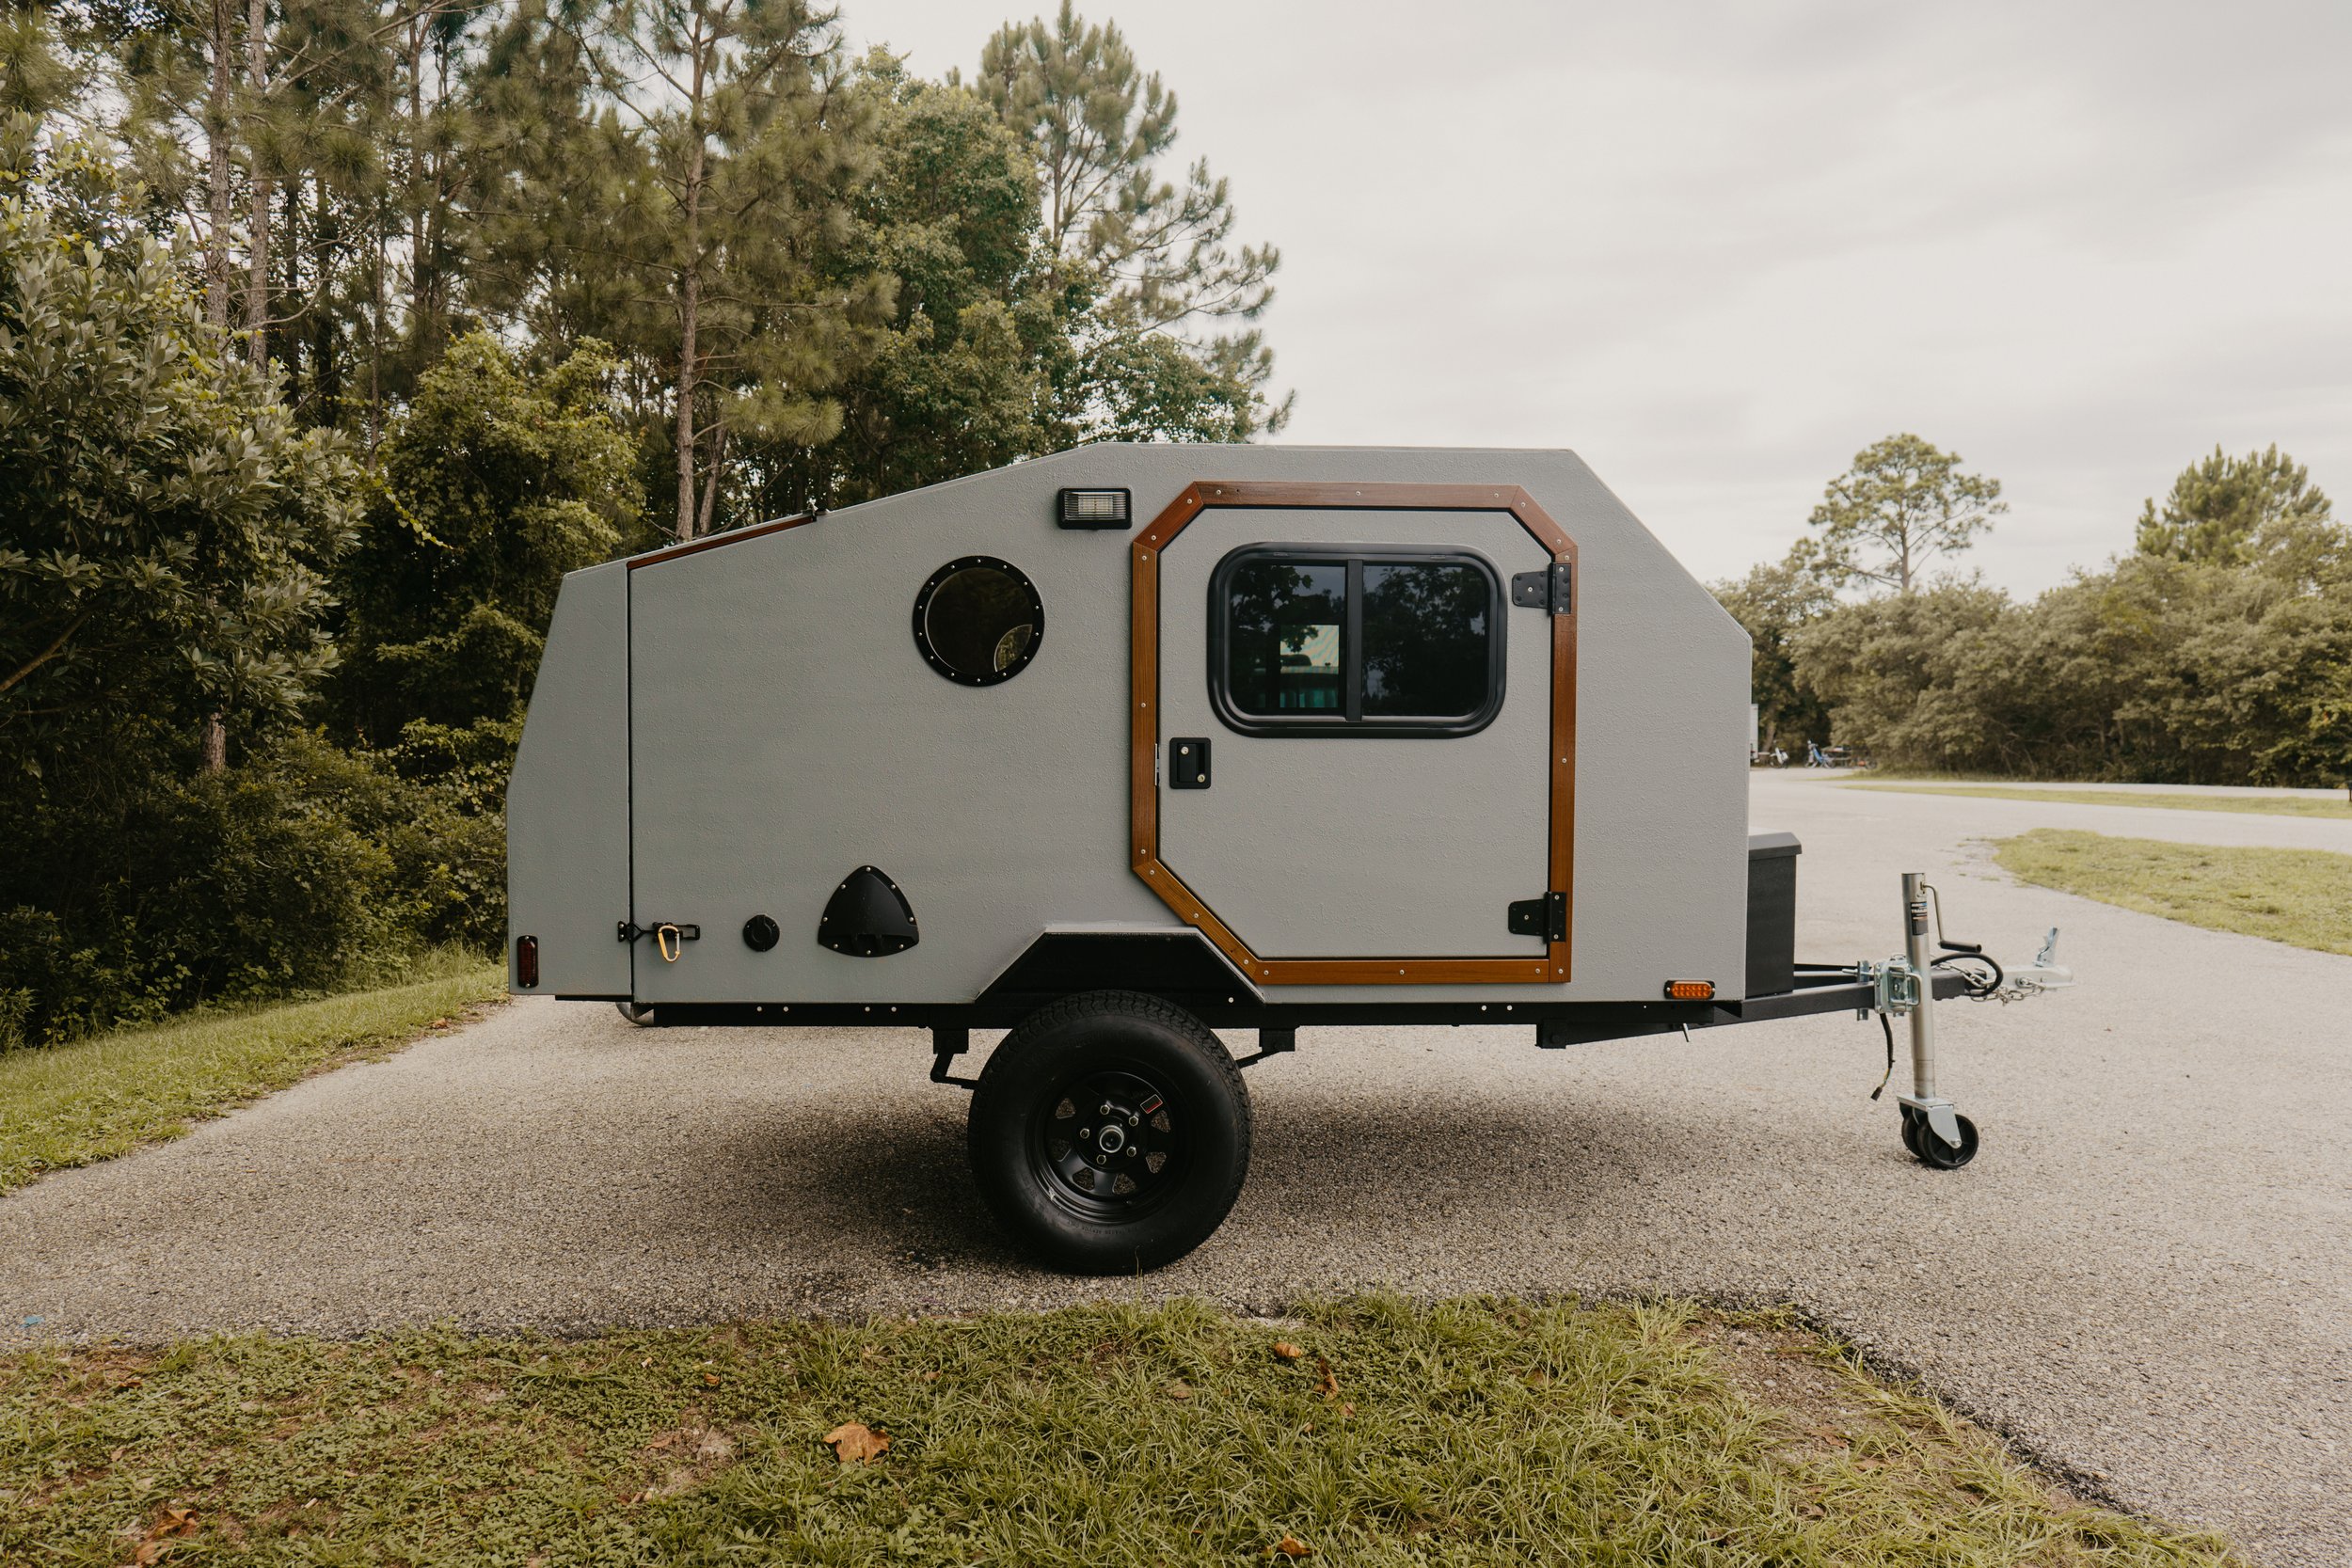
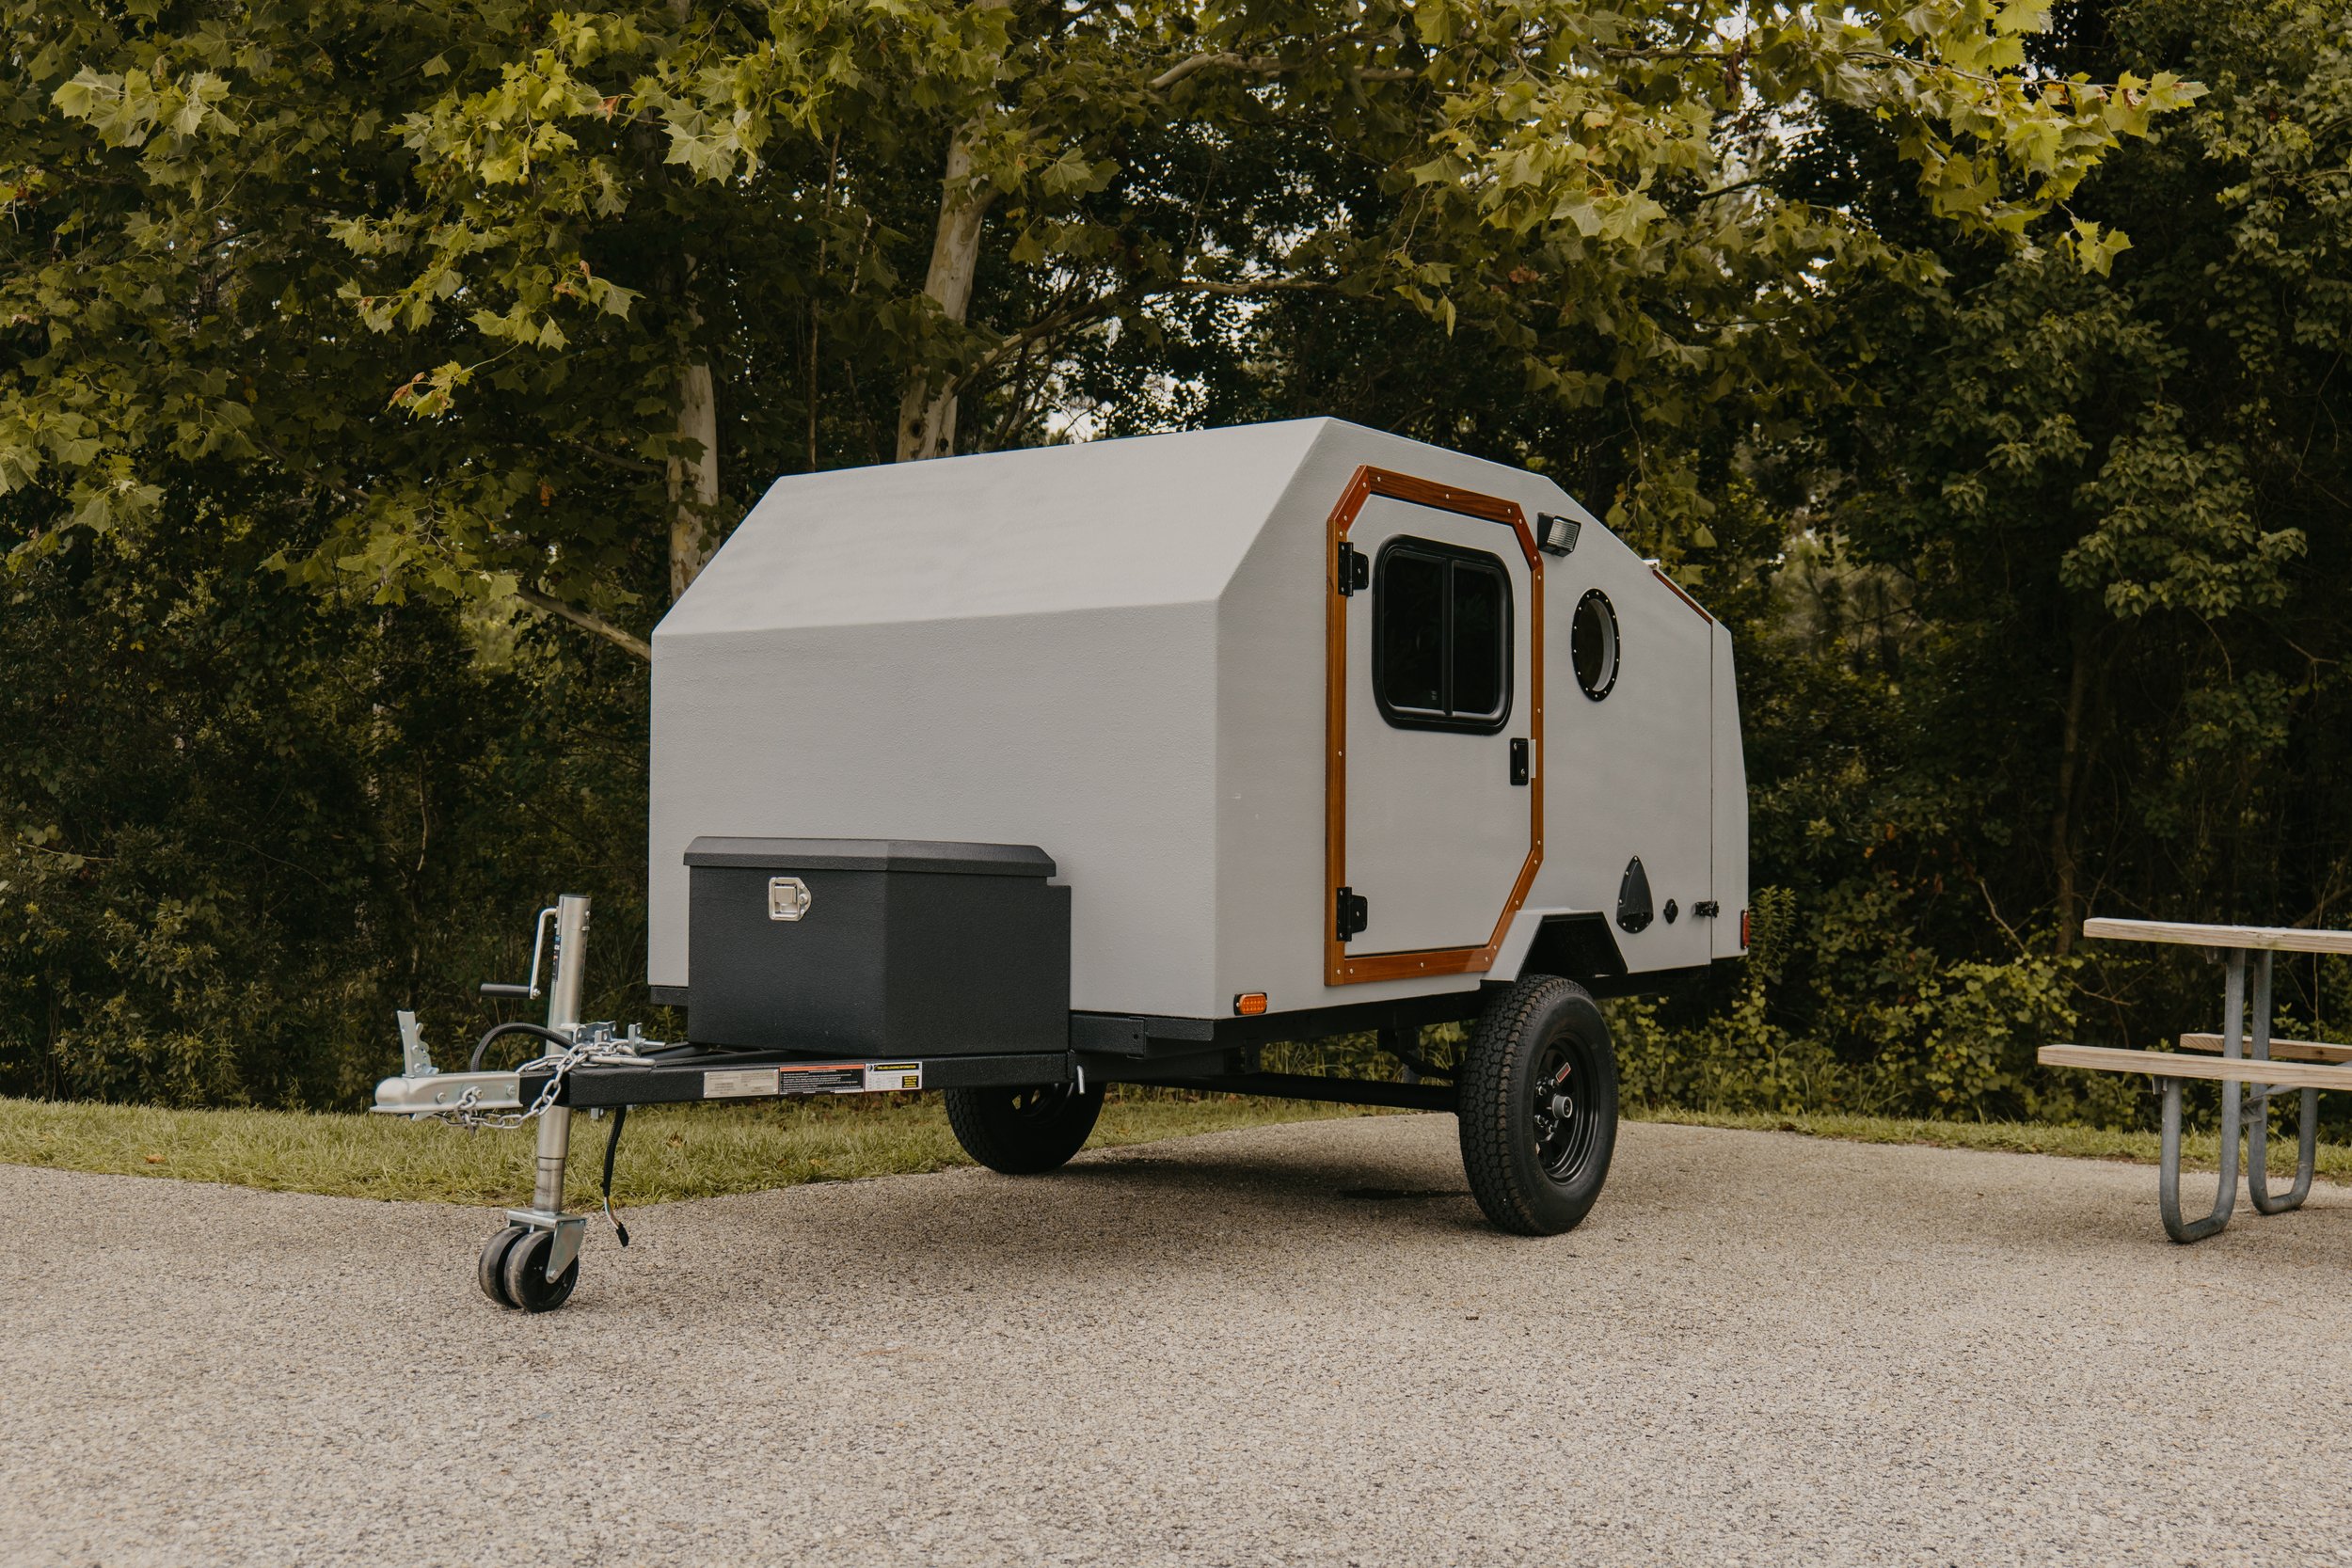
Constructing the Shell
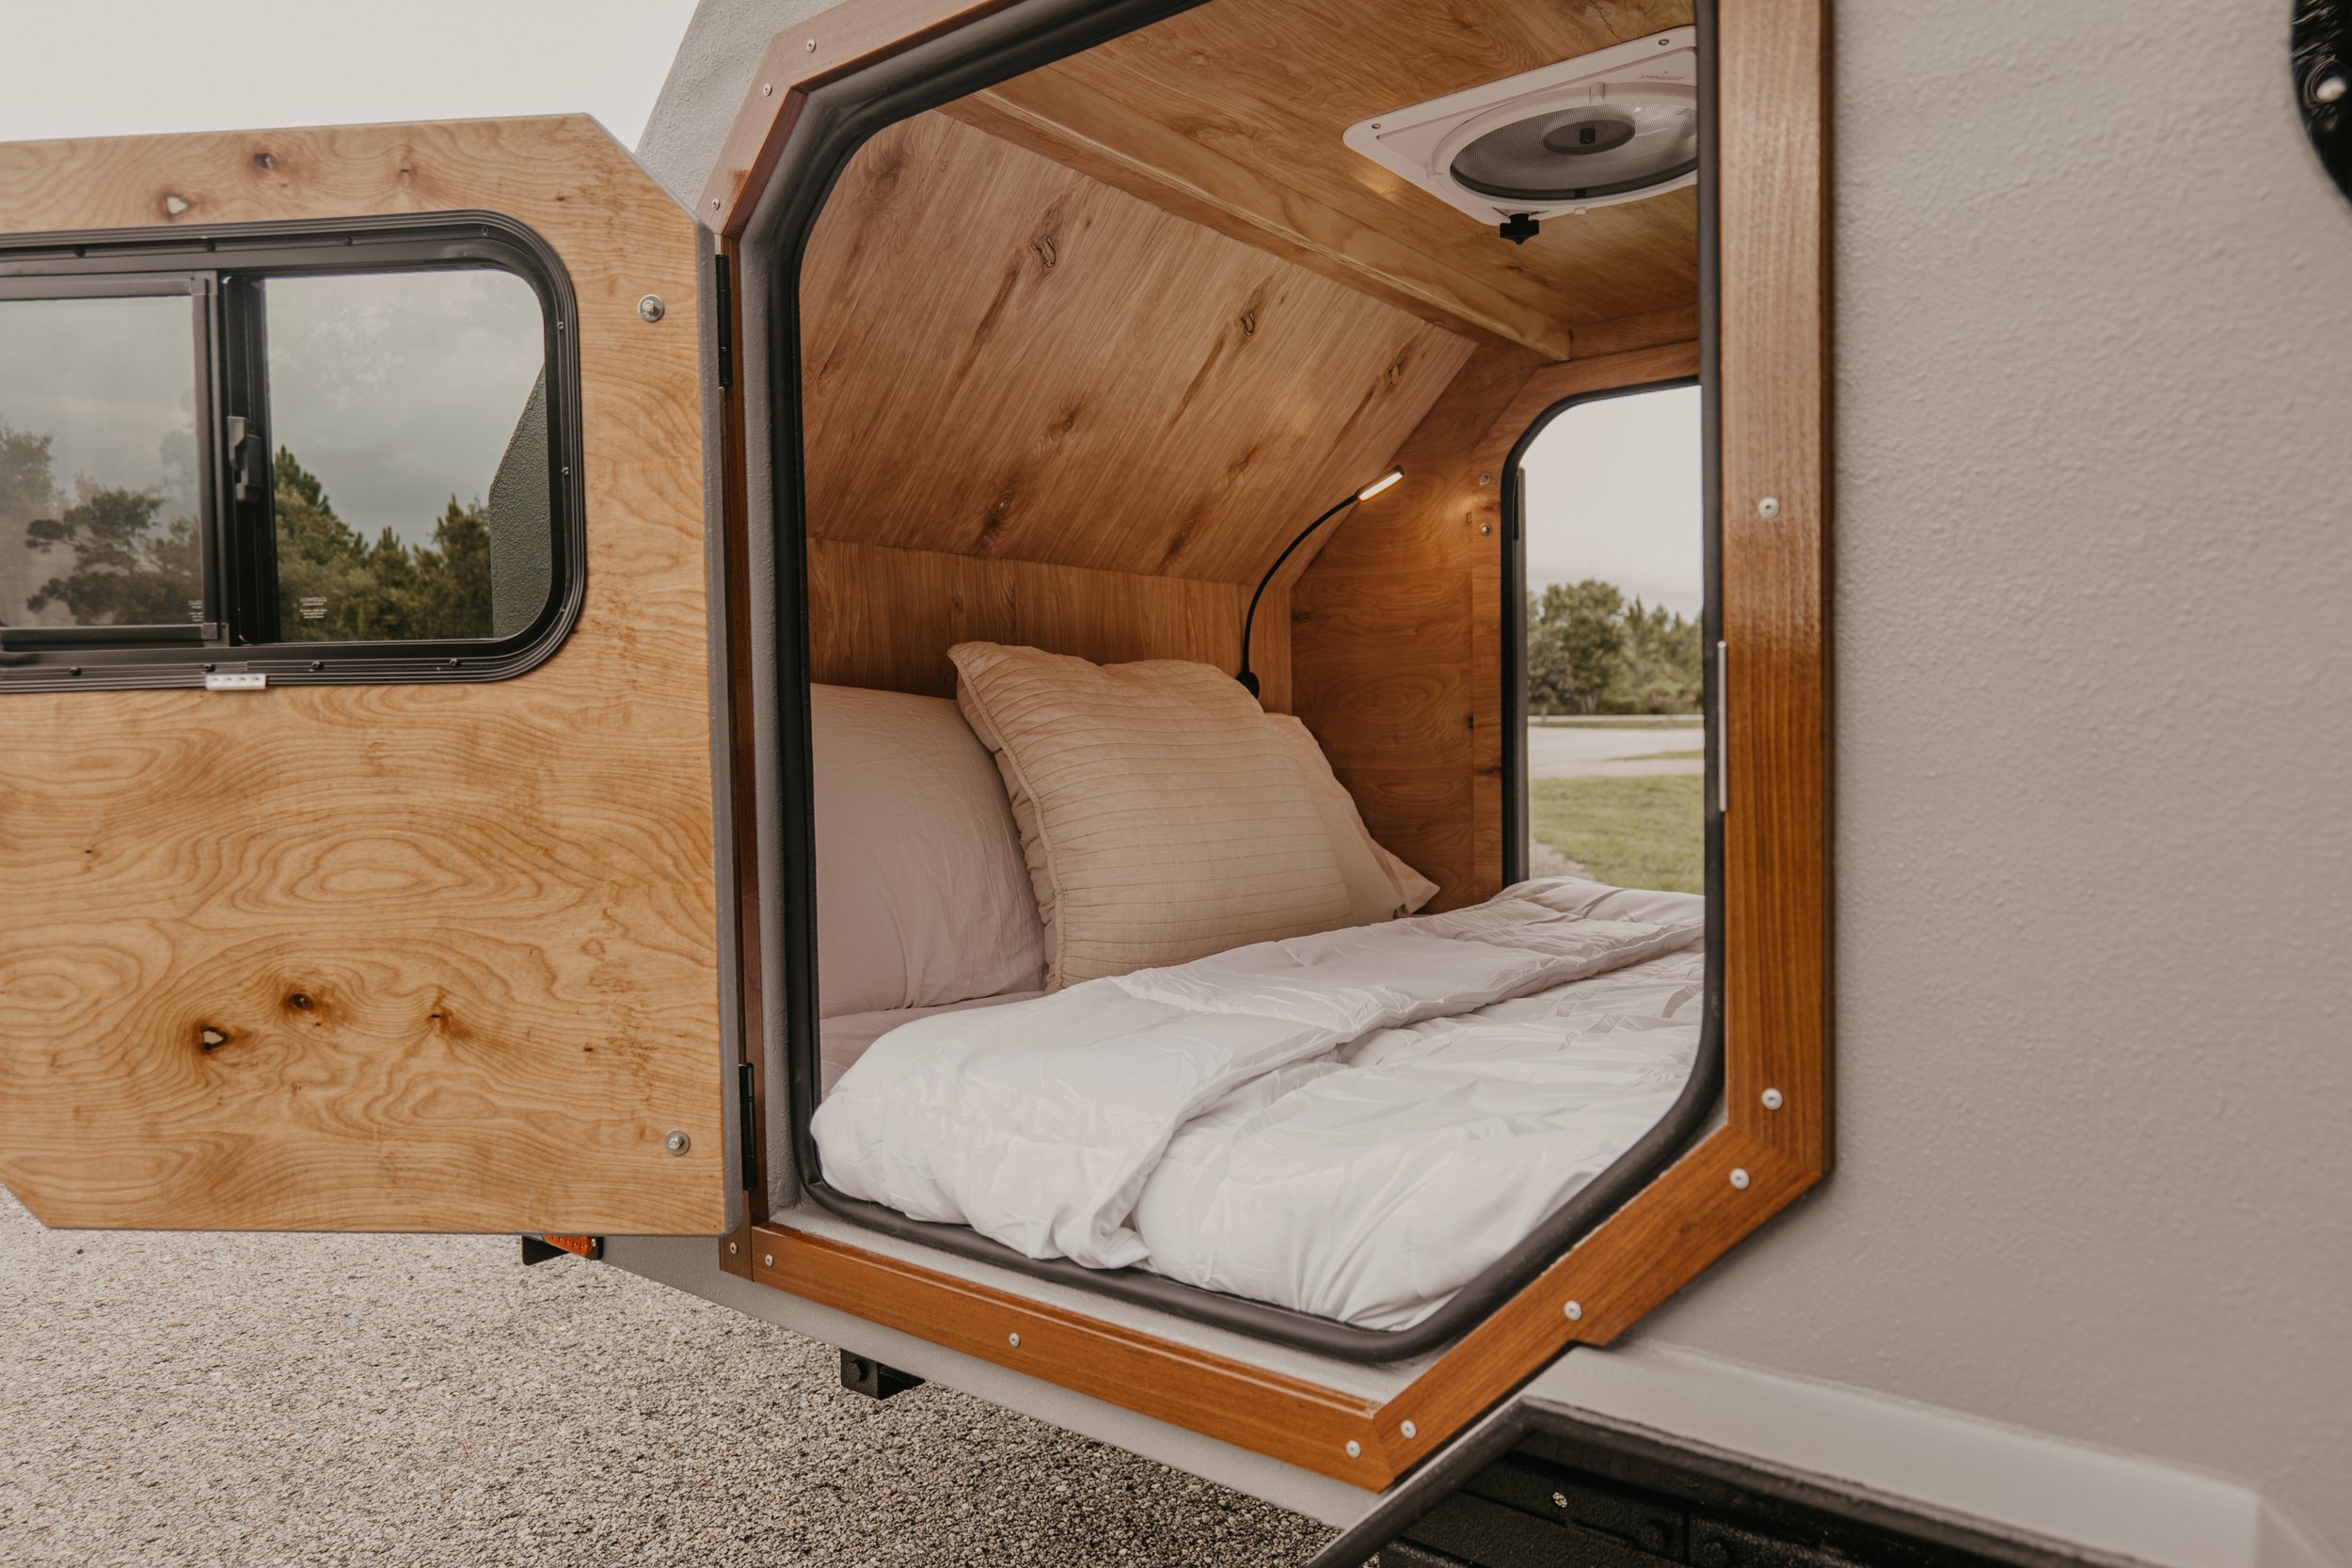
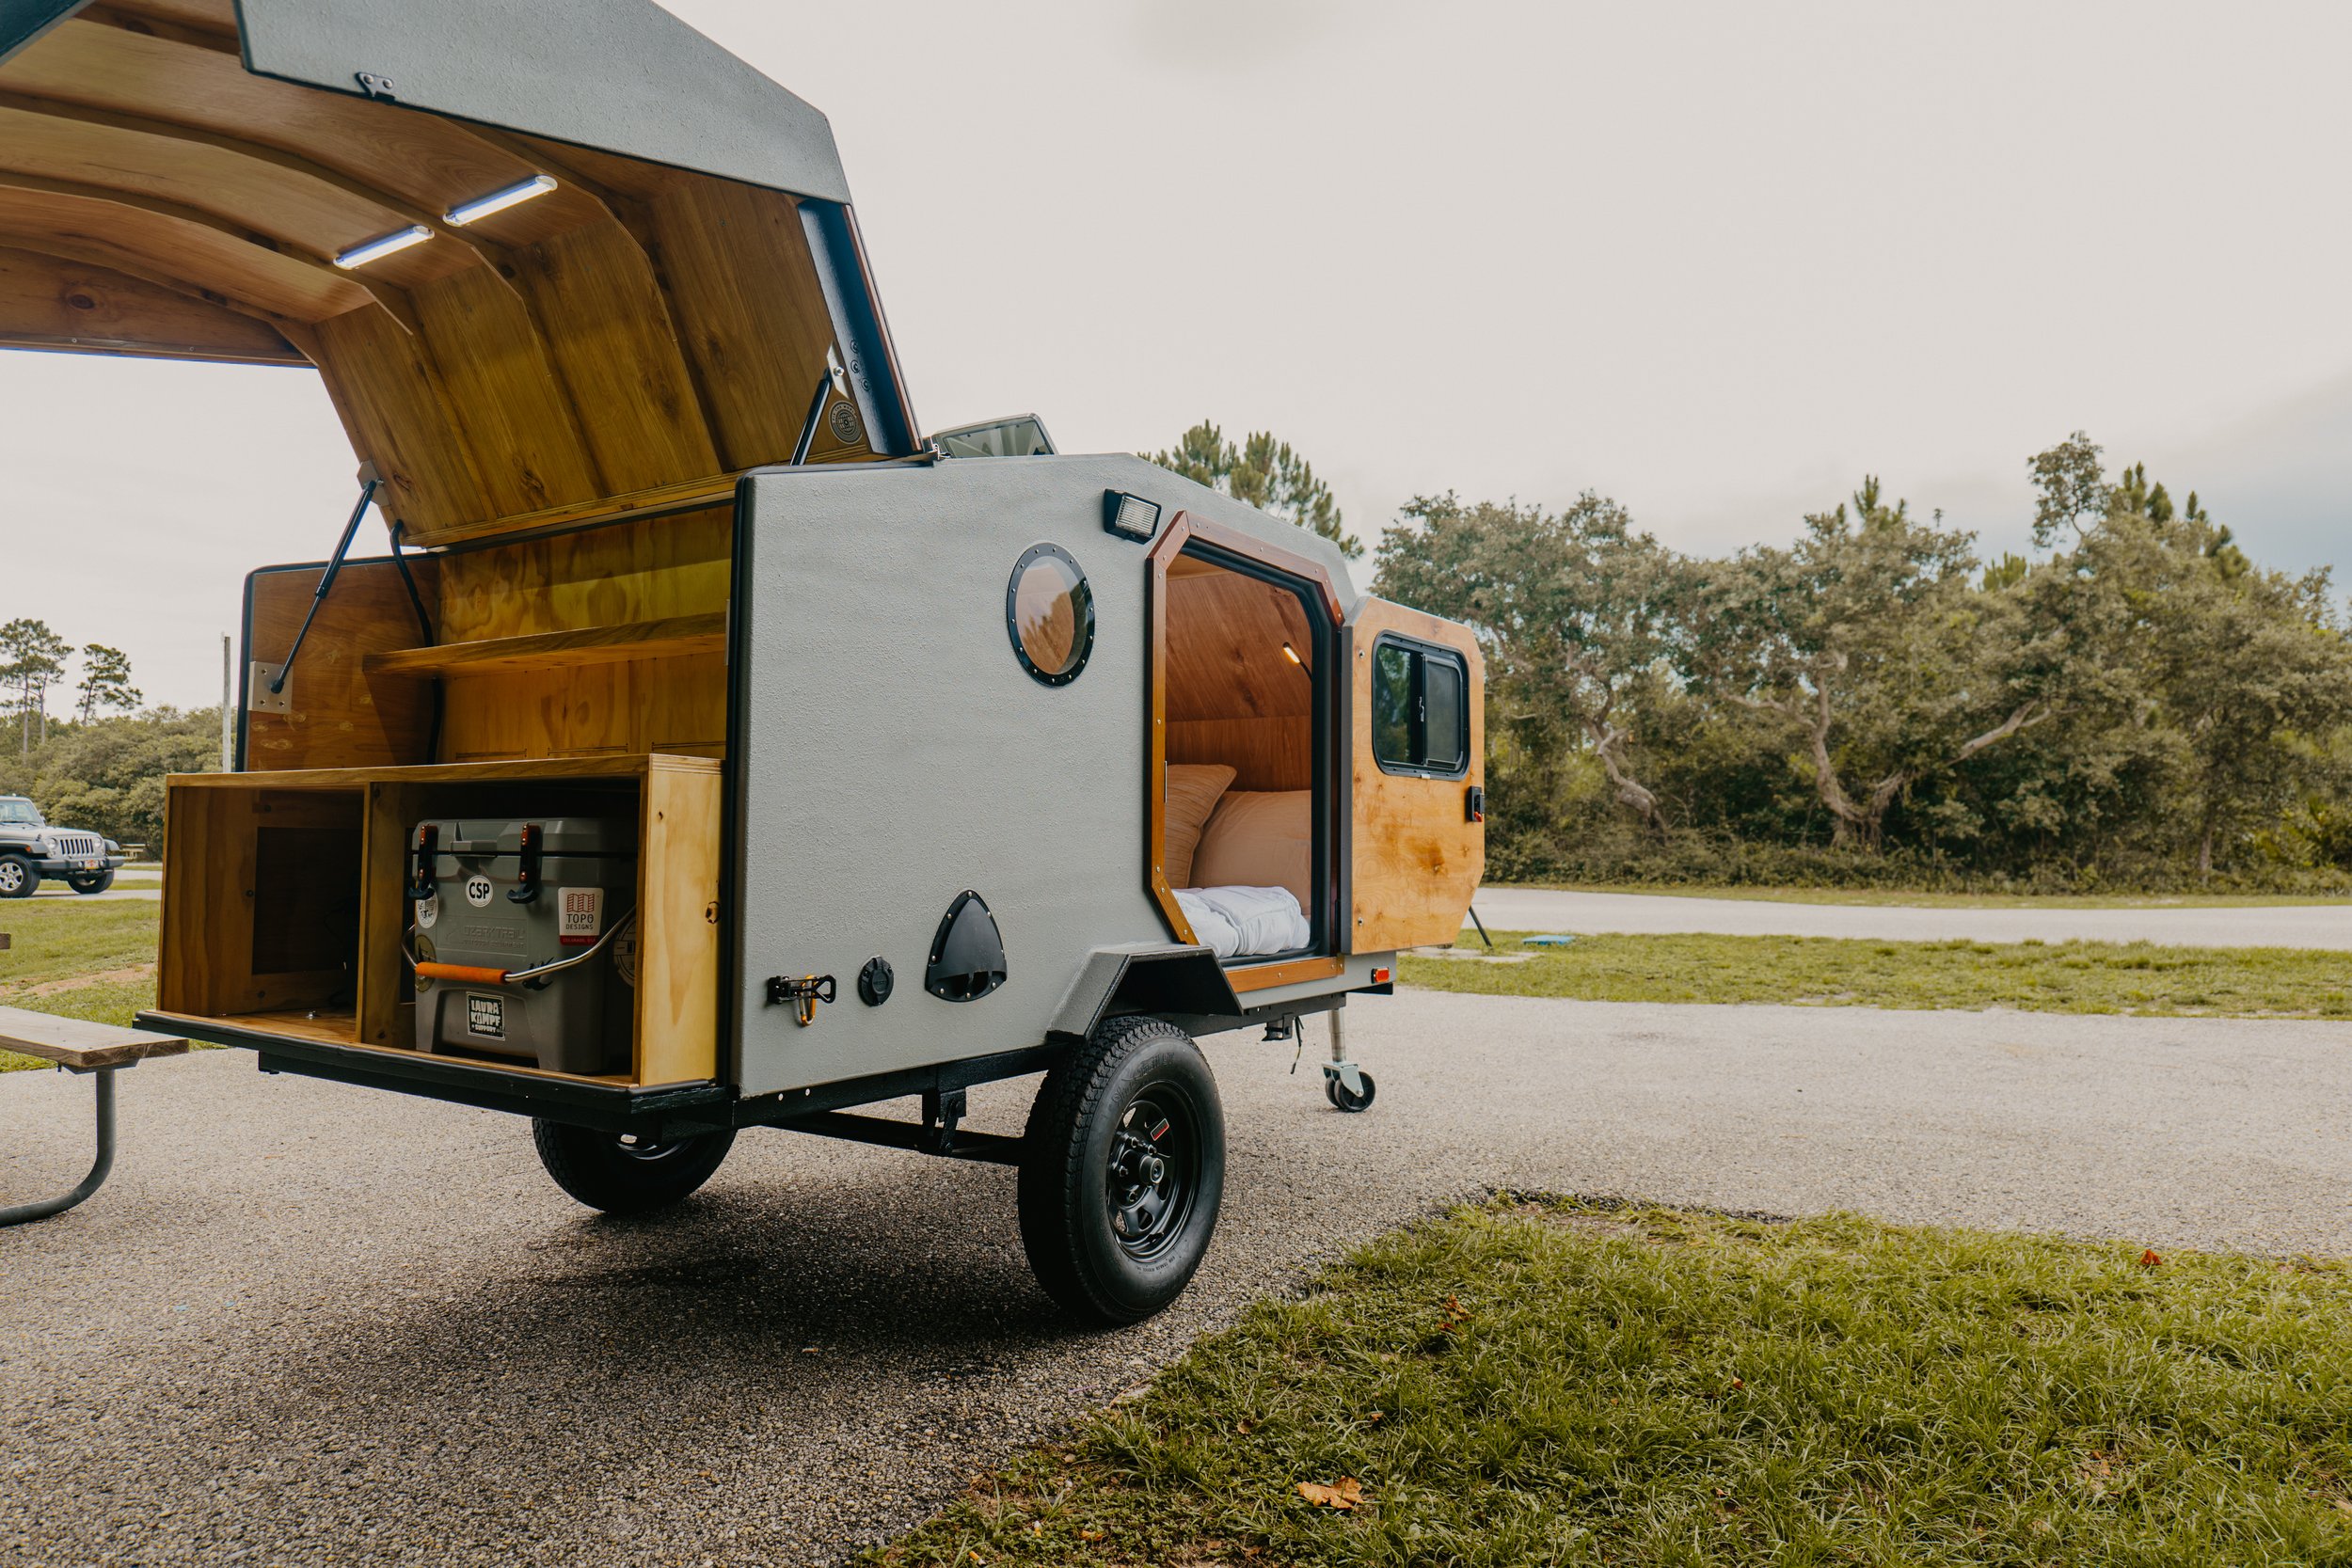
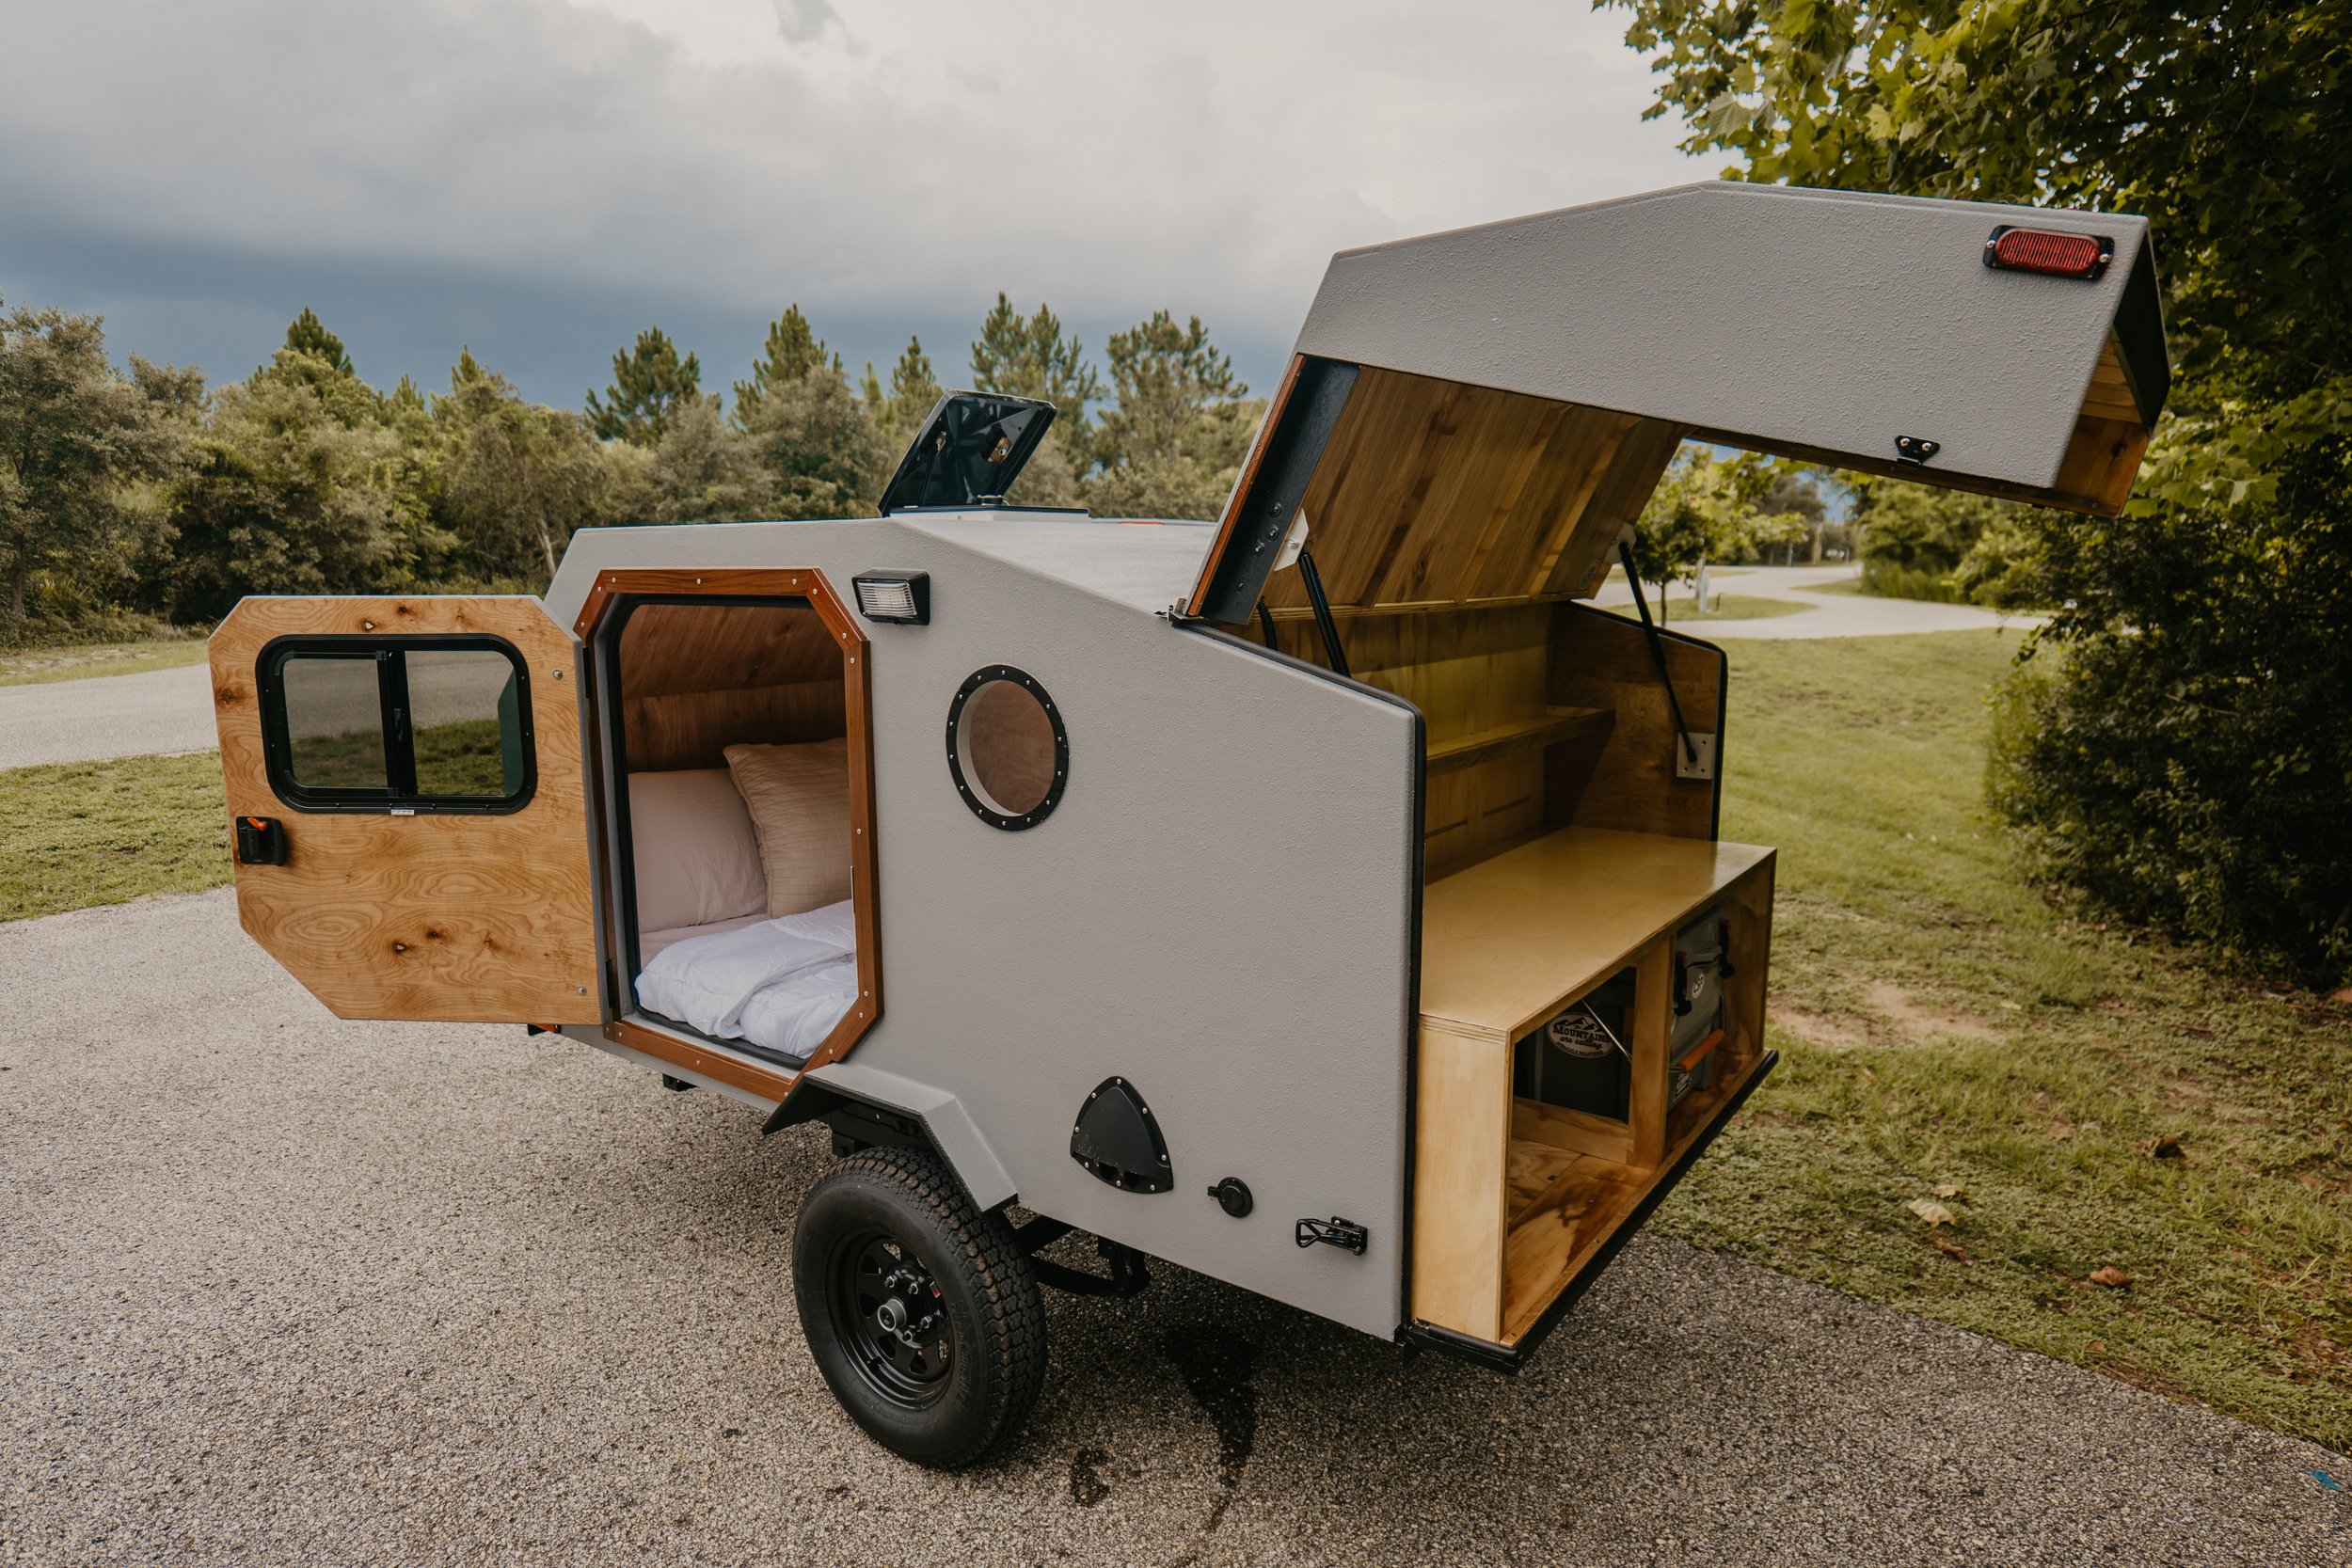
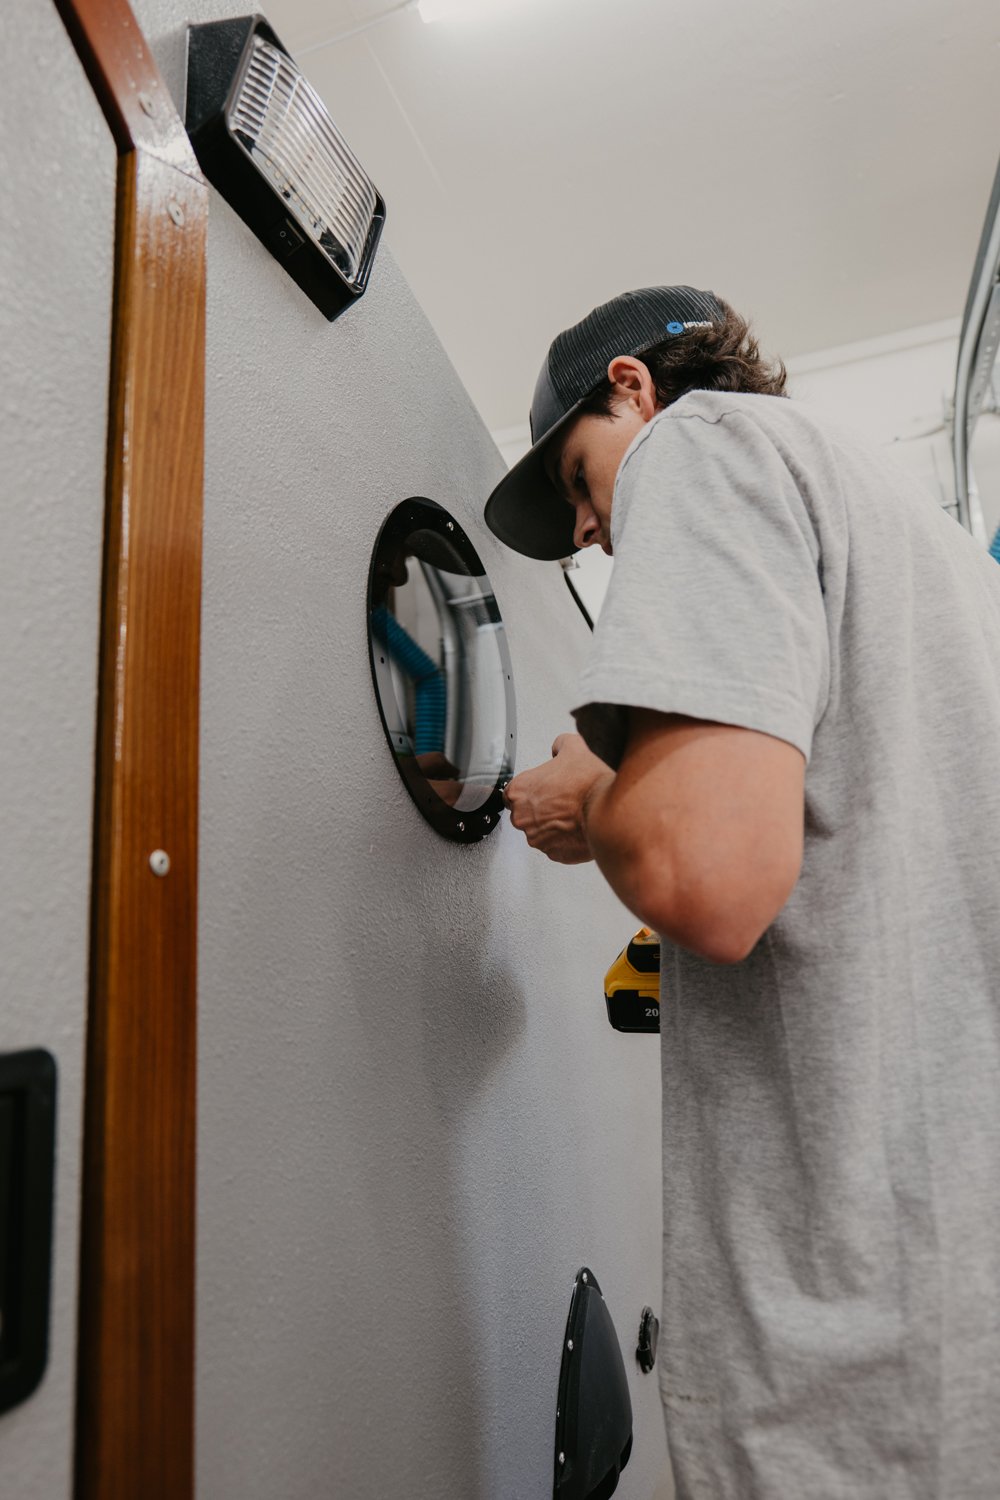
Cut the plywood to match your design and carefully assemble the walls and roof sections. Our walls have 3 layers. The outer layer in 1/2” birch plywood that has waterproof glue. The inside frame is 3/4” plywood with 3/4” foam insulation in the negative space. Thee interior layer is 1/4” birch plywood, however, we decided to use the “bad” side of the plywood for some visual interest. Use proper insulation material to keep the interior comfortable in different weather conditions. You can also install windows and a rear hatch for ventilation and access to the kitchen area.
Interior and Amenities:
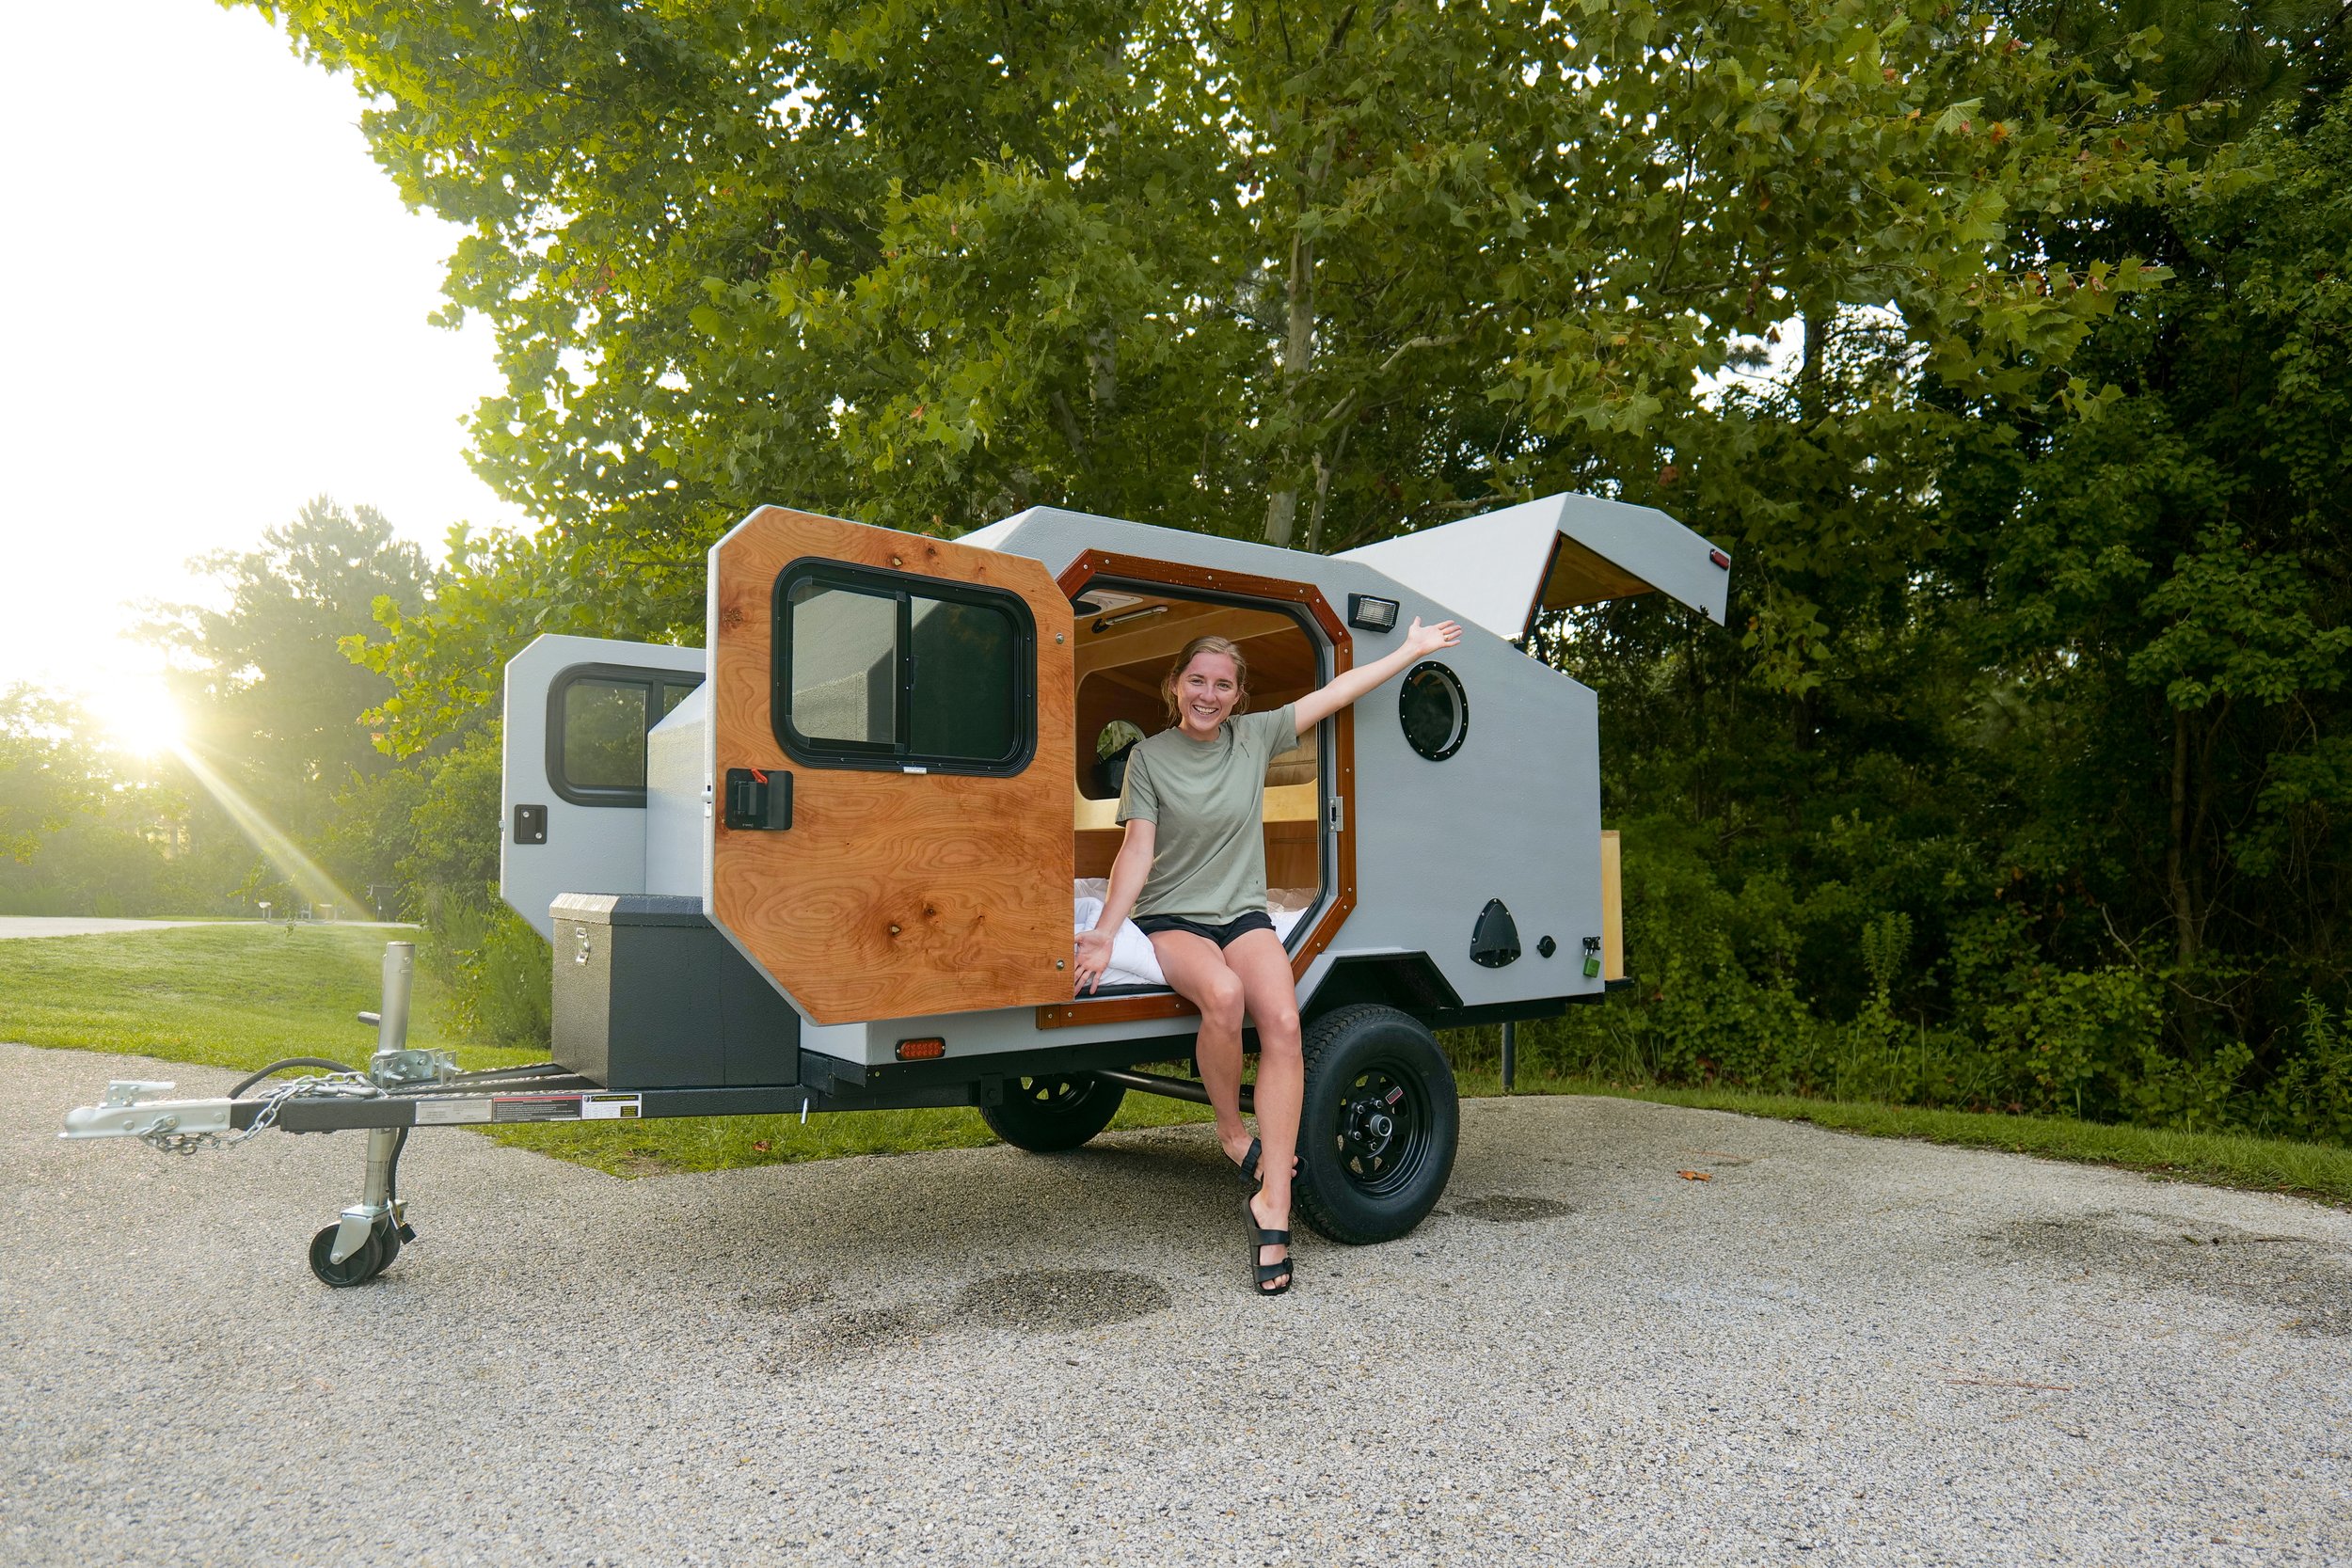
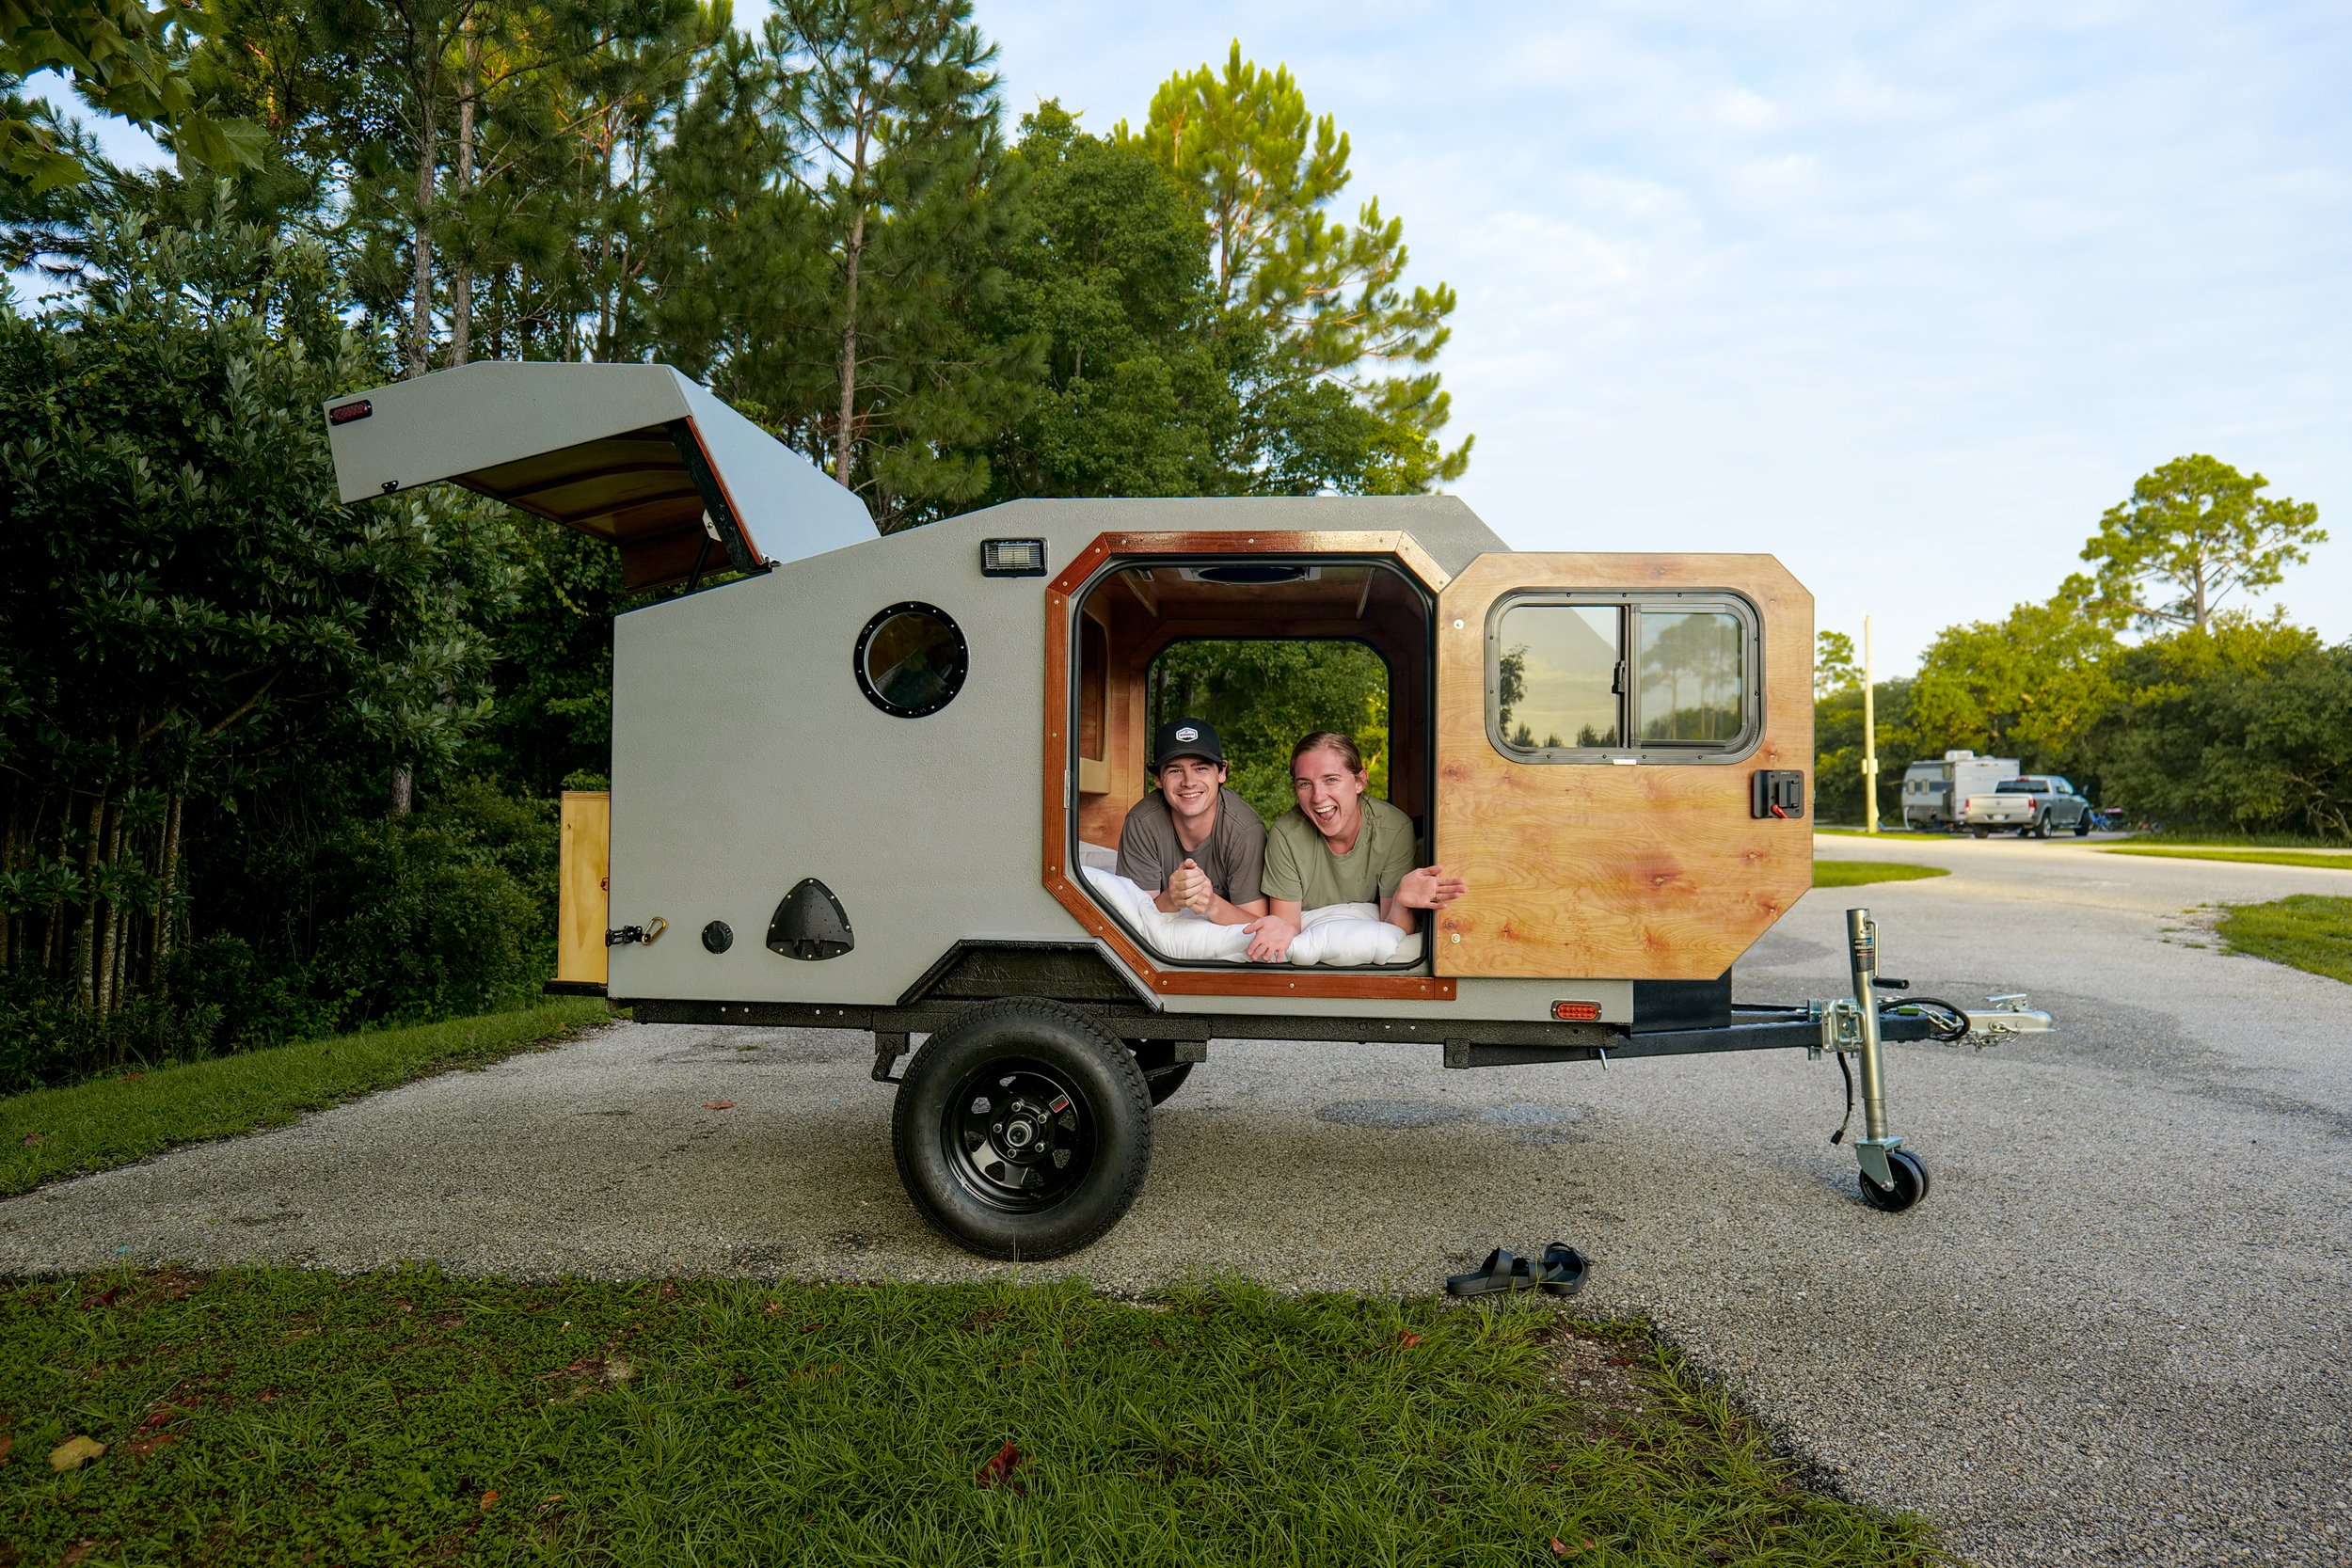
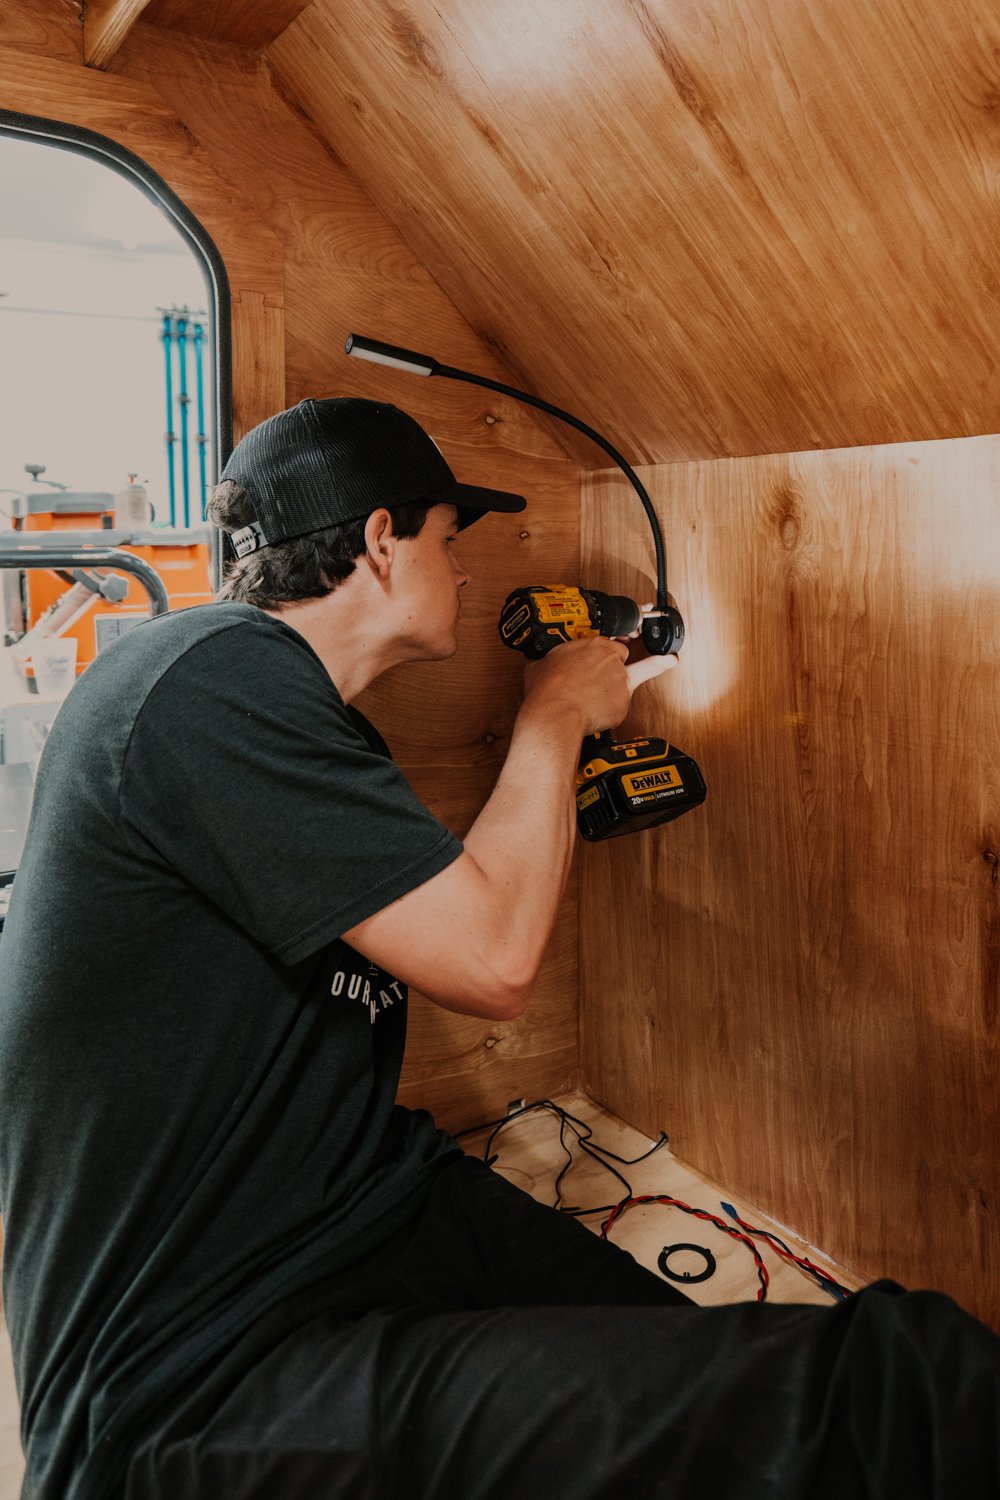
Now comes the fun part – designing the interior! Space optimization is crucial in a teardrop camper, so think creatively. Build-in storage compartments, a sleeping area, and a small kitchenette. We built this teardrop for a client with a baby, so we opted to build a bunk inside where normally cabinets and storage would be. We installed 2 bedside LED lights with USB charging ports, an overhead light that is mainly for using when loading and unloading (it’s pretty bright), and a MaxxAir fan that works wonders. There is also more USB ports under the bunk with 120v outlets.
Exterior Finishing:
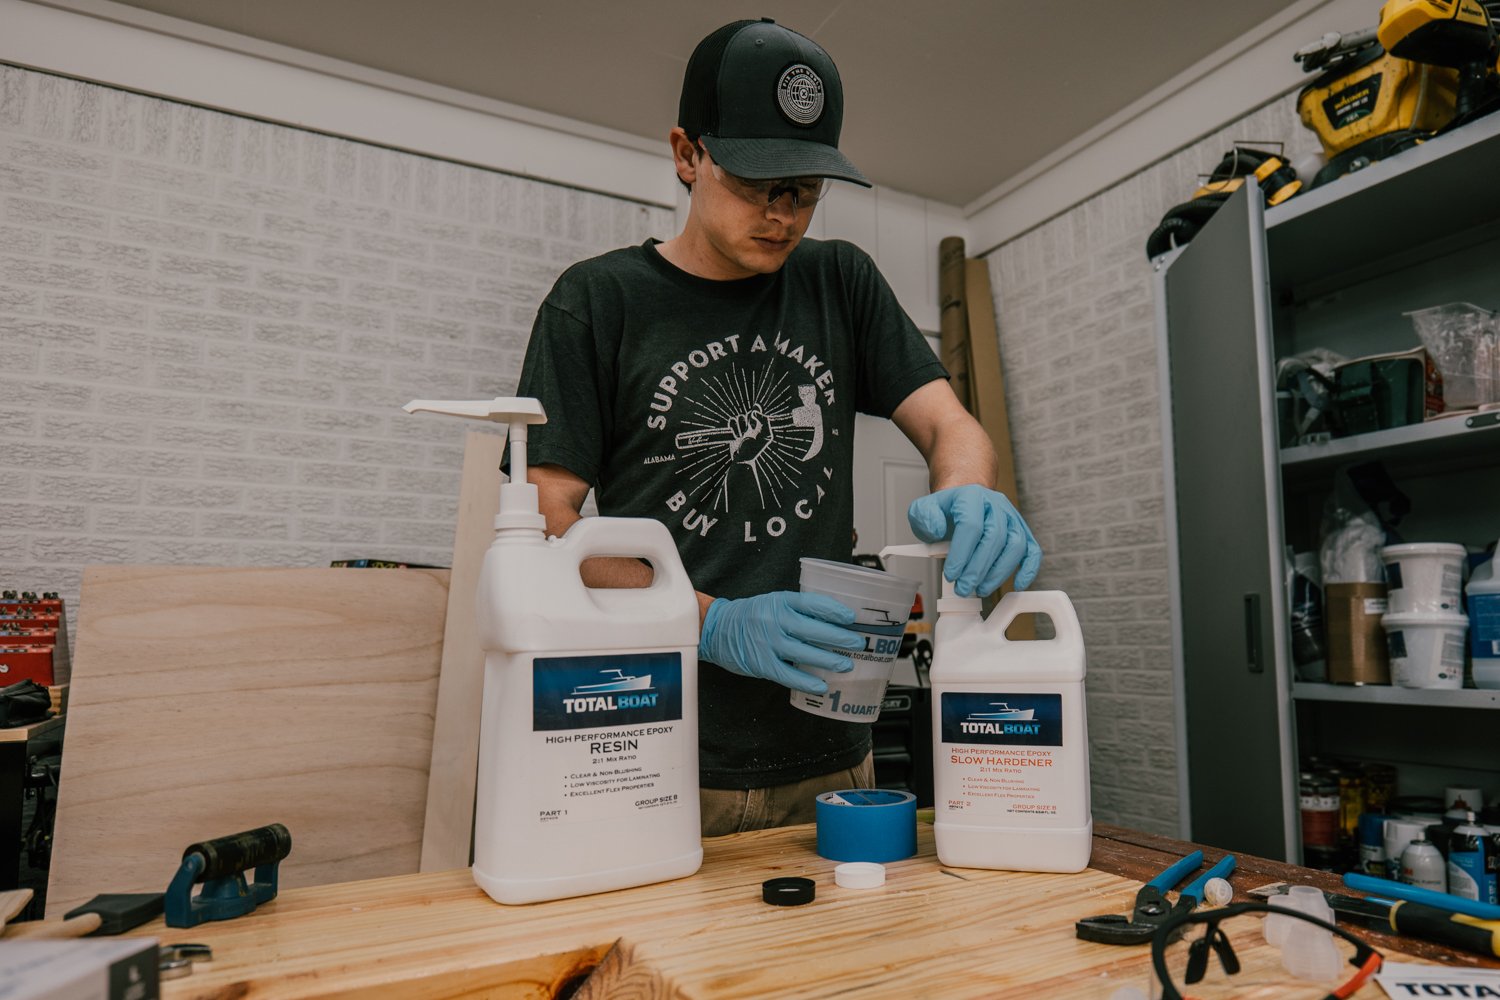
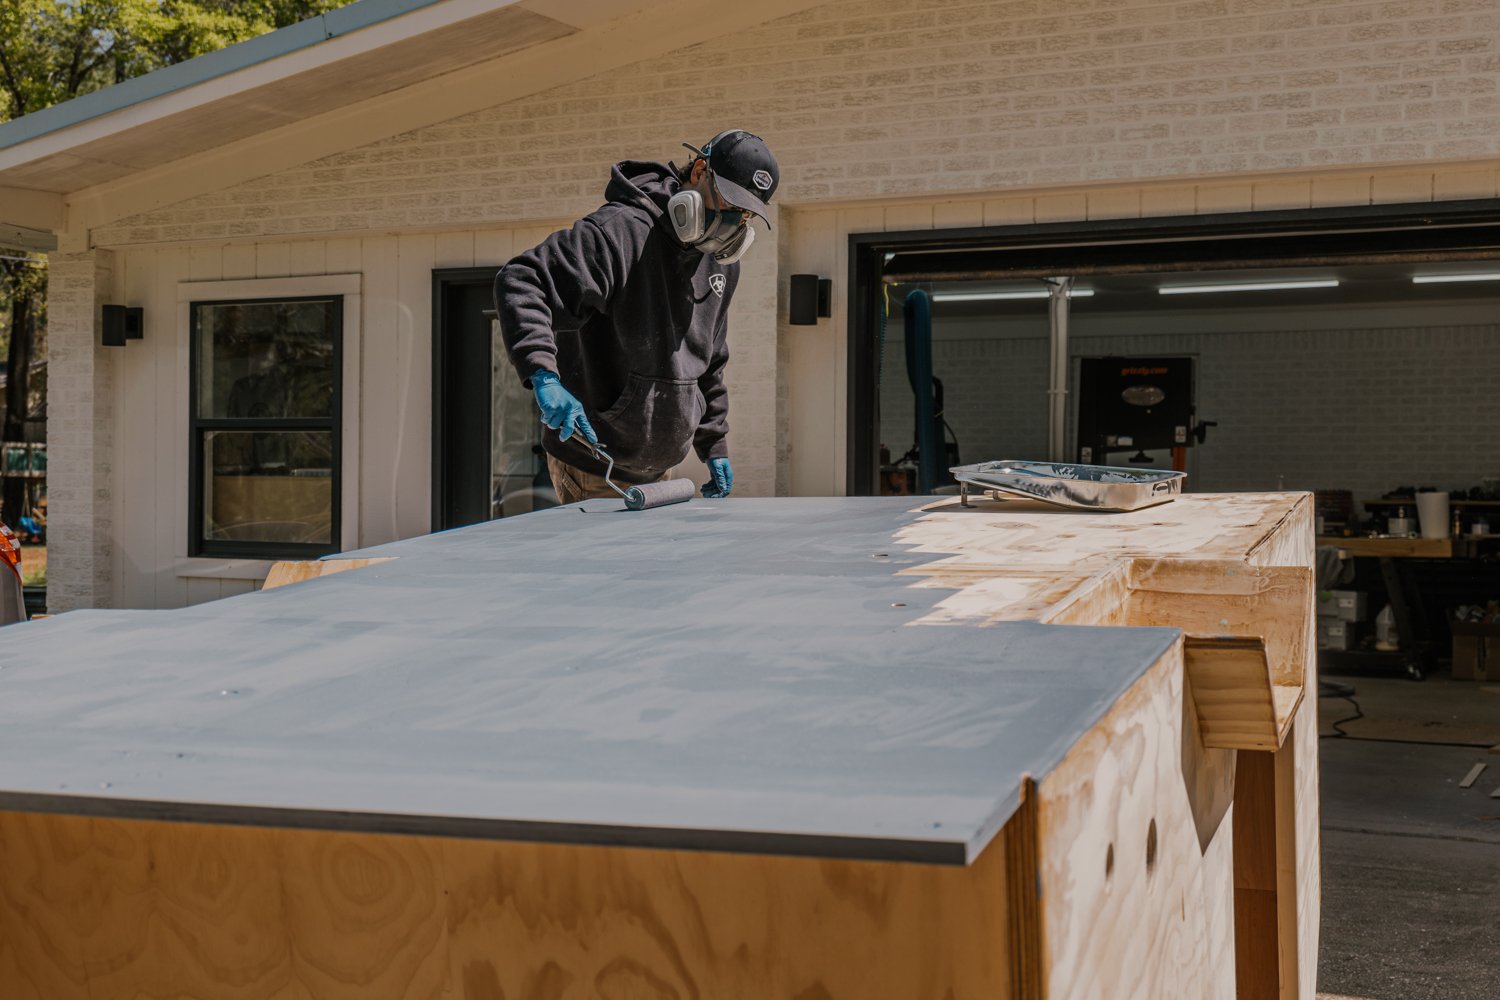
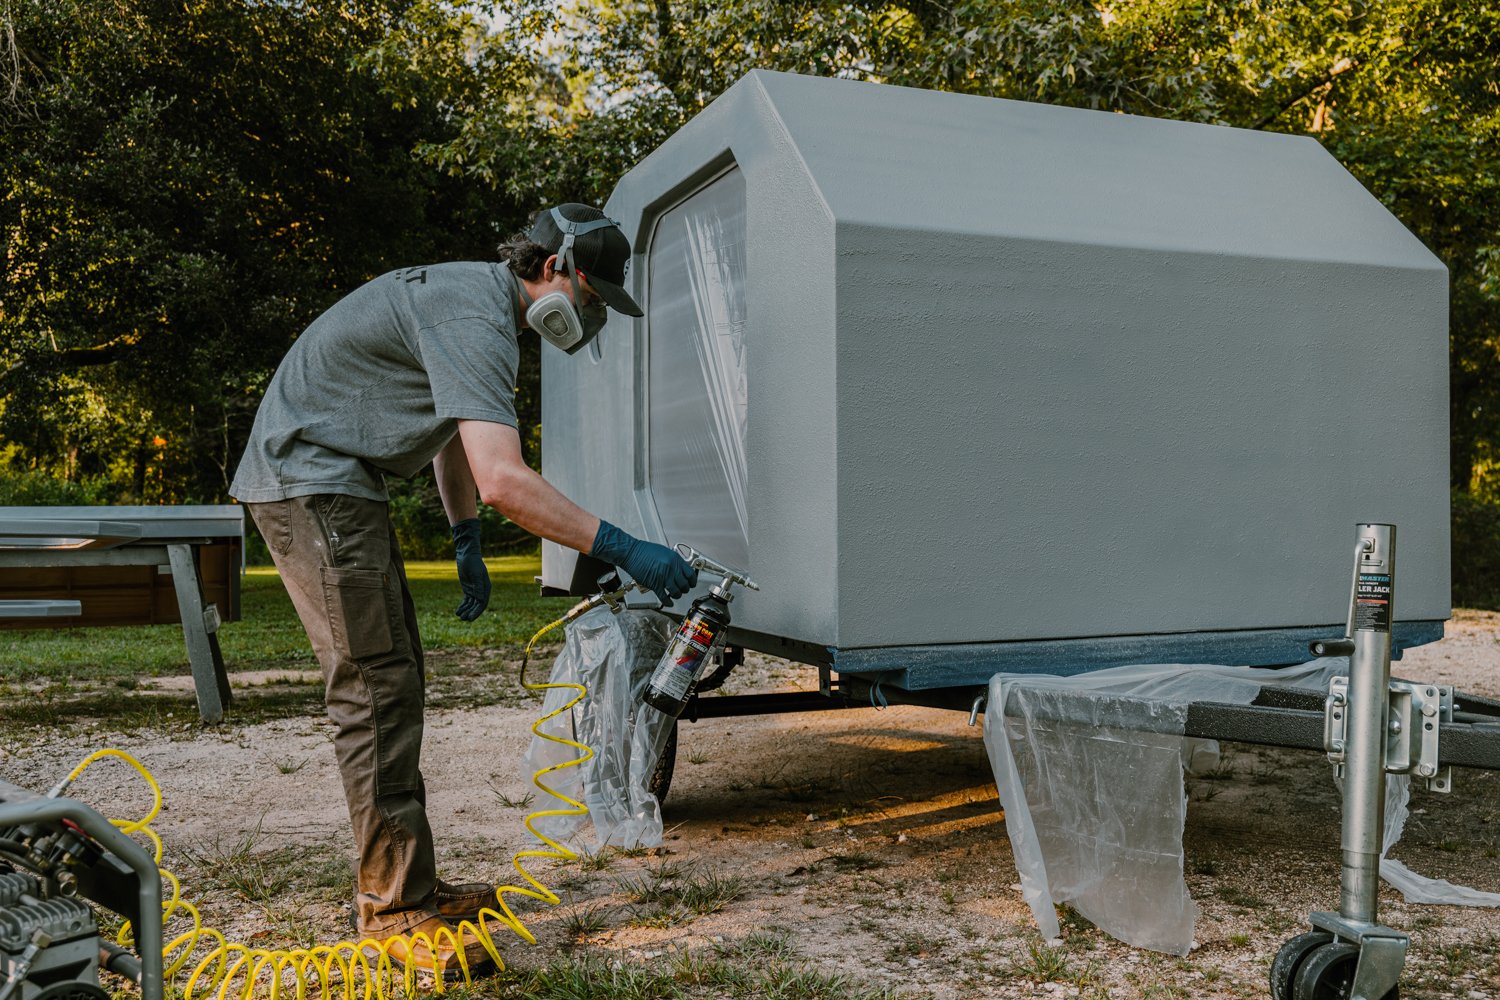
We used bed liner for the exterior material. It’s durable, looks rugged, and simple to apply. HOWEVER. You must prep your surface very very well before applying bed liner. There are so many issues with other campers that have bed liners flaking and peeling off. Some factors were: what material did they use under the bed liner and how was it sealed? Starting off with the exterior grade plywood has waterproof glue and a really thick layer on the outside. You cannot have voids in your plywood for this process. That is a place for moisture to collect and make thin veneer peel up. The next thing we did was apply epoxy and fiberglass at every seem because the next thing that really matters with bed liner is movement. Also, it’s very inaccurate that wood moves too much for bed liner, but wood does move more at the seams than metal does, so that is why it is very important to seal those edges. The last thing we did in the prep is add an epoxy-based primer from TotalBoat. This on its own would have done the waterproofing trick, but this is going to give the bed liner a solid surface.
Safety and Legal Considerations:
Before hitting the road, ensure your teardrop camper complies with all safety standards and legal requirements for towing and camping in your area. Check the weight limits, lighting, and braking systems of your trailer. Also, obtain any necessary licenses or registrations for your camper.
For the finale, let us show you the final images while we camped for the very first time!